The Very BEST Whole Wheat Bread
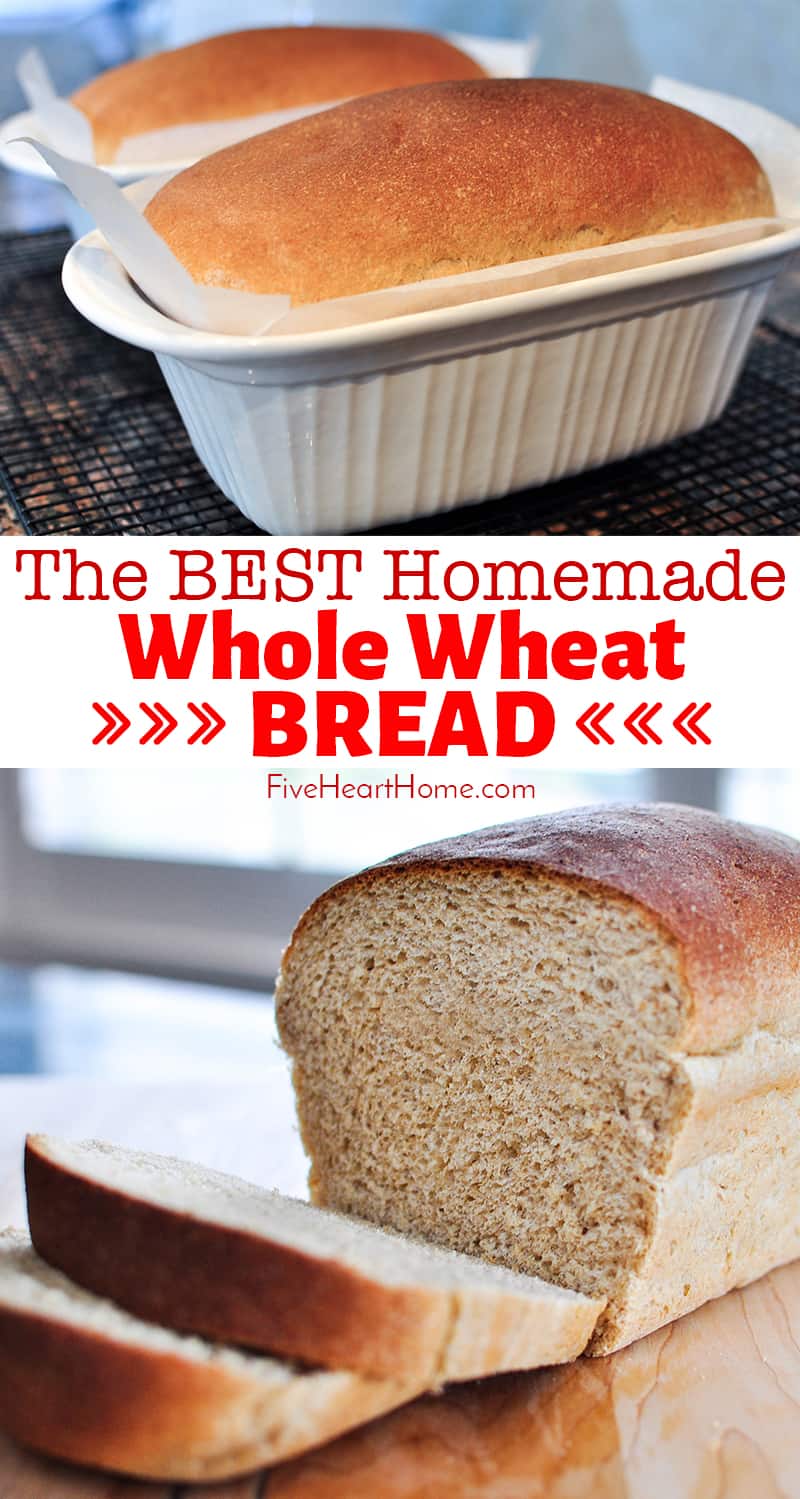
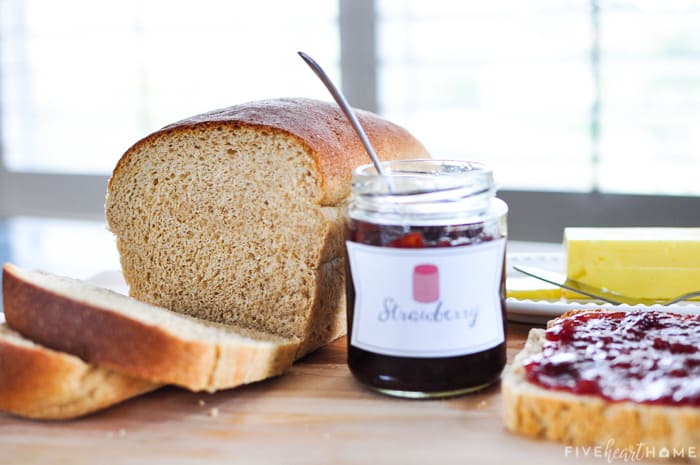
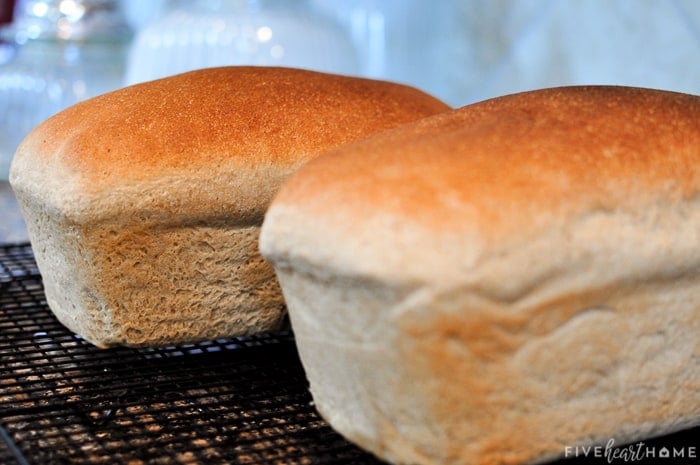
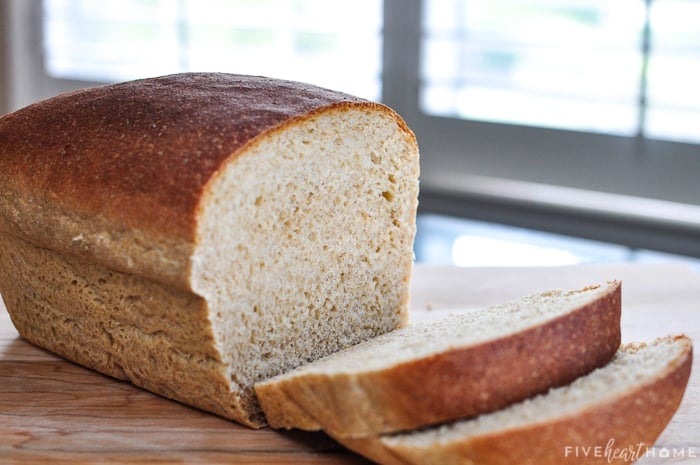
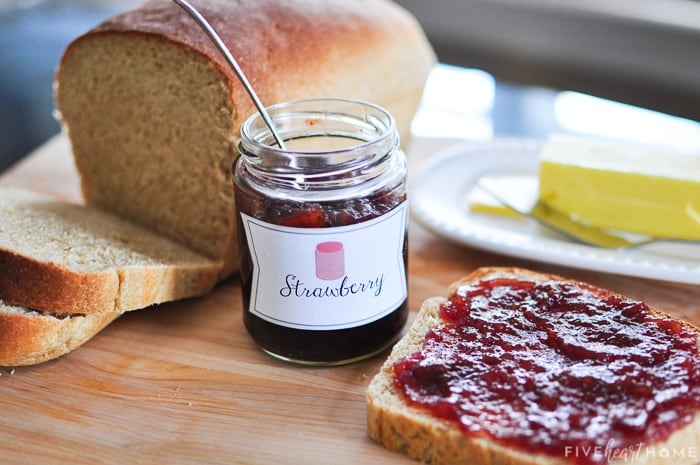
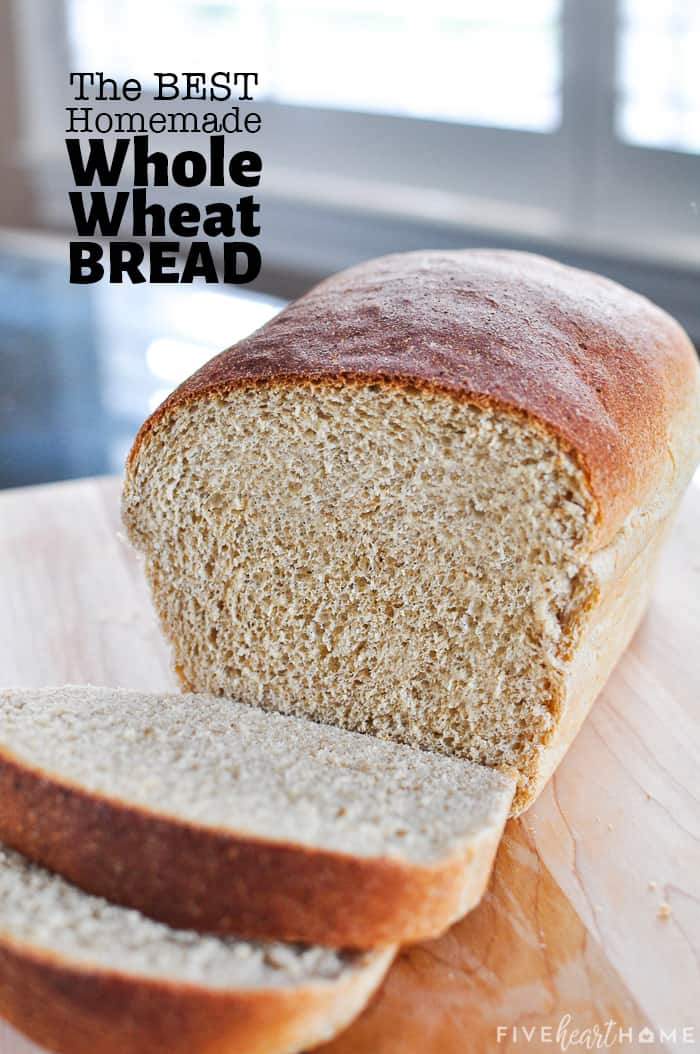
The Very BEST Whole Wheat Bread is the softest, moistest, fluffiest, freshest-staying, homemade, 100% whole wheat bread you've ever tried!
This bread, y'all. This bread. I titled this Whole Wheat Bread recipe "the BEST" and I'm not even exaggerating here. I've baked many a whole wheat bread recipe over the years, and this one is head-and-shoulders above the rest.
Hundreds of raving comments (since I first published this recipe six years ago) can't be wrong...right?! So I decided to update this old post with tons of additional information and tips to help ensure your bread making success!
THE BEST Whole Wheat Bread
Here's the deal...what makes this bread so amazing is that it stays soft and fresh for days after it's been baked.
Just about all homemade bread tastes fabulous fresh out of the oven. But then whatever isn't initially eaten tends to dry out a bit as the days stretch on, particularly in the case of wheat bread.
But this bread is just as good on the third day (if it lasts that long!) as it was on the first. Seriously! I wouldn't believe it if I hadn't experienced it first hand myself. It's like store-bought, stay-soft bread without the preservatives. Forgive me for going all Scarlett O'Hara on you, but as God is my witness, I'll never make another whole wheat bread recipe again!
The Best Whole Wheat Flour for Bread Baking
One of my bread making tricks is that I like to use white whole wheat flour when I make bread. Even though it has the word "white" in its title, this flour is 100% whole wheat.
Traditional whole wheat flour is milled from red wheat; white whole wheat flour is milled from (hard) white wheat. Its lighter grain results in a milder flavor and lighter texture than the whole wheat flour to which most of us are accustomed.
Don't be fooled by the taste, though...white whole wheat flour is unrefined and 100% whole wheat! It's nutritionally the same as its red wheat cousin. I buy King Arthur brand unbleached white whole wheat flour, but I'm sure there are other brands out there that would work just as well.
How to Make the Best Whole Wheat Bread
Not only does this whole wheat bread turn out better than most, but the recipe is actually simpler to make than most! Some of the steps may seem a bit unconventional to an experienced bread maker. But if you give this recipe a chance, I think you'll be pleased with the results.
- Fit your stand mixer with a dough hook. Measure out flour, vital wheat gluten, and instant dry yeast into the bowl and mix until combined.
- Pour in very warm water (between 120°F and 130°F) and mix for one minute. The water needs to be hot enough to activate the yeast but not so hot that it kills it.
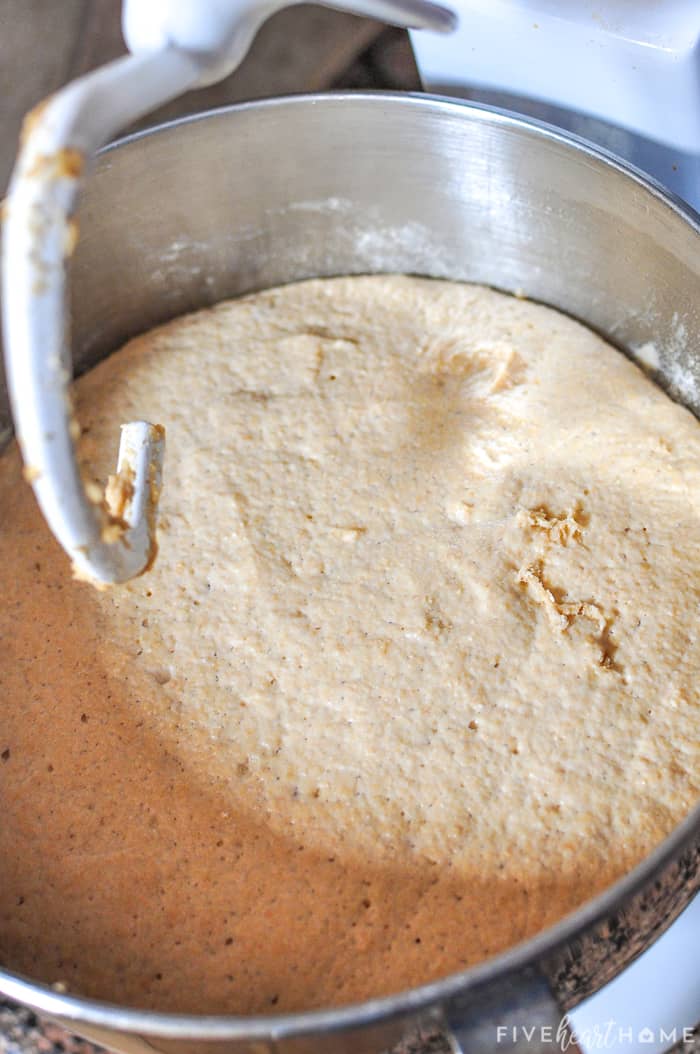
Cover with a clean kitchen towel and allow to rest for 10 minutes.
- Uncover the bowl.
Beat in salt, oil, honey, and lemon juice.
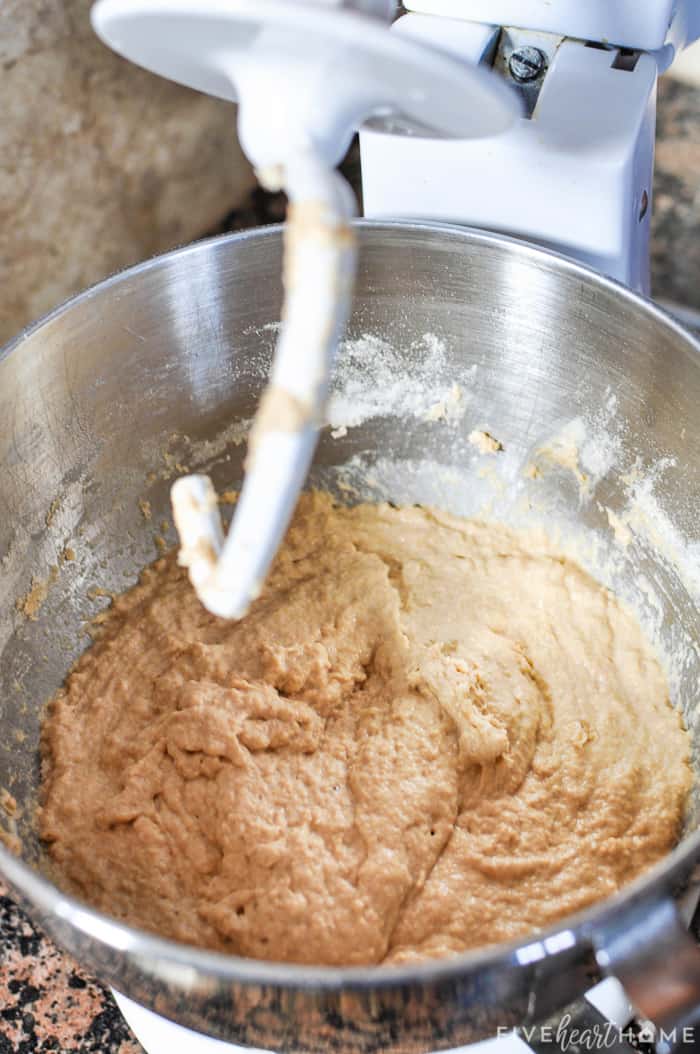
- Add more flour, mixing it in one cup at a time until well incorporated. Allow the dough hook to knead the dough until it becomes smooth instead of sticky and pulls away from the side of the bowl.
This typically takes 10 to 15 minutes but may take as little as 5 minutes.
- Grease and/or line your pans and set aside.
- Turn on the oven to 350°F. After exactly one minute, turn it back off. This will preheat the oven to lukewarm...just enough to give your loaves the perfect warm spot to rise!
- Turn the dough out onto a greased surface.
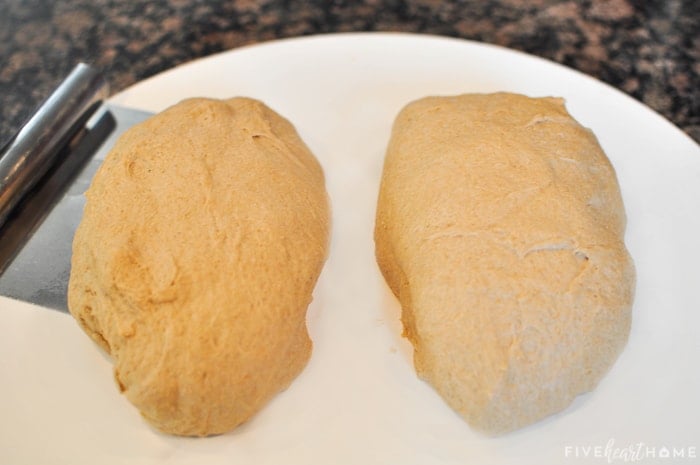
Divide it equally in half and shape it into two loaves.
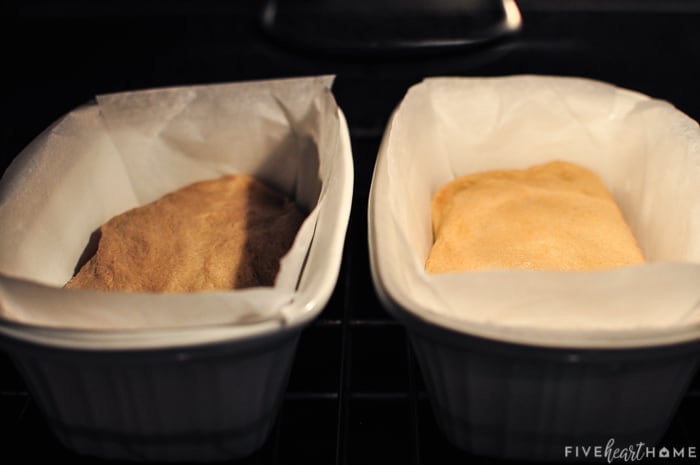
Transfer the loaves to the prepared bread pans, pressing the dough into the corners.
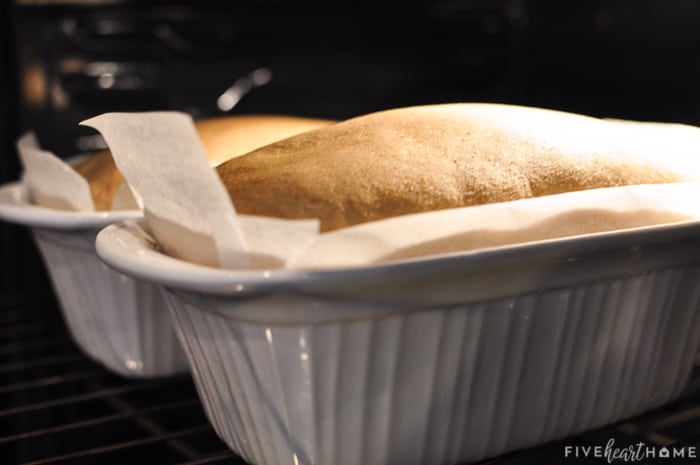
- Place the pans in the warm oven and allow them to rise for 20 to 40 minutes, or until they are nicely domed and as high as you wish your final whole wheat bread loaves to be.
- Once the loaves have risen to your liking, turn on the oven to 350°F WITHOUT TAKING THE BREAD OUT OF THE OVEN. Set the timer for 30 minutes. I know, I know...sounds weird. But trust me.
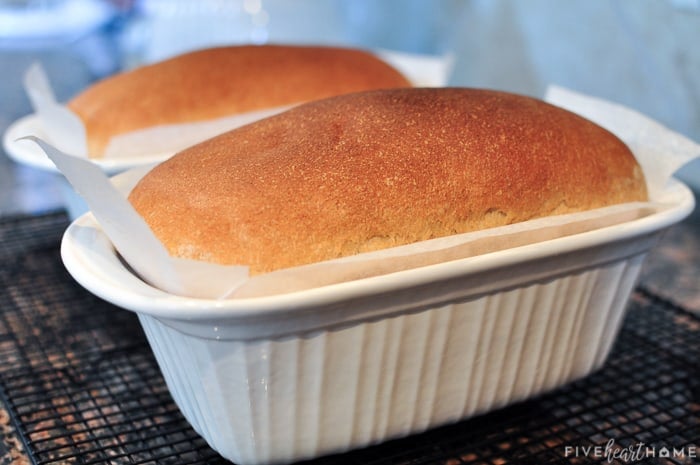
- Your bread is done when it's golden brown on top with an internal temperature from 190°F to 200°F on an instant-read thermometer. Turn the hot loaves out onto a rack to cool completely.
And that's it. One step at a time...you can do this!
What's a Bread Sponge?
Let's talk about step #2 for a moment, shall we? I believe that the biggest factor that makes this bread stay so soft and fresh is the step in the recipe calling for you to make a sponge. Now I'm not talking about the kind of sponge you keep by your kitchen sink. In bread making, a sponge is a very moist dough that just begins to rise as it gives the yeast a head start. After it's had some time to do its magic, you add more flour and ingredients and proceed with the recipe. The sponge in this recipe only needs to sit for about 10 minutes. But apparently that's all it takes to achieve this bread's wonderful texture.
Ingredient Substitutions
For optimal results, make this whole wheat bread as directed. However, the recipe will still work (and even turn out great) incorporating a variety of substitutes. Just keep in mind that changing the ingredients may result in a different taste and/or texture in your final loaves. Switching ingredients could also require you to tweak an amount or a step, such as needing to add extra flour and/or kneading a bit longer to achieve the proper dough consistency. But if you're willing to experiment a bit, people have had success with the following substitutions...
(NOTE: Many of the below recipe tweaks have been taken from the comment section. I have not tried all of these substitutes myself.)
- Flour. You can make this recipe with regular (as opposed to "white") whole wheat flour. Or you may substitute all-purpose white flour for around half of the whole wheat flour. You may also use freshly ground whole wheat flour (milled from red wheat or white wheat). Just keep in mind that fresh milled flour is much "airier," so you may need to allow it some time to pack down before measuring it out...or just plan on using extra flour, as necesary. Also, with any flour substitution, you may need to slightly adjust the amount of flour added at the end of the recipe. For example, if the dough seems extra sticky and doesn't start pulling away from the bowl in a timely manner, you can work in additional flour (one spoonful at a time) until the texture seems right.
- Vital Wheat Gluten. This ingredient helps whole wheat bread recipes rise, and it encourages soft and chewy loaves with that stay-fresh quality. That being said, if you don't have any on hand or prefer not to use it, many people report having made this bread successfully while leaving out the vital wheat gluten.
- Yeast. I recommend using instant dry yeast (sometimes called "quick rise" or "rapid rise"), as directed in the recipe. You might have success if trying regular active dry yeast...but then again, maybe not. 😉 If you do decide to gamble on active dry yeast, my research indicates that to substitute it for instant dry yeast, you should multiply the amount by 1.25.
- Lemon Juice. If you don't have any lemon juice on hand, you may substitute another type of acid in its place. Orange juice, white vinegar, or apple cider vinegar would all work.
- Honey. You may reduce the honey, if you wish. Also, maple syrup or agave may be substituted for the honey.
Other Recipe Notes
- The stand mixer pictured in this post is a classic, 5-quart, tilt-head KitchenAid.
- You may halve this recipe to make only one loaf of bread.
- You can also make this bread by hand...just prepare your muscles for all of that kneading.
- People have also reported success in halving the ingredients and making this recipe in a bread maker. But I don't own a bread maker and I'm not sure of the specifics...so you may have to experiment on that one. 😉
Avoiding Sticking
The only difficulty that I ran into the first time I made this bread is that it stuck to my loaf pans, despite the fact that I had generously greased them. Nonstick pans are recommended for this recipe, so if you've got 'em, use 'em! But since I prefer baking in my stoneware pans, I figured out a way around not using nonstick.
I grease my pans with coconut oil and then line them with parchment paper, using the coconut oil to adhere the paper to the pan. I find that if I cut a piece of parchment paper the length of each pan and allow it to somewhat stick out the sides, then I only need to cut two small pieces of paper per pan for the ends that remain uncovered. The key is pressing the parchment paper down and smoothing it as much as possible so you don't end up with a bunch of creases in your bread.
How to Store Your Whole Wheat Bread
This recipe makes two loaves, so I like to keep one wrapped (I use Glad Press 'n Seal) and stored in the pantry for eating. The second loaf I keep wrapped up in the refrigerator until we're ready to enjoy it.
I have a bread box, but I still prefer keeping my loaf wrapped inside of the bread box. And when I cut off the first slice, I store that end piece pressed against the cut end of the loaf as a kind of "cap" to help prevent it from drying out. When we're ready for the second loaf, I take it out of the fridge and store it at room temperature in the bread box.
Since this is fresh homemade bread with no preservatives, it will start to mold after several days. So keeping that second loaf in the fridge until we're ready for it buys us some extra time. You could also successfully freeze the second loaf if you prefer. However, we usually eat it soon/fast enough that refrigerating suffices.
If it takes your family awhile to work through two loaves of bread, another winning alternative would be to give the second loaf away! I mean, who wouldn't love the thoughtful gesture of freshly-baked homemade bread?
If you have never baked homemade bread before, I encourage you to try it. It may seem intimidating at first and the various steps do take a bit of time, but overall, it truly is easy. And if you are already an expert baker, then I hope you'll add this recipe to your repertoire!
Now go forth and make bread!
And psssst...if you happen to love this bread recipe, I actually adapted it to make The Very BEST Whole Wheat Dinner Rolls! Your holiday table won't be the same without 'em. 😉
Whole Wheat Bread Recipe
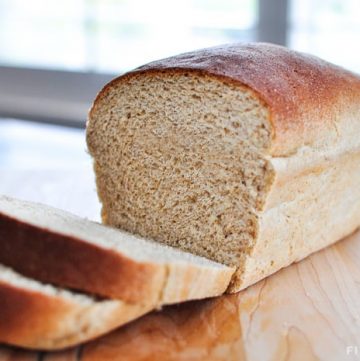
The Very BEST Whole Wheat Bread
Ingredients
Step 1:
- 3 ½ cups white whole wheat flour
- ⅓ cup vital wheat gluten
- 4 teaspoons instant dry yeast, "quick rise" or "rapid rise"
Step 2:
- 2 ½ cups very warm water, 120°F to 130°F
Step 3:
- 1 tablespoon salt
- ⅓ cup coconut oil, melted and cooled (OR vegetable oil)
- ⅓ cup honey
- 4 teaspoons lemon juice
Step 4:
- 2 ½ cups white whole wheat flour
Instructions
- In the bowl of a stand mixer fitted with a dough hook, mix together 3 ½ cups white whole wheat flour, vital wheat gluten, and quick-rise yeast until well combined.
- Add the water and mix for one minute, scraping down bowl halfway through. Cover the bowl with a clean kitchen towel and allow to rest for 10 minutes.
- Uncover the bowl and add the salt, oil, honey, and lemon juice. Beat for 1 minute.
- Add the remaining 2 ½ cups of flour, one cup at a time, mixing well between each cup. Knead the dough in the mixer (still using the dough hook) until the dough pulls away from the sides of the bowl and feels smooth rather than sticky. This usually takes 10 to 15 minutes, but if your dough pulls away and loses its stickiness sooner, it could take as little as 5 minutes.
- Grease two nonstick bread pans measuring 8 ½" x 4 ½" x 2 ½" to 9" x 5" x 3" each (or grease two regular bread pans and then line them with parchment paper). Preheat the oven to lukewarm by setting it to 350°F and then turning it back off after exactly 1 minute.
- Turn the dough onto a greased surface. Evenly divide it into two loaves. Form and place the dough into the prepared bread pans, gently pressing it into the corners.
- Place the pans in the warm oven and allow them to rise for 20 to 40 minutes, until the dough is nicely domed above the tops of the pans. Without removing the pans from the oven, turn on the oven to 350°F and set the timer for 30 minutes. The bread is done when the tops are golden brown and the internal temperature reaches 190°F to 200°F on an instant-read thermometer. Once the loaves are baked, immediately remove the hot bread from the pans to cool on a rack.
Equipment Needed
Notes
- I use coconut oil in this recipe. It works wonderfully and doesn't make the bread taste like coconut at all. However, you may use sunflower, safflower, or another light-flavored vegetable oil, if you prefer.
- Kneading and rising times are approximate and depend on many different variables. The dough must be kneaded until it pulls away from the bowl and is no longer sticky, even if that takes shorter or longer than 10 to 15 minutes. Also, the dough should be allowed to rise in the pans until it is as high as you want your final bread to be.
- White whole wheat flour is 100% whole wheat flour that yields a lighter taste and texture than regular whole wheat flour.
- Other types of flour (regular whole wheat flour, all-purpose white flour, freshly milled wheat flour, etc.) may be substituted for the white whole wheat flour in this recipe. Just keep in mind that the final flavor and texture of the bread may turn out different. Also, if you use an alternate flour (particularly freshly milled flour, which can be less dense), you may need to slightly adjust the amount of flour added at the end of the recipe. For example, if the dough seems extra sticky and doesn't start pulling away from the bowl, you can work in additional flour, one teaspoon at a time, until the texture seems right.
- If you don't have any lemon juice on hand, you may substitute another type of acid in its place (such as white vinegar or apple cider vinegar).
- Vital wheat gluten helps whole wheat bread recipes rise and yield soft and chewy loaves. That being said, if you don't have any on hand or prefer not to use it, many people report having made this bread successfully leaving out the vital wheat gluten.
Nutrition
Recipe adapted from Deals to Meals.
Post originally published on July 8, 2013.

 Cover with a clean kitchen towel and allow to rest for 10 minutes.
 Beat in salt, oil, honey, and lemon juice.
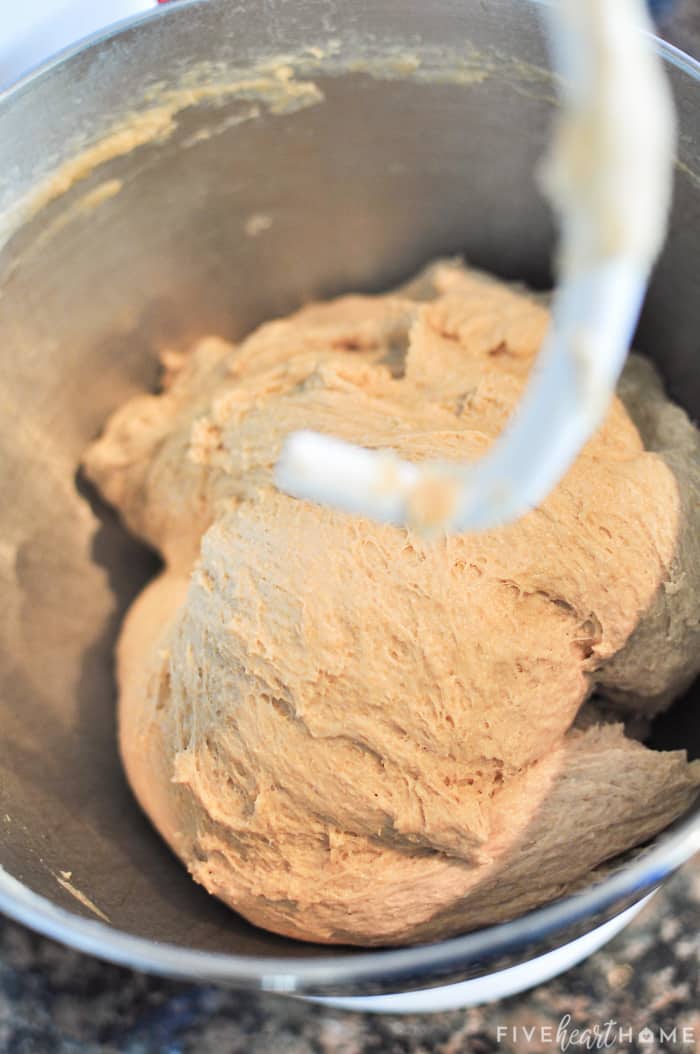 This typically takes 10 to 15 minutes but may take as little as 5 minutes.
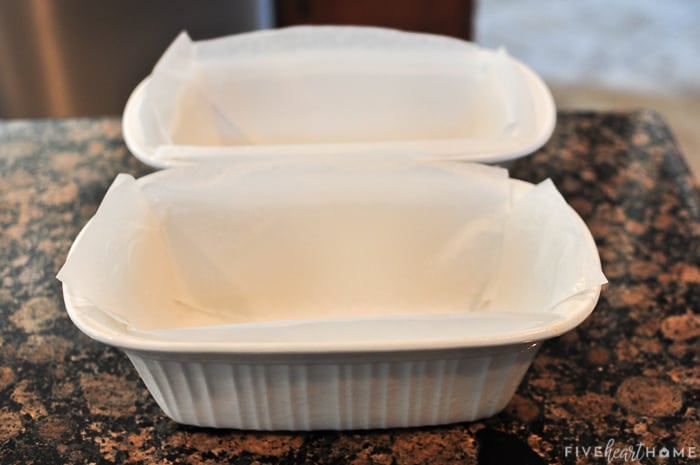
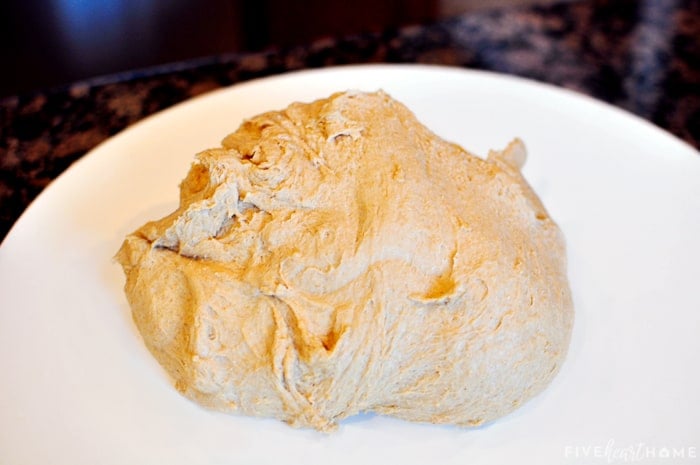 Divide it equally in half and shape it into two loaves.
 Transfer the loaves to the prepared bread pans, pressing the dough into the corners.



This looks delicious! I'm sorry if this has already been asked, but where do you find wheat gluten? I love baking bread but have only ever used just yeast. Thank you in advance!
Hi Letitia! I find vital wheat gluten at my regular grocery store, but it is a rather large store. It's typically in the baking aisle, near the other less common flours and starches. But if your regular store doesn't carry it, you should definitely be able to find it at a health food or whole foods-type store. The brand I find around here is Bob's Red Mill. Other common brands are Arrowhead Mills and King Arthur Flour. If you can't find it on a store, you can always order it online. A small bag will last a long time! Good luck!
Hi Samantha,
Thank you for sharing the recipe on your tasty wheat bread. It's not only giving me an option how to maintain it's freshness but you've perfectly share on how to do it.
You're welcome, Angela...enjoy!
I'm trying this bread for the first time. Is there really only one rise? Most bread recipes I've made in the past have two rises. I'm going to go ahead and do two rises and see what happens.
I have been making this bread recipe for six months, once or twice a week. After the first time I made this, I stopped trying other bread recipes. I use this for sandwiches, as gifts, with meals. It is the most reliable and forgiving recipe in my recipe folder. I don't know how many times this has come out of the oven and we eat it hot and decide not to have anything else for supper. All of which is to say, THANK YOU!!!!
I have baked it in three different ovens with the 1 minute preheat, and the rise time in the oven has still worked well. When I need oven space for something else, I use the microwave as a proofing box--I put the loaves in the microwave with 4 cups of very hot water to raise the temperature in the microwave.
The only change I make is to add 2 Tblsp lecithin or bran extract as an emulsifier. I don't bother with parchment paper anymore, as it rarely sticks when I spray the stoneware or metal bread pan with spray. I grind my wheat and it doesn't seem to matter whether I use a hard red or a soft white wheat, the texture changes to reflect this but it's always good.
I keep my yeast in refeigerator and the lecithin in the freezer. I don't bother to let them come to room temperature but add them cold to the flour mix.
I have used this for rolls and hamburger buns (at first I rolled out and used a biscuit cutter, but it seems to do better if handle gently and break off pieces and shape into balls). Using half the dough to make 8 hamburger buns seems to work well.
For serving Holy Communion, I divide into four loaves instead of two loaves and shape each piece into a ball. After it rises and before baking I use a bread knife to cut a cross into the top.
For challah I substitute 3 eggs for part of water (just put in measuring cup and fill to 2 1/2 cups, and I use a little hotter water, 140, since the eggs are cold) and I add 1 cup of dry milk.
For cinnamon rolls, I roll out half the dough to flat, add cinnamon sugar filling, roll up and slice into 12 pieces. bake 25 minutes and drizzle with thin icing.
Again, thanks for posting this recipe!
Wow, Cyndi...thanks for such a thorough comment sharing all of your tips, tricks, and variations for this bread! You are sure to help a lot of other readers who would like to experiment with this recipe. I really appreciate you taking the time to share your experiences, and I especially love that you've been baking it for Holy Communion. 🙂 Hope you have a wonderful week!
Samantha, I just made your bread and it is delicious! Though I forgot to add lemon juice, it turned out fantastic. I mill my own flour and I used red hard winter wheat berries which gave an incredible earthy taste to this bread. Also, I used agave syrup instead of honey (I'm allergic to honey) and I found it to be a great substitution. In sum, thank you for sharing your recipe. My one-year-old can't take her eyes away from this bread - she liked it so much.
Yay, Masha! I'm so glad that this bread turned out well for you. I'm sure your freshly ground flour made it even better! I appreciate you coming back to let me know that you enjoyed this recipe. Hope your December is off to a wonderful start! 🙂
Hi,
Just wondering can I omit vital wheat gluten?
Thank you
Hi Amber! Yes, you can omit the vital wheat gluten. Others have done so and reported that the bread still turned out great. 🙂 Enjoy!
I just made this recipe and the loaves came out great. Excellent flavor, super simple, and I love that it’s just a few ingredients - and you know what’s actually going into the bread you eat. Thanks for sharing this!
You're welcome, Tara...I'm so glad that you had success with this recipe! I love knowing exactly what's in my bread as well. 😉
Do you by chance know how much dough should go into a Pain De Mie 16" x 4"x4" (pullman) bread pan? I would like to try your whole wheat recipe but do not know what rule of thumb to use for different size brad pans. Hope you can help. Thank you
I'm very sorry, Denise, but I'm not familiar with a pullman bread pan. I have only baked this recipe using two standard-sized loaf pans. It's a pretty adaptable recipe and I'm sure it would work in another size of pan, but you may have to experiment a bit to figure out the best amount of dough for such a pan. Good luck!
2 /2 c flour will make two loaves of Whole Wheat bread? What size bread pans do you use? Thank you for your itme
Hi Denise! The total amount of flour is divided up in the recipe to help you add the correct amount and the correct time. You start out using 3 1/2 cups flour, and then later in the recipe, you add an additional 2 1/2 cups flour (for a total of 6 cups). I use 1 3/4-quart loaf dishes (here is my affiliate link for the exact ones I use >>> http://amzn.to/1Aj9AjE), but any standard sized bread pan should work fine. Hope that helps!
Made this recipe this afternoon! Delicious! I'm so glad I read your info on the recipe before making it...I learned something's new! The "sponge" method ---awesome....and the preheat 350 let it run 1 minute and turn off....brilliant!
I started the recipe at about 12:30 this afternoon or possibly later and had a loaf for my family dinner and a loaf for work to share...all before leaving at 5:00!!!
I used red wheat because it's what I had and the last 2 1/2 cups I used white bread flour! I believe this will be a family favorite and staple! Thanks for the recipe and tips!
Next it's the meatball sandwich recipe.....
It makes me so happy to hear that this bread was a success for you, Dawn...thanks for taking the time to let me know! I'm glad you found the directions easy to follow and the tips helpful. Enjoy the bread, and I hope the meatball subs are a hit as well! 🙂 Have a wonderful week!
Just made this bread. I had to use a variety of flours as I didn't have enough white whole wheat, but it is delicious! I will be making this regularly. Yum!
I'm so happy to hear that you enjoyed this bread, Natalie, and that it turned out well using different flours. Thanks for coming back to share that it was a hit! 🙂
I am reading the recipe and I am a little confused. It says add the first 3 ingredients and then in the next step it says to add remaining flour a cup at a time. Are you adding more flour? I am new to bread making so I want to be sure I get this right. Thanks!
Hi Lisa! Sorry if the recipe is confusing. You do add the first three ingredients in their entirety (3 1/2 cups white whole wheat flour, 1/3 cup vital wheat gluten, and 4 teaspoons instant/quick-rise yeast) and then mix in the water. Then, after allowing the dough to rest, you add the next four ingredients (1 tablespoon salt, 1/3 cup oil, 1/3 cup honey, 4 teaspoons lemon juice). After beating per the recipe, you add the final 2 1/2 cups flour, one cup at a time. You'll notice that the final addition of flour is listed separately at the very end of the ingredients. I tried to put little dividers in the ingredient list to make it easier to understand which ingredients went together in which steps. I hope this makes sense and clarifies the recipe for you! 🙂 Please let me know if you have any other questions and good luck with your bread!
Hi! I just made you whole wheat bread recipe. It turned out amazing! I could not find white whole wheat (I live in Canada and they don't sell it here yet) so I used whole grain whole wheat flour. It turned out fabulous! So yummy! Thank you!
You are so very welcome, Laura...I love hearing that you love this recipe! Hope you enjoy it for many years to come. Thanks for stopping back by to let me know that it was a hit! 🙂
This was hands down the best wheat bread I've ever made. I used white wheat flour as well (Bob's Red Mill), although I ran just short and included a half cup or so of regular wheat flour. Anyhow, it was OUTSTANDING. Soft, flavorful, and no one could tell that it was 100% wheat. I used half coconut oil and half olive oil just to make sure it didn't taste like coconut. Thank you for sharing!!!
I'm so happy to hear that, Jamie! Thanks so much for taking the time to let me know that you enjoyed this recipe. 🙂 Hope you're having a great week!
I made this bread for the first time today, and it was delicious!! My friend was visiting, and we ate a whole loaf, with homemade grape jam. Oops. The taste and texture were perfect. I did have trouble with the rising: I let it rise for almost 2 hours and it still didn't even top the pan. But I'm not sure I used the right temperature water, and my ancient oven has no light, so I had to keep opening the door to check on the rising. I turned the oven on once or twice for about 20 seconds to try to rewarm it. All that to say, even with so much trouble, it was WELL worth it, and I will definitely be making this again! Here's hoping I can get it to rise. 🙂
Glad this bread was a hit, Audrey! I'm sure I could polish off a whole loaf as well if I had some homemade grape jam...yum! Sorry the rising took longer than anticipated...hopefully you'll get this recipe down to an art after making it a few times. Thanks so much for letting me know that you enjoyed it. Hope you have a great week!
I just wanted to say thanks for this delicious recipe! I worked at a Great Harvest Bread Company for nearly 5 years -so I know good bread- and this is now my favorite bread. I have needed to add more like 3-4 cups at the end rather than 2 1/2, but it's been very humid here (I live in SE Louisiana).
This recipe is great as is, but lately I've been adding in rolled oats and ground flax seeds (adjusting the flour accordingly)...extra healthy and delicious!! Thanks again!!
I'm so glad to hear that this bread is your new favorite, Jenny, and it's great that you figured out the right amount of extra flour to counter the humidity where you live. Adding oats and ground flax seeds sound like a great idea...I'll have to try that sometime! Hope you enjoy this recipe for many years to come...thanks for taking the time to let me know that it was a hit! 🙂
Hello, Can I use fresh yeast in this recipe?
Hi Aneta! I'm so sorry, but I've never used fresh yeast before. I imagine that it would work just fine in this recipe, but I don't have any experience converting amounts of dry yeast to fresh. I found several sources indicating how much fresh yeast would be equivalent to a certain amount of dry yeast (such as this one --> http://www.nigella.com/kitchen-queries/view/Different-kinds-of-yeast/22), so I bet that a quick Google search will give you the answers you need. Good luck! 🙂
Love this whole wheat bread recipe. I used fresh ground white whole wheat (had to add just a little more), avocado oil instead of coconut; I love both, and fresh lime juice instead of lemon since we have a tree. I had 2 beautiful, wholesome, delicious loaves (no sinking loaves here). Thank you for sharing the recipe, it will be my "go to" sandwich bread.
I'm so glad you enjoyed this bread enough to make it your new "go-to" Holly...and your variations sound great! Thanks for taking the time to comment...hope you have a wonderful week! 🙂
I have been having trouble with rise the past several times I've used this recipe (after it rising beautifully the first few times). It has been humid/rainy so I've been adding additional flour, enough so that the dough is smooth rather than sticky and pulls away from the mixing bowl. Should I be adding more still? If so, how will I know when I've added enough? It's been rising just to the top of my loaf pans when before it was rising well above the top. I've allowed the full 40 minutes for rise every time.
Hi Faith! Bread baking can be so temperamental based on the weather, can't it? If you've got the dough to a texture that pulls away from the bowl by adding a bit more flour, it doesn't sound like you need to add anymore. Rather, I'd probably just allow for extra rising time. I know that there have been times I made this recipe that it needed longer than usual to rise as high as I wanted it. Just keep an eye on it. I hope this works for you...and if not, I hope the humidity goes away soon -- ha! 😉 The only other thought I have is that perhaps your yeast is not fresh? Here is one way to test it (or you can Google for other methods): http://www.redstaryeast.com/lessons-yeast-baking/yeast-shelf-life-storage/yeast-freshness-test . Good luck!
Thank you for the quick reply! I will try allowing more time or rise. I'm also wondering, after reading that link, if I'm using too-hot water and killing the yeast. I will try using warm water instead of so hot. We recently replaced the hot water heater in our home so tap water is heating up faster than it used to.
Yes! If your water is suddenly warmer than it used to be, that could definitely be affecting your yeast. Good thinking! 🙂 Do you have a thermometer to determine the temp of the water you've been using?