The Very BEST Whole Wheat Bread
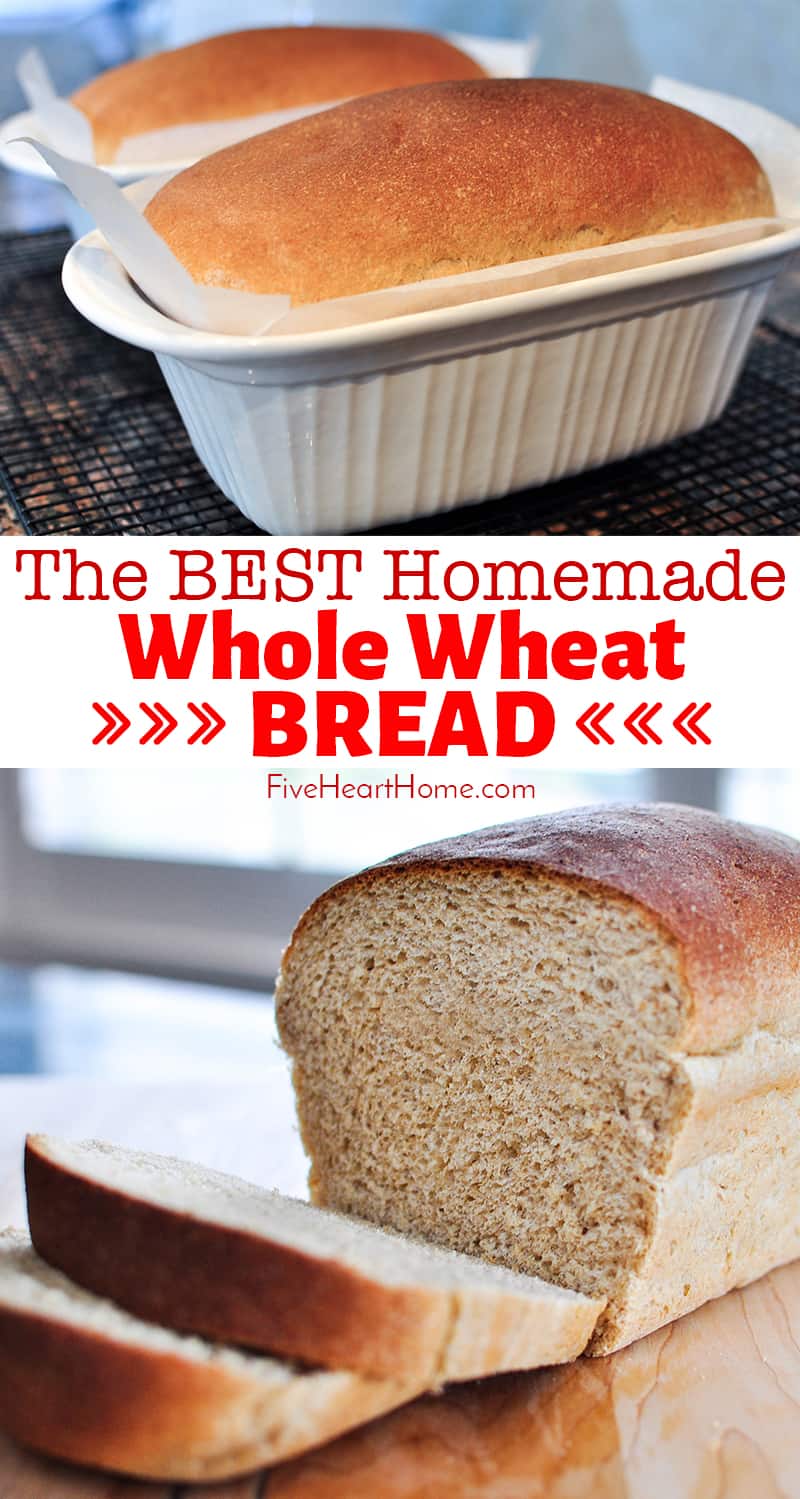
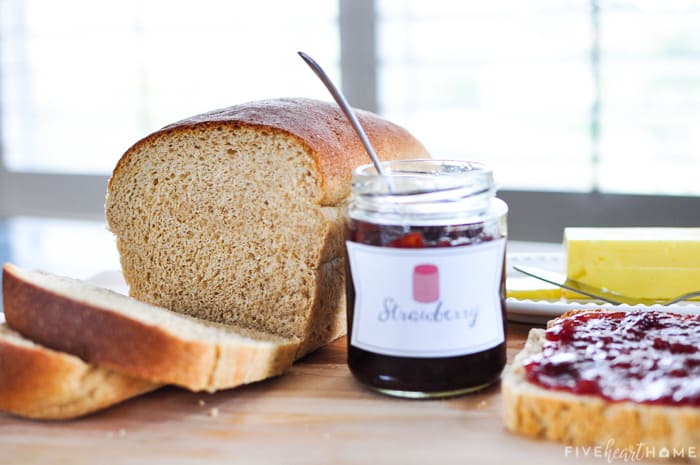
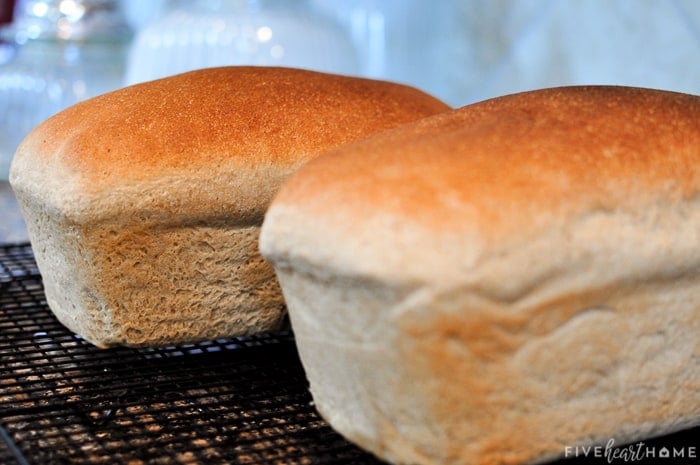
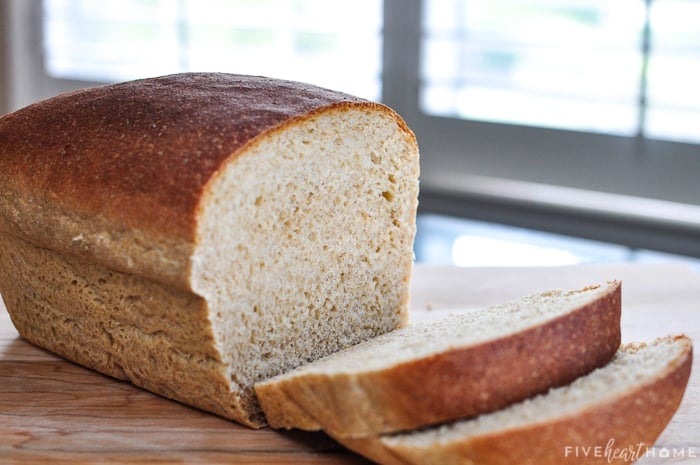
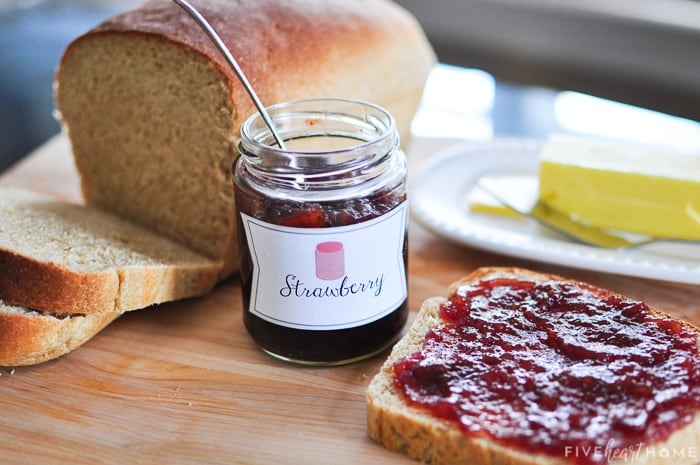
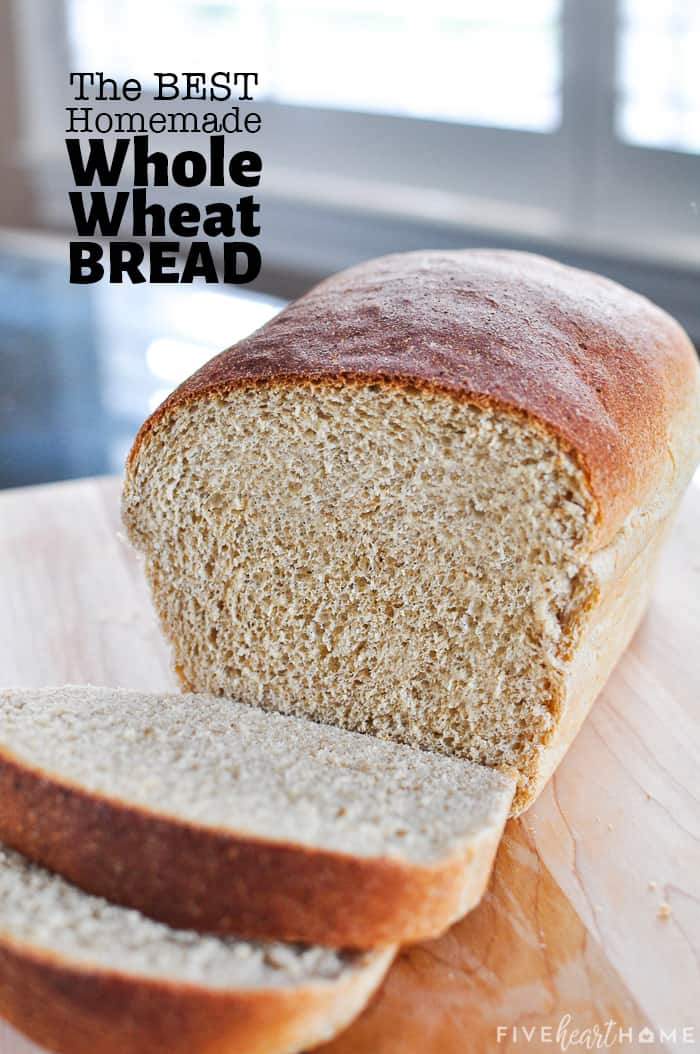
The Very BEST Whole Wheat Bread is the softest, moistest, fluffiest, freshest-staying, homemade, 100% whole wheat bread you've ever tried!
This bread, y'all. This bread. I titled this Whole Wheat Bread recipe "the BEST" and I'm not even exaggerating here. I've baked many a whole wheat bread recipe over the years, and this one is head-and-shoulders above the rest.
Hundreds of raving comments (since I first published this recipe six years ago) can't be wrong...right?! So I decided to update this old post with tons of additional information and tips to help ensure your bread making success!
THE BEST Whole Wheat Bread
Here's the deal...what makes this bread so amazing is that it stays soft and fresh for days after it's been baked.
Just about all homemade bread tastes fabulous fresh out of the oven. But then whatever isn't initially eaten tends to dry out a bit as the days stretch on, particularly in the case of wheat bread.
But this bread is just as good on the third day (if it lasts that long!) as it was on the first. Seriously! I wouldn't believe it if I hadn't experienced it first hand myself. It's like store-bought, stay-soft bread without the preservatives. Forgive me for going all Scarlett O'Hara on you, but as God is my witness, I'll never make another whole wheat bread recipe again!
The Best Whole Wheat Flour for Bread Baking
One of my bread making tricks is that I like to use white whole wheat flour when I make bread. Even though it has the word "white" in its title, this flour is 100% whole wheat.
Traditional whole wheat flour is milled from red wheat; white whole wheat flour is milled from (hard) white wheat. Its lighter grain results in a milder flavor and lighter texture than the whole wheat flour to which most of us are accustomed.
Don't be fooled by the taste, though...white whole wheat flour is unrefined and 100% whole wheat! It's nutritionally the same as its red wheat cousin. I buy King Arthur brand unbleached white whole wheat flour, but I'm sure there are other brands out there that would work just as well.
How to Make the Best Whole Wheat Bread
Not only does this whole wheat bread turn out better than most, but the recipe is actually simpler to make than most! Some of the steps may seem a bit unconventional to an experienced bread maker. But if you give this recipe a chance, I think you'll be pleased with the results.
- Fit your stand mixer with a dough hook. Measure out flour, vital wheat gluten, and instant dry yeast into the bowl and mix until combined.
- Pour in very warm water (between 120°F and 130°F) and mix for one minute. The water needs to be hot enough to activate the yeast but not so hot that it kills it.
Cover with a clean kitchen towel and allow to rest for 10 minutes.
- Uncover the bowl.
Beat in salt, oil, honey, and lemon juice.
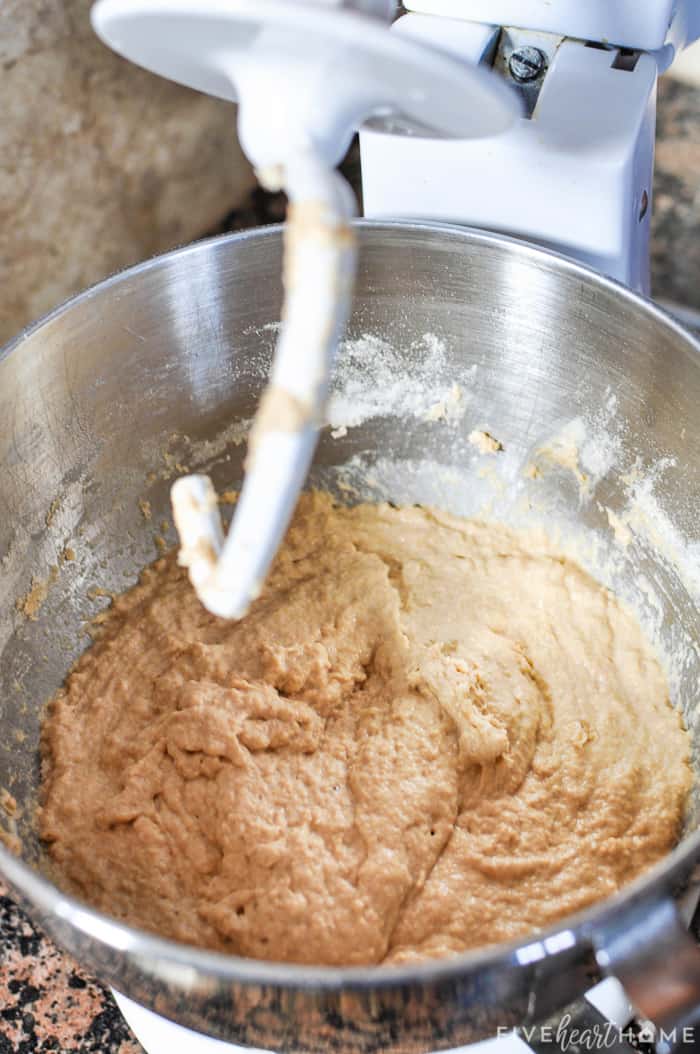
- Add more flour, mixing it in one cup at a time until well incorporated. Allow the dough hook to knead the dough until it becomes smooth instead of sticky and pulls away from the side of the bowl.
This typically takes 10 to 15 minutes but may take as little as 5 minutes.
- Grease and/or line your pans and set aside.
- Turn on the oven to 350°F. After exactly one minute, turn it back off. This will preheat the oven to lukewarm...just enough to give your loaves the perfect warm spot to rise!
- Turn the dough out onto a greased surface.
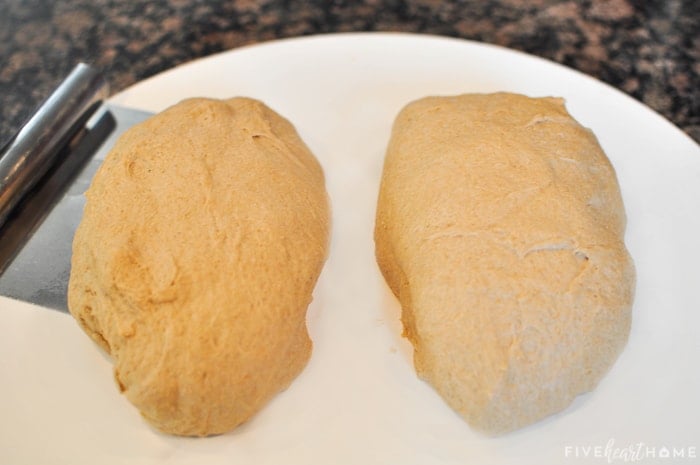
Divide it equally in half and shape it into two loaves.
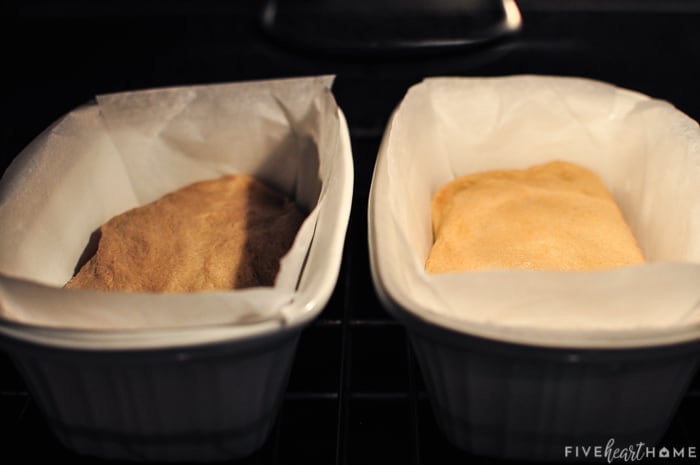
Transfer the loaves to the prepared bread pans, pressing the dough into the corners.
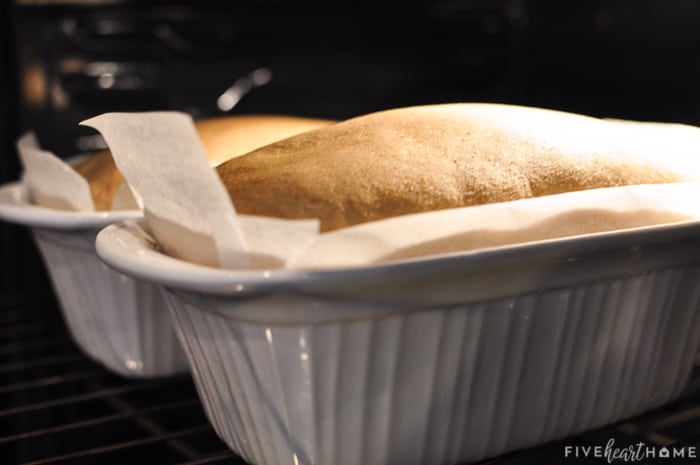
- Place the pans in the warm oven and allow them to rise for 20 to 40 minutes, or until they are nicely domed and as high as you wish your final whole wheat bread loaves to be.
- Once the loaves have risen to your liking, turn on the oven to 350°F WITHOUT TAKING THE BREAD OUT OF THE OVEN. Set the timer for 30 minutes. I know, I know...sounds weird. But trust me.
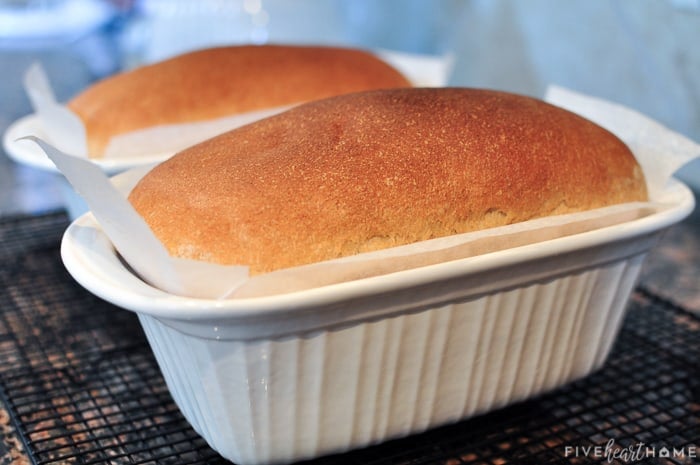
- Your bread is done when it's golden brown on top with an internal temperature from 190°F to 200°F on an instant-read thermometer. Turn the hot loaves out onto a rack to cool completely.
And that's it. One step at a time...you can do this!
What's a Bread Sponge?
Let's talk about step #2 for a moment, shall we? I believe that the biggest factor that makes this bread stay so soft and fresh is the step in the recipe calling for you to make a sponge. Now I'm not talking about the kind of sponge you keep by your kitchen sink. In bread making, a sponge is a very moist dough that just begins to rise as it gives the yeast a head start. After it's had some time to do its magic, you add more flour and ingredients and proceed with the recipe. The sponge in this recipe only needs to sit for about 10 minutes. But apparently that's all it takes to achieve this bread's wonderful texture.
Ingredient Substitutions
For optimal results, make this whole wheat bread as directed. However, the recipe will still work (and even turn out great) incorporating a variety of substitutes. Just keep in mind that changing the ingredients may result in a different taste and/or texture in your final loaves. Switching ingredients could also require you to tweak an amount or a step, such as needing to add extra flour and/or kneading a bit longer to achieve the proper dough consistency. But if you're willing to experiment a bit, people have had success with the following substitutions...
(NOTE: Many of the below recipe tweaks have been taken from the comment section. I have not tried all of these substitutes myself.)
- Flour. You can make this recipe with regular (as opposed to "white") whole wheat flour. Or you may substitute all-purpose white flour for around half of the whole wheat flour. You may also use freshly ground whole wheat flour (milled from red wheat or white wheat). Just keep in mind that fresh milled flour is much "airier," so you may need to allow it some time to pack down before measuring it out...or just plan on using extra flour, as necesary. Also, with any flour substitution, you may need to slightly adjust the amount of flour added at the end of the recipe. For example, if the dough seems extra sticky and doesn't start pulling away from the bowl in a timely manner, you can work in additional flour (one spoonful at a time) until the texture seems right.
- Vital Wheat Gluten. This ingredient helps whole wheat bread recipes rise, and it encourages soft and chewy loaves with that stay-fresh quality. That being said, if you don't have any on hand or prefer not to use it, many people report having made this bread successfully while leaving out the vital wheat gluten.
- Yeast. I recommend using instant dry yeast (sometimes called "quick rise" or "rapid rise"), as directed in the recipe. You might have success if trying regular active dry yeast...but then again, maybe not. 😉 If you do decide to gamble on active dry yeast, my research indicates that to substitute it for instant dry yeast, you should multiply the amount by 1.25.
- Lemon Juice. If you don't have any lemon juice on hand, you may substitute another type of acid in its place. Orange juice, white vinegar, or apple cider vinegar would all work.
- Honey. You may reduce the honey, if you wish. Also, maple syrup or agave may be substituted for the honey.
Other Recipe Notes
- The stand mixer pictured in this post is a classic, 5-quart, tilt-head KitchenAid.
- You may halve this recipe to make only one loaf of bread.
- You can also make this bread by hand...just prepare your muscles for all of that kneading.
- People have also reported success in halving the ingredients and making this recipe in a bread maker. But I don't own a bread maker and I'm not sure of the specifics...so you may have to experiment on that one. 😉
Avoiding Sticking
The only difficulty that I ran into the first time I made this bread is that it stuck to my loaf pans, despite the fact that I had generously greased them. Nonstick pans are recommended for this recipe, so if you've got 'em, use 'em! But since I prefer baking in my stoneware pans, I figured out a way around not using nonstick.
I grease my pans with coconut oil and then line them with parchment paper, using the coconut oil to adhere the paper to the pan. I find that if I cut a piece of parchment paper the length of each pan and allow it to somewhat stick out the sides, then I only need to cut two small pieces of paper per pan for the ends that remain uncovered. The key is pressing the parchment paper down and smoothing it as much as possible so you don't end up with a bunch of creases in your bread.
How to Store Your Whole Wheat Bread
This recipe makes two loaves, so I like to keep one wrapped (I use Glad Press 'n Seal) and stored in the pantry for eating. The second loaf I keep wrapped up in the refrigerator until we're ready to enjoy it.
I have a bread box, but I still prefer keeping my loaf wrapped inside of the bread box. And when I cut off the first slice, I store that end piece pressed against the cut end of the loaf as a kind of "cap" to help prevent it from drying out. When we're ready for the second loaf, I take it out of the fridge and store it at room temperature in the bread box.
Since this is fresh homemade bread with no preservatives, it will start to mold after several days. So keeping that second loaf in the fridge until we're ready for it buys us some extra time. You could also successfully freeze the second loaf if you prefer. However, we usually eat it soon/fast enough that refrigerating suffices.
If it takes your family awhile to work through two loaves of bread, another winning alternative would be to give the second loaf away! I mean, who wouldn't love the thoughtful gesture of freshly-baked homemade bread?
If you have never baked homemade bread before, I encourage you to try it. It may seem intimidating at first and the various steps do take a bit of time, but overall, it truly is easy. And if you are already an expert baker, then I hope you'll add this recipe to your repertoire!
Now go forth and make bread!
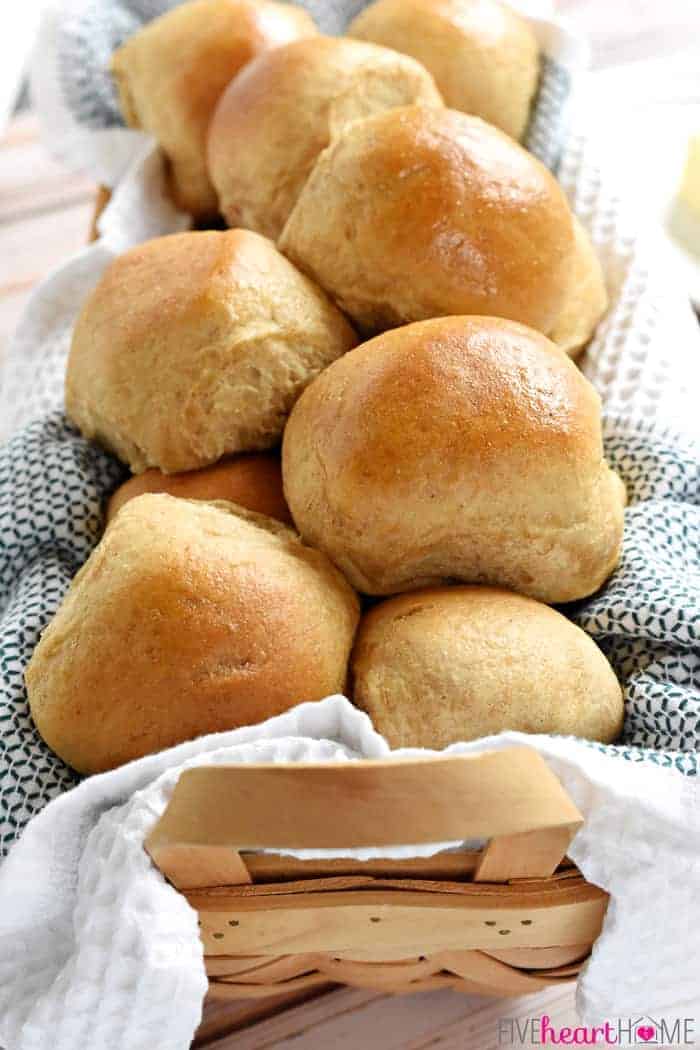
And psssst...if you happen to love this bread recipe, I actually adapted it to make The Very BEST Whole Wheat Dinner Rolls! Your holiday table won't be the same without 'em. 😉
Whole Wheat Bread Recipe
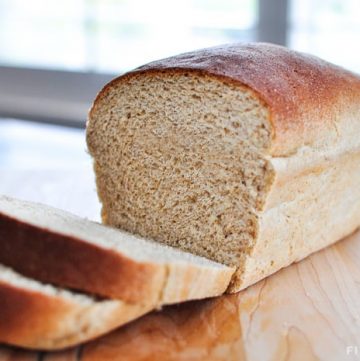
The Very BEST Whole Wheat Bread
Ingredients
Step 1:
- 3 ½ cups white whole wheat flour
- ⅓ cup vital wheat gluten
- 4 teaspoons instant dry yeast, "quick rise" or "rapid rise"
Step 2:
- 2 ½ cups very warm water, 120°F to 130°F
Step 3:
- 1 tablespoon salt
- ⅓ cup coconut oil, melted and cooled (OR vegetable oil)
- ⅓ cup honey
- 4 teaspoons lemon juice
Step 4:
- 2 ½ cups white whole wheat flour
Instructions
- In the bowl of a stand mixer fitted with a dough hook, mix together 3 ½ cups white whole wheat flour, vital wheat gluten, and quick-rise yeast until well combined.
- Add the water and mix for one minute, scraping down bowl halfway through. Cover the bowl with a clean kitchen towel and allow to rest for 10 minutes.
- Uncover the bowl and add the salt, oil, honey, and lemon juice. Beat for 1 minute.
- Add the remaining 2 ½ cups of flour, one cup at a time, mixing well between each cup. Knead the dough in the mixer (still using the dough hook) until the dough pulls away from the sides of the bowl and feels smooth rather than sticky. This usually takes 10 to 15 minutes, but if your dough pulls away and loses its stickiness sooner, it could take as little as 5 minutes.
- Grease two nonstick bread pans measuring 8 ½" x 4 ½" x 2 ½" to 9" x 5" x 3" each (or grease two regular bread pans and then line them with parchment paper). Preheat the oven to lukewarm by setting it to 350°F and then turning it back off after exactly 1 minute.
- Turn the dough onto a greased surface. Evenly divide it into two loaves. Form and place the dough into the prepared bread pans, gently pressing it into the corners.
- Place the pans in the warm oven and allow them to rise for 20 to 40 minutes, until the dough is nicely domed above the tops of the pans. Without removing the pans from the oven, turn on the oven to 350°F and set the timer for 30 minutes. The bread is done when the tops are golden brown and the internal temperature reaches 190°F to 200°F on an instant-read thermometer. Once the loaves are baked, immediately remove the hot bread from the pans to cool on a rack.
Equipment Needed
Notes
- I use coconut oil in this recipe. It works wonderfully and doesn't make the bread taste like coconut at all. However, you may use sunflower, safflower, or another light-flavored vegetable oil, if you prefer.
- Kneading and rising times are approximate and depend on many different variables. The dough must be kneaded until it pulls away from the bowl and is no longer sticky, even if that takes shorter or longer than 10 to 15 minutes. Also, the dough should be allowed to rise in the pans until it is as high as you want your final bread to be.
- White whole wheat flour is 100% whole wheat flour that yields a lighter taste and texture than regular whole wheat flour.
- Other types of flour (regular whole wheat flour, all-purpose white flour, freshly milled wheat flour, etc.) may be substituted for the white whole wheat flour in this recipe. Just keep in mind that the final flavor and texture of the bread may turn out different. Also, if you use an alternate flour (particularly freshly milled flour, which can be less dense), you may need to slightly adjust the amount of flour added at the end of the recipe. For example, if the dough seems extra sticky and doesn't start pulling away from the bowl, you can work in additional flour, one teaspoon at a time, until the texture seems right.
- If you don't have any lemon juice on hand, you may substitute another type of acid in its place (such as white vinegar or apple cider vinegar).
- Vital wheat gluten helps whole wheat bread recipes rise and yield soft and chewy loaves. That being said, if you don't have any on hand or prefer not to use it, many people report having made this bread successfully leaving out the vital wheat gluten.
Nutrition
Recipe adapted from Deals to Meals.
Post originally published on July 8, 2013.

 Cover with a clean kitchen towel and allow to rest for 10 minutes.
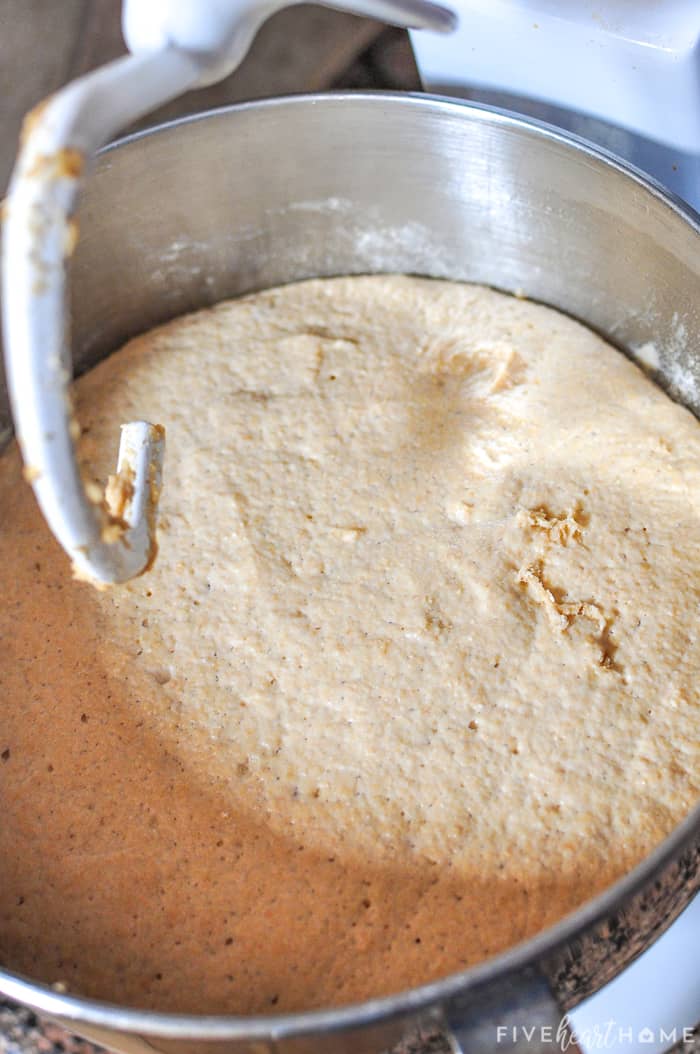 Beat in salt, oil, honey, and lemon juice.
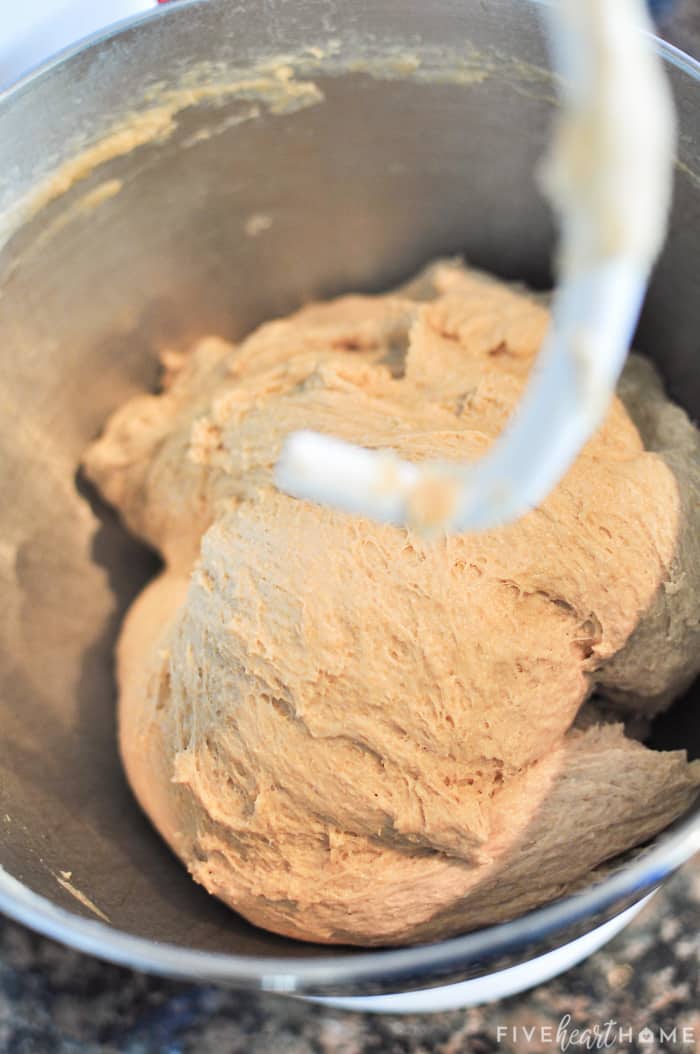 This typically takes 10 to 15 minutes but may take as little as 5 minutes.
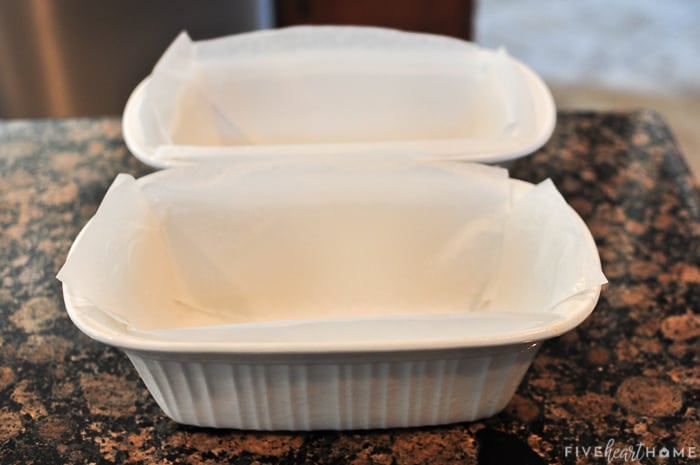
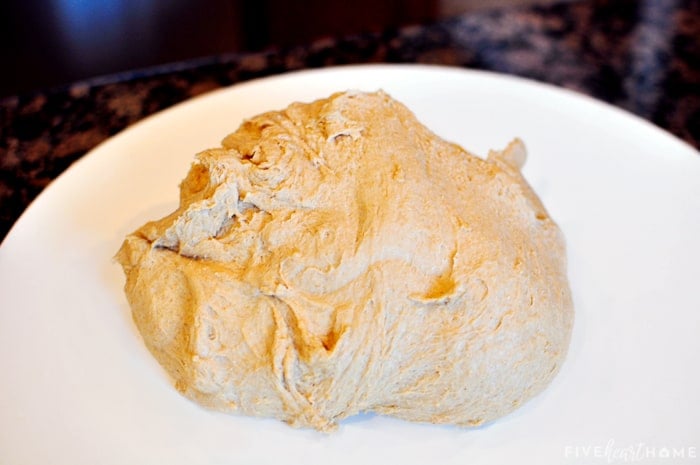 Divide it equally in half and shape it into two loaves.
 Transfer the loaves to the prepared bread pans, pressing the dough into the corners.


Hey there just wanted to give you a quick heads up. The words in your article
seem to be running off the screen in Chrome. I'm not sure
if this is a format issue or something to do with web browser compatibility but I thought I'd post to let you
know. The layout look great though! Hope you get the issue resolved
soon. Thanks
Thank you SO MUCH, Jacquelyn! I had no idea that this was an issue as everything was showing up correctly in various browsers on my computer. But after checking around, I determined that some people were indeed seeing cut-off or overlapping text. I really appreciate you bringing this to my attention! I'm working with someone to fix it now. If only food blogging involved cooking, taking photos, and writing without worrying about the technical stuff! 😛 Thanks again for the heads-up!!!
Help! My loaves were very short. I'm using 9x5 inch loaf pans but the dough never rose anywhere near the top, let alone over the top, of the pan. What am I doing wrong? Despite the lack of height, these smelled divine!! I'm determined to keep at it.
Hi Lisa! Hmmm...there can be different reasons why your bread didn't rise, so it's hard for me to advise without knowing all of your variables. The most likely possibilities would be that your yeast was old, or your water was too hot and killed the yeast, causing your bread to not rise. Do you think either of those could have been the culprit? I hope your bread tasted okay despite its lack of rising, and I'm glad you're going to keep trying! Good luck!
May I offer a small suggestion about your bread sticking to your loaf pans. What I do is:
1/2 cup vegetable shortening
1/2 cup canola oil
1/2 cup flour
Mix it all together until it is completely smooth and put in a air tight container and store in cool dry place. It works beautifully.
What a great idea, Robert...thank you so much for sharing that! It's sure to help a lot of readers interested in making this recipe. 🙂 Hope you're having a great weekend!
I'm just wondering what will happen if I skip the Lemmon juice--since I don't have any. :-/
Hi Kim! Yeast prefers an acidic environment, so you should be able to use orange juice or white vinegar if you don't have lemon juice. Or you can leave it out altogether and it shouldn't make that much difference. Good luck!
Hi Samantha! This recipe looks amazing! ! Can it be used with stone ground whole wheat flour instead?? Thanks so much!!
Hi Angela! I haven't tried it with stone ground wheat flour, but I think it would work just fine, with some minor tweaking possibly necessary. I know that some people have used different types of flour with this recipe and have discovered, for instance, that the dough might be a bit too sticky after kneading...so they just added a tad bit more flour. I'm not sure if this will be the case with your flour, but it's just something to be aware of. And your final bread might have a stronger wheat-y taste than if you had used white whole wheat flour, but that's not necessarily a bad thing either. 😉 Good luck...I hope it turns out well!
If Ethel Mertz had showed up at my back door while I was making this bread I wouldn't have been surprised. I felt like Lucille Ball! I didn't have all the right ingredients and also needed to half the recipe. Somewhere along the lines things went awry and I had a sticky ball of goo like you wouldn't believe. I was determined though and ended up kneading by hand and adding flour until it wasn't a sticky mess. I didn't have high hopes... not because of your recipe but because I had used a different kind of flour, skipped the gluten, and used active dry yeast...not to mention the likely error I made while halving the ingredients. In spite of all of that this bread is fabulous! It's soft and tasty and I will be making this every week for my family. My daughter is allergic to eggs, milk and nuts so I've started making as much as possible at home and from scratch. This will be a definite staple! Thanks for sharing!
Your story totally made me laugh, Veronica! I'm so glad that everything turned out even after your I-Love-Lucy-esque experience...hopefully the next time you make this bread is a little less exciting. 😉 Thanks for coming back to share, and I hope you're able to find some more from-scratch recipes for your daughter...it can be such a challenge to avoid food allergies, particularly several at the same time. Good luck, and I hope you enjoy this recipe for a long time to come! 🙂
Can I make this without a mixer? What modifications should I make? Thanks! Im excited to start making our own wheat bread instead of buying the stuff full of preservatives!
Hi Abby! I've never tried it, but I see no reason why you couldn't make this bread without a mixer...it's just going to require a lot of elbow grease and extra time to mix it by hand and then do all of the kneading by hand. If you scroll through the other comments, other people have asked about and given tips regarding making it by hand. Good luck if you try it!
Just wanted to say how much I love this bread. I've been making it regularly for several months. I have loved homemade bread since I was a kid (my mom gave us Wonder Bread--yuck) and had sporadically tried to make it with no real success for like 10 years. Then I came across this recipe, and now I'm making bread like a pro and am always sad if I run out and have to buy store-bought.
Just a note from my experience: Maybe it is the yeast I'm using (active dry), but for the bread to work for me, after kneading I have to let it double in size in a bowl before I shape it into loaves and let it rise again. I let it rise both times at room temperature and then put the loaves in a preheated 350 degree oven. Works like a charm every time.
Thanks again. I'm so excited to be making my own bread now!
What a great testimonial, Scarlett...thank you so much for sharing that! I'm glad you finally found a keeper recipe, and I appreciate your tip on what makes it work best for you. Bread making can be temperamental, so sometimes it's a matter of trial and error to get a recipe to work for different people. Hope you enjoy this recipe for many years to come and thanks again for stopping by to let me know that it's been a success! 🙂 Happy Friday!
I could not find "white whole wheat flour" here in Canada so I used 3 ½ cups of regular whole wheat flour and 2 ¼ cups of regular white flour. After adding 2 cups of white flour, the dough was already pulling away from the sides of the bowl so I added only an extra ¼ cup. The bread is beautiful, soft, good texture and no large holes! Thanks!
I'm so glad this recipe worked out with your modifications, Michele! And thanks for coming back to share that. I get a lot of questions about this recipe and your experience is sure to help another reader down the road. 🙂
Talking of modifications Samantha have your tried it with less sweetener (honey). I know that whole wheat bread typically has some but this tasted sweet to my european tastes (when we arrived 47 years ago from Paris but originally British) there was very little good bread here and I thought it tasted like cake so I started making my own. Of course now you can get marvelous bread if you are willing to pay ???. I never put any sugar or other sweetener in my crusty loaves or fat but that bread only is good for a day or so before although still good for toast. I see the advantage of the oil and honey but wondered if anyone had tried less of both. Thanks.
Hi!
I wanted to tell you that I made this bread last week and it was awesome! I have been learning to make bread since Christmas, when I got my Kenmore Elite 500w stand-mixer. This is, by far, the absolute best recipe, and I think my search for a go-to recipe for my weekly bread making is over. I did not have wheat gluten, so didn't use it, but still turned out perfectly. Stayed soft til the end. 🙂 I am happy to make our lunches with bread I made myself! I impressed the hubby with this. Thanks for sharing.
Yay, Amy...I'm so glad to hear that! Thanks for stopping back by to let me know that this bread was a hit, and I appreciate you sharing that it turned out well even without the vital wheat gluten. That info is sure to help another reader who's wondering the same thing! 🙂 Enjoy your bread making adventures, and I hope you have a great week!
Just wanted to say I tried this today after many attempts at making a soft and delicious whole wheat loaf and this is BY FAR the best and most delicious bread I have ever made. I used 100% freshly ground whole wheat flour and vegetable oil (since my coconut looked a little suspect...) and it came out perfect. I used an instant read thermometer to make sure it was done inside (190 degrees!). Thank you for sharing! It'll be the only one I make from now on!
Yay! I'm so glad to hear it, Karen! Thanks for letting me know...I'm always happy to hear recipe success stories, and I hope you enjoy this one for many years to come. 🙂 Have a great week!
Just made this today and oh my goodness it was great! The smell and size and texture are wonderful. I have made chewy wheat loaf bricks before but they have had a very wheaty taste. This seemed to be a much milder almost blander taste. I had everything on hand exactly and the directions were spot on! First time ever for that:-) I just was wondering if the flavor was what I should expect or if anyone had success with a heartier flavor or maybe adding more honey and less coconut oil. Wonder if this would work for white bread loaf too? Thanks so much for the recipe! Cannot wait to play with it a little!
Hi Stefani! I'm so glad you had a successful outcome! This recipe works for me every time if I follow the directions. But for that reason, I've never strayed from the directions, so I'm not sure how adjusting the honey and/or coconut oil would affect the final outcome. But by all means feel free to experiment with the recipe! This is a very mild tasting bread primarily because of the white whole wheat flour, so you might be able to achieve a 'heartier' flavor by incorporating some regular whole wheat flour. I hope you're able to tweak it to get it just the way you like it! 🙂
I have a KitchenAid mixer but not the bread hook. I have the standard one. Any ideas? Thank you
I am also going to try a bread maker.
A lot of people have said that they wanted to try this recipe in the bread maker, but I have yet to hear back from anyone how it turned out! Be sure to cut the ingredients at least in half if using a bread maker. Other than that, your guess is as good as mine for what might work! 🙂 Again, I haven't tried it...I've only ever made this recipe exactly as I've written the directions. But I hope it works if you try it!
Hi Angela! You know, I've never tried making bread in my Kitchen Aid with the standard paddle attachment, so I'm not sure if it would work or not. The dough hook allows the dough to kind of spin off of it as it rotates, and for some reason I can imagine the Kitchen Aid getting bogged down making bread with the paddle...but I'm not positive since I haven't tried it??? If the paddle doesn't end up working, you can always plop the dough on the counter and knead it by hand from there. Good luck if you try it, and let us know if it works!
Hi,
My local super market does not sell vital wheat gluten... what can be used to replace this?
am looking forward to making this bread! xx
Hi Darcy! Several commenters before you have asked about this as well. The comment just above yours, from Rob, talks about how he had success incorporating some bread flour in lieu of using vital wheat gluten. And the comment about five above yours, from Pavitrha, I replied to with some info regarding the vital wheat gluten. Basically, the bread should turn out fine without it, but it may have a slightly less "elastic" texture and may not stay soft for quite as long. Good luck...hope you enjoy this recipe!
Hi Samantha! So glad to have found your site although I am used to weighing everything in grams for constant quality. I can convert. BUT I have a question and comment!
I have instant yeast, I have Active Dry yeast. My confusion is what is quick rise yeast?? Never heard that term before. Is it the same as instant? If not then what would be the conversion please?
And THANK you Rob! I was about to give up because presently I have 15 pounds of bread flour and 10 pounds of stone ground wheat flour! SO glad you posted about using 50/50. I have been using the Tangzong method for wholemeal bread which is great but wanted to try something different that is whole wheat. Have to use up my bread flour first though and then fine this white whole wheat flour.
Blessings!
Blue Bird
Hi Blue Bird! Yes, I use instant dry yeast in this recipe. I've been using the Red Star brand lately, which calls it Quick Rise, but I've also seen other brands call it Rapid Rise. I will go back into the recipe and clarify...thanks for pointing out that that could be confusing!
I'm glad that Rob's comment was helpful to you! I love it when people make adjustments to a recipe and then come back to share what did or didn't work for the benefit of others!
Hope this bread turns out great for you! Thanks for stopping by and hope you're having a great week! 🙂
Okay, not to confuse the topic more, but it sounds like Rapid Rise yeast may be a bit different than instant or Quick Rise, at least according to this conversation: http://chowhound.chow.com/topics/341172
So I would say to use instant or Quick Rise in this recipe, if possible. It sounds like Rapid Rise may be more suited to breadmakers? I'm not a yeast expert...just trying to figure out the differences myself! 😉
Thank you for getting back to me. HELP!! Now I have a problem! Was not sure if Rob still added the VWG or not, so I did 2 tabs. I found that converting all was not going to work well. So as it but Rob said 50/50 which means 3 cups bread flour, 3 cups wwf. It has been kneading in my kitchen aid on 2 for 20 minutes but not pulling away from the bowl. So I added 2 tab bread flour. Still not pulling away from the bowl. Not sure what to do?! I measured very carefully. It is like mushy oatmeal! 🙁
Hi again...I'm sorry my response is probably too late for you! For sticky dough after 20 minutes of kneading, I probably would have tried adding more flour, a small amount at a time, until it pulled away from the bowl. Bread making can be variable depending on so many factors, right down to the humidity in the air, so sometimes it takes a bit more flour to get the right elasticity. Could it also be possible that using bread flour in place of some of the whole wheat flour slightly affected the measurements? Sometimes I find that making a bread recipe for the first time is a bit of an experiment and I work out the kinks for the next time I make it. 🙂 I hope you figured out a way to salvage the dough and that your bread turns out okay!
Hi there,
After 25 mins.of kneading in the KA I slowly added bread flour not wheat as I knew the wheat would not absorb the moisture as well. (By the way very cold here so the house is very dry) I know there are so many variables in flour too. Anyway, at 2 tabs at a time I added about 1/2 cup with total knead time 50 mins and the dough finally pulled away. It was a little sticky but on greased counter ok soft. My stove is a brand new LP gas. It did not work setting 350 for 1 min. I did that and put a hot pan of water. (Found it takes it 10 mins to come to temp!) They raised but about 1/2" above the pans but fell and started to run over sides. The bread of course is not high, trimmed off all the edges. Crumb is even until last 1/4" at bottom of loafs, taste is very good, of course a bit dense. I will wait until I have whlole white wheat before trying this again and stick to the tangzhong whole meal. Thank you kindly for the help and still very pleased with your blog!! I will post when I try again! 🙂
Blessings!
I'm glad the bread turned out for you despite all of your variables! Thanks for coming back to let me know. 🙂 Hope you have a great rest of the week!
Not sure that this will help anyone out but I didn't have any vital wheat gluten, either...so I decided to go with 50/50 bread flour/whole wheat flour...thought that would amp up the gluten content without the special ingredient. Best loaf of whole wheat (okay only part whole wheat) bread I have ever made. Whole wheat bread is hard to master...never wants to rise for me (and I bake all the bread we eat). My husband much prefers whole grain to white bread (sigh...another compromise)...he will be thrilled when he gets home tonight.
Thanks so much for sharing that, Rob! I'm sure that other readers will find your experience helpful. I'm glad to hear that your bread turned out great, and I hope that it was a hit with your husband! Have a great weekend! 🙂
Tried the recipe and it came out perfect. I don't have a mixer so I did it by hand. Was wonder if you tried it with all the wet ingredients in the beginning.
Thanks for sharing!
Hi Rochelle! I'm so glad that your bread turned out well! I'm impressed that you kneaded it by hand...I bet that was a great workout. 😉 And I've only ever made the recipe exactly as written, in regards to when I add the wet and dry ingredients. Thanks for stopping by and sharing your success! Happy Friday!
Samantha,
What type of stand mixer do you use? I used my KitchenAid Professional 5 Plus which has a 450 watt motor. Its a beast! The poor thing stopped within the first couple of minutes of the kneading process! I've been making white bread for a number of years with this machine and haven't had a problem. Just curious to know what everyone is using to mix this recipe. By the way it turned out great!
Hi Amy! Oh my...I'm sorry to hear that! I just have a 10+ year old, regular Kitchen Aid, and while kneading bread definitely gives it a workout and it feels warm to the touch by the end, it has never stopped or got stuck in the middle of the process. Most people I know who have made this recipe also used a Kitchen Aid, though I'm sure a Bosch would do a really good job as well. I'm glad that your bread turned out well despite the difficulties!
Hi Samantha
Congrats... U have brought smile to so many faces...I also want to try this bread recipe. I will be trying for the first time. Pls suggest me, can I use glassware utensil [used for cakes] in lieu of pan u suggested.
Hi Prashant! I'm glad you're excited about trying this bread! However, I'm afraid I don't exactly understand your question. You can use any type of bread pans for this recipe, but just try to ensure that the bread will come out of the pan once baked. Nonstick metal pans will work, or if you use ceramic like I do, lining them with parchment paper helps. I haven't tried baking this bread in a shallow glass cake pan, so I can't really advise if that would work or not. I imagine the rise might be affected and the baking time would have to be adjusted. Good luck!
Hi Samantha,
I ve just read so many comments on how wonderful this bread turned out and really want try it. Could you help me understand what vital wheat gluten is? I live in Bangalore, India and haven't come across this in gourmet stores too. Is there any alternative to this?
Hi Pavithra! Great question. There is already gluten (the protein found in wheat) in the flour you use. Adding vital wheat gluten to your recipe is just adding even more gluten, in powdered form, which improves the elasticity and texture of bread. If you can't find vital wheat gluten in India, it is certainly okay to leave it out of this recipe! Your bread just might end up a tad less soft and stay-fresh than if you had used it. Here's an example of vital wheat gluten, and this describes a bit more what it does: http://www.amazon.com/Arrowhead-Mills-Vital-Wheat-Gluten/dp/B0006OCZ4E/ref=sr_1_4?ie=UTF8&qid=1391004607&sr=8-4&keywords=vital+wheat+gluten. But I wouldn't worry about substituting anything for it if you don't have it. Hope that helps...happy bread baking!