The Best EASY Butter Pie Crust (Foolproof…YOU Can Do It!)
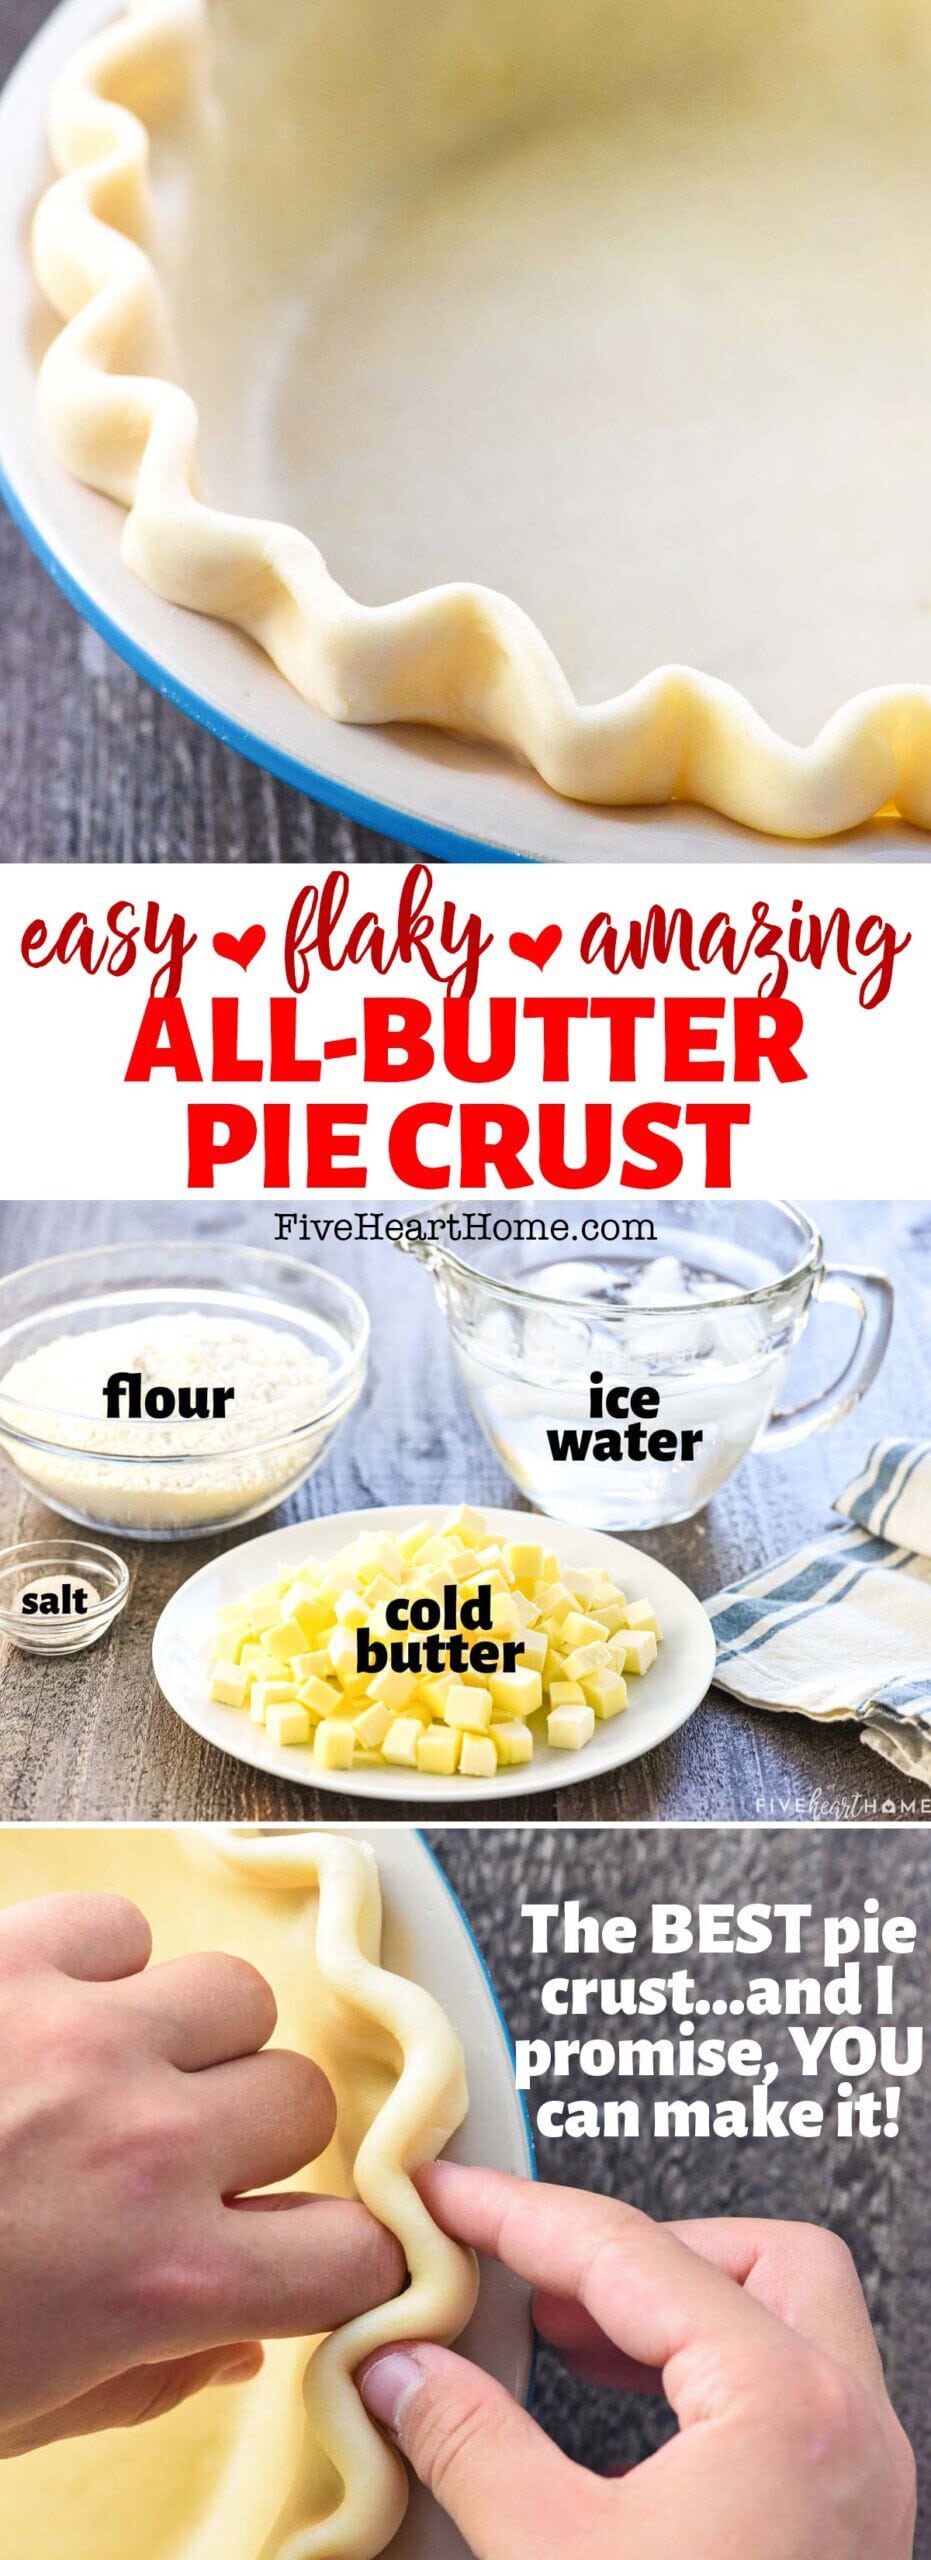
This Butter Pie Crust is homemade, easy to make with just FOUR simple ingredients, and amazingly flaky and delicious! It’s truly foolproof (even if you’re not already a pie crust expert) and the ONLY pie crust recipe you’ll ever need…hundreds of rave reviews can’t be wrong!
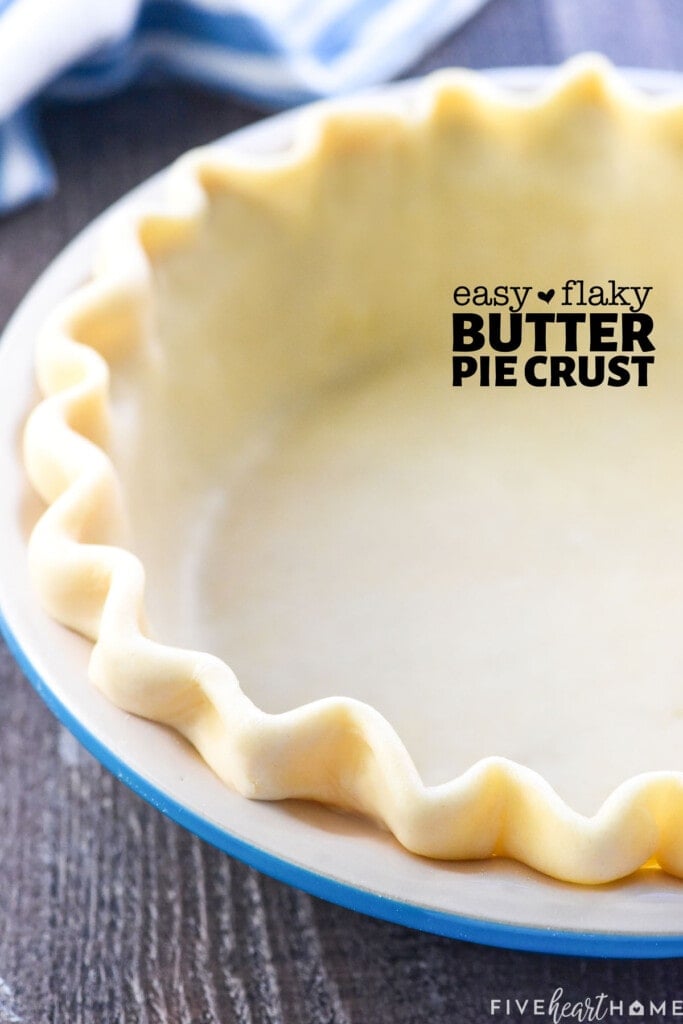
Pie crust is one of those things that many people are intimidated to make from scratch. Believe me, I get it. I used to be right there, too, thinking that my best option was to buy a frozen or refrigerated pie crust every time I wanted to make a pie.
But several years ago, I decided to face my pie crust phobia head-on. I mean, what could be so difficult about flour, salt, butter, and water? If Marie Callender could do it, by golly, so could I! 😉
And the verdict?
Y'all. Making your own pie crust recipe really is easy. On top of that, the flavor of this flaky, homemade Butter Pie Crust far surpasses anything you can buy pre-made!
And yes, I am firmly in the all-butter pie crust camp. I know that vegetable shortening has its merits when it comes to pie crust, but it's an ingredient that I prefer to avoid when possible. So I've found that I can get a perfectly flaky, flavorful crust using only butter! But it does involve a few tricks.
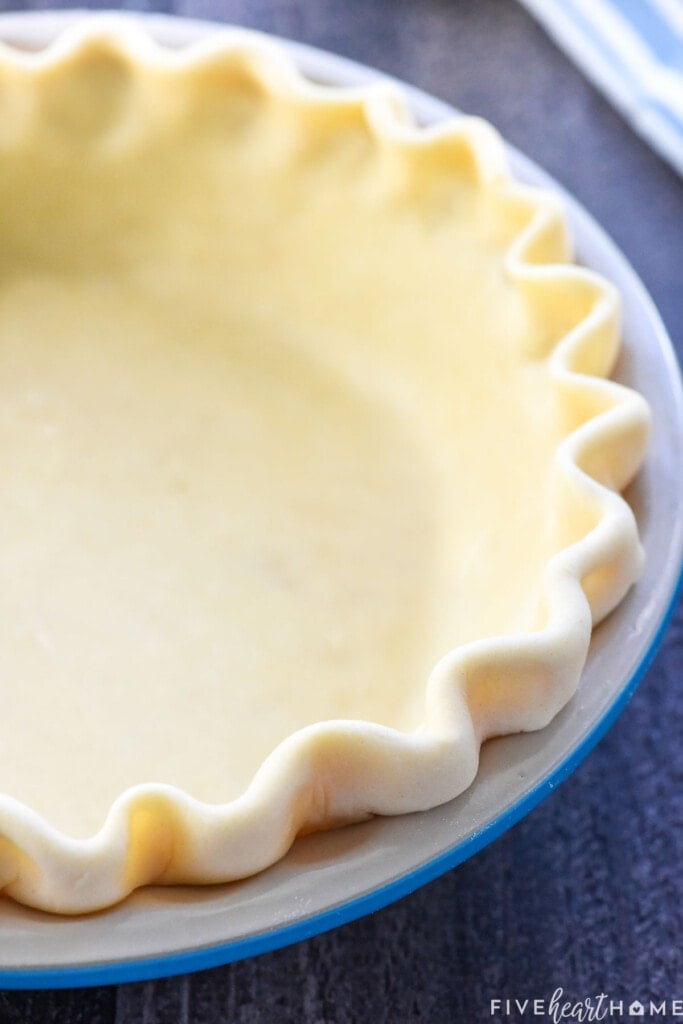
Secrets to an All Butter Pie Crust
There are two secrets to success when making a flaky pie crust recipe:
- Cold ingredients. And...
- A food processor! That's right, folks, I let the food processor do the grunt work for me.
The key is starting with ice-cold butter and water. And just as importantly, you need to keep the ingredients cold by working them quickly and not using your hot little hands more than necessary.
The reason? Because once your dough is all rolled out and popped into the oven, those still-intact pieces of cold butter will melt and steam and burst, creating little air pockets that yield the flakiness in your pie crust. That doesn't happen if all of your butter has already melted into the dough before hitting the oven.
Can You Make a Pie Crust Without a Food Processor?
Now if you don't have a food processor, you can certainly achieve the best pie crust recipe without one. After all, I don't think our grandmothers relied on a Cuisinart. 😉
You'll just have to cut your ingredients together using a pastry blender or cutter and then use a spatula to work in the water.
It takes a bit more elbow grease and patience, but making your homemade pie crust by hand can still yield great results.
Alrighty now, enough chit chat. Let's get on with our Butter Pie Crust making, shall we?
Ingredients
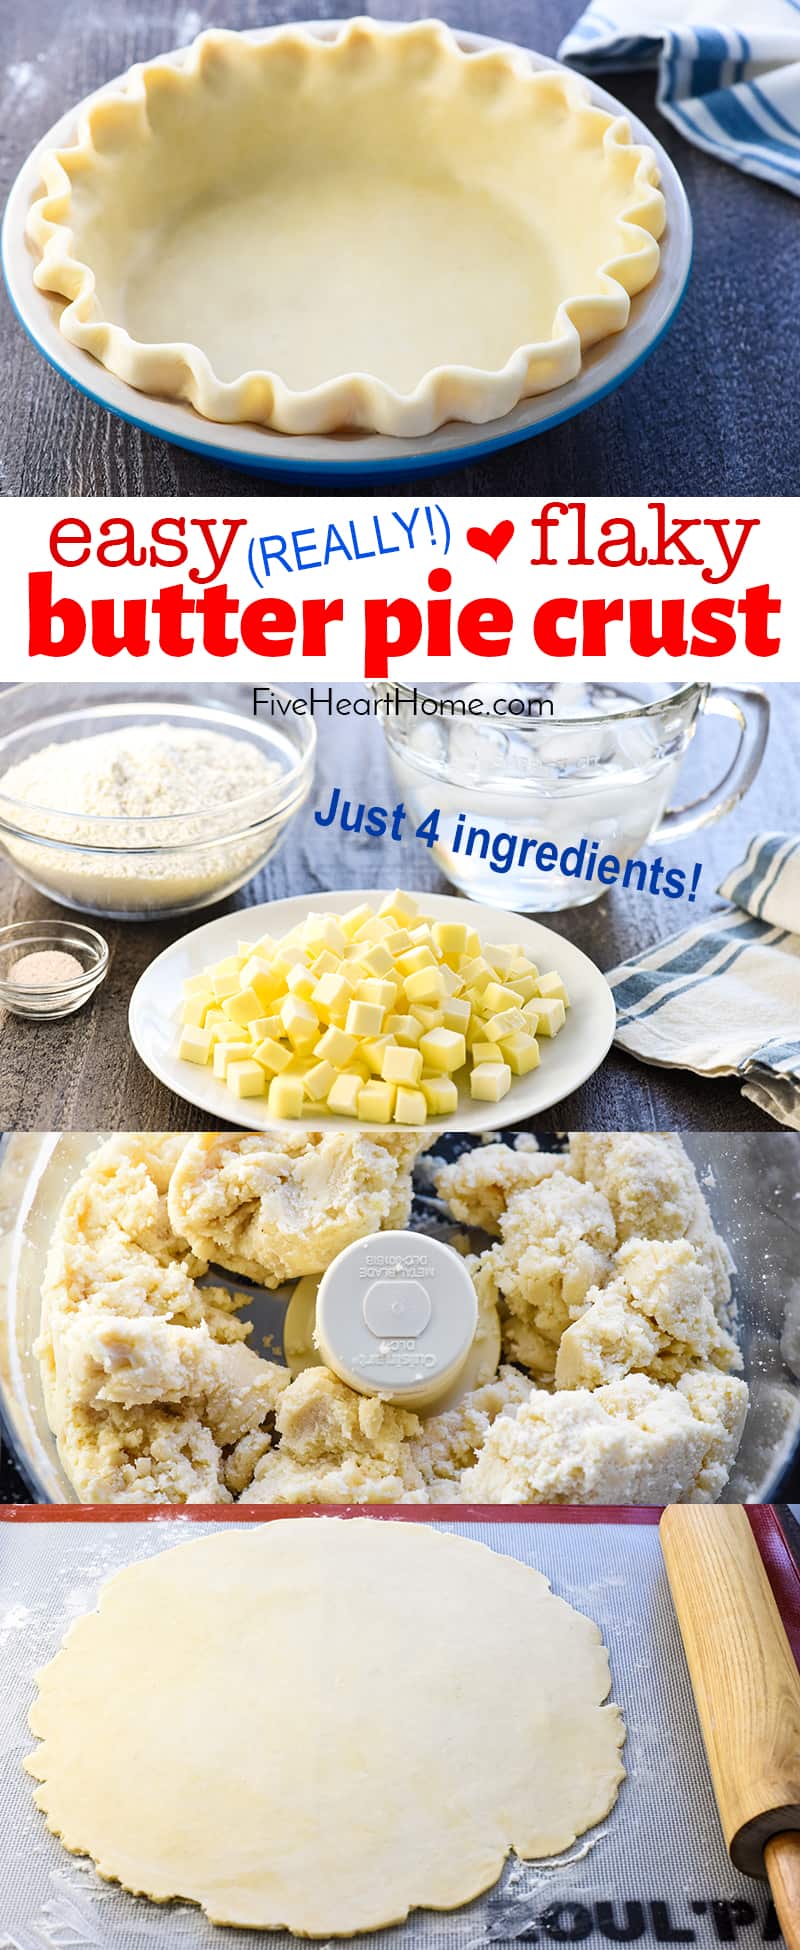
It's hard to believe that such a flaky, tender, melt-in-your-mouth, all butter pie crust starts with just FOUR ingredients:
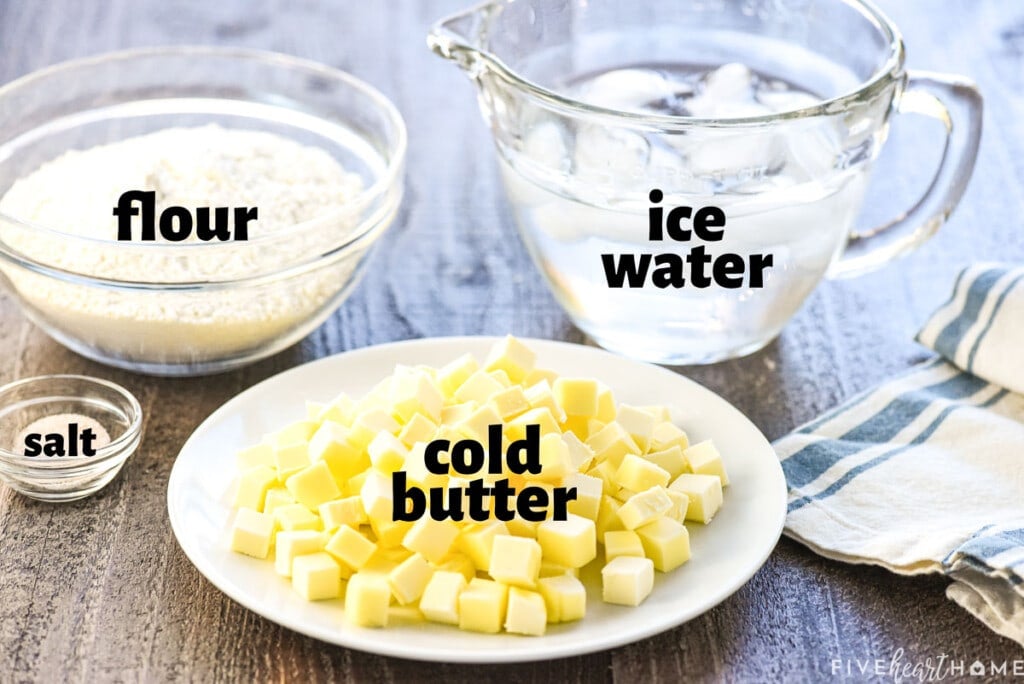
- Unsalted butter. It needs to be very cold! And if you only have salted butter, you'll need to slightly decrease the amount of salt that the recipe calls for.
- All-purpose flour. Be sure to fluff your flour and then level off the top for accurate measuring.
- Salt. I use fine sea salt in just about every recipe I make and it works well here, too.
- Ice water. Once again, extremely cold ingredients are of utmost importance!
How to Make Pie Crust
(The below photos are intended to be helpful, but please refer to the recipe card at the bottom of this post for FULL DIRECTIONS.)
Hopefully these step-by-step photos will show you just how easy homemade pie crust really is. Don't be intimidated!
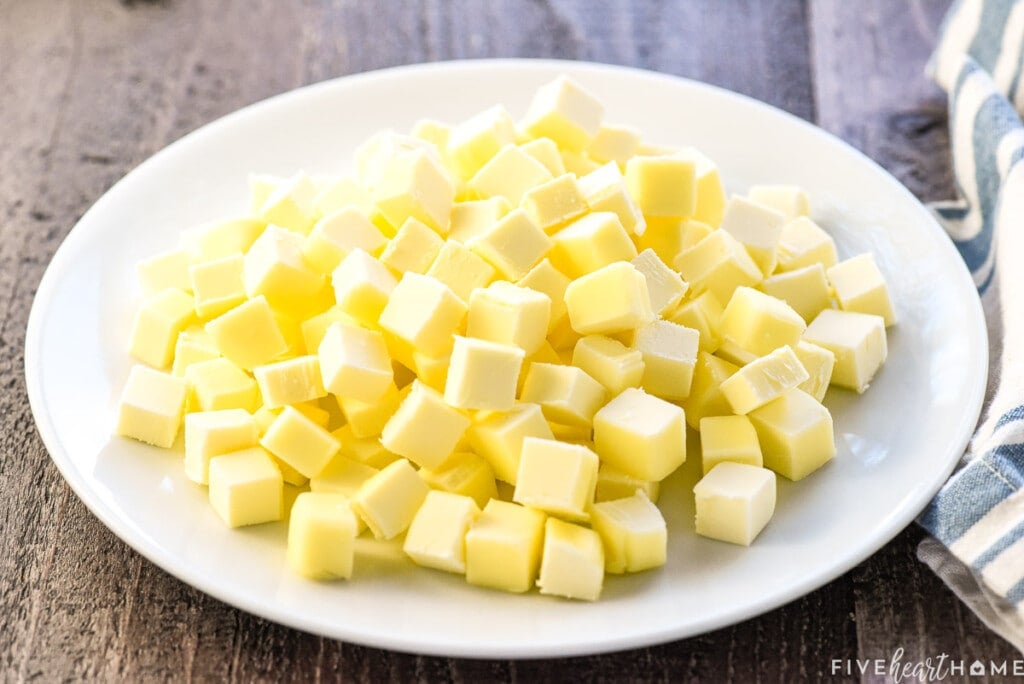
- Start by dicing your butter into small cubes and then popping 'em into the freezer for a while. You want your butter to be nice and cold, even partially frozen.
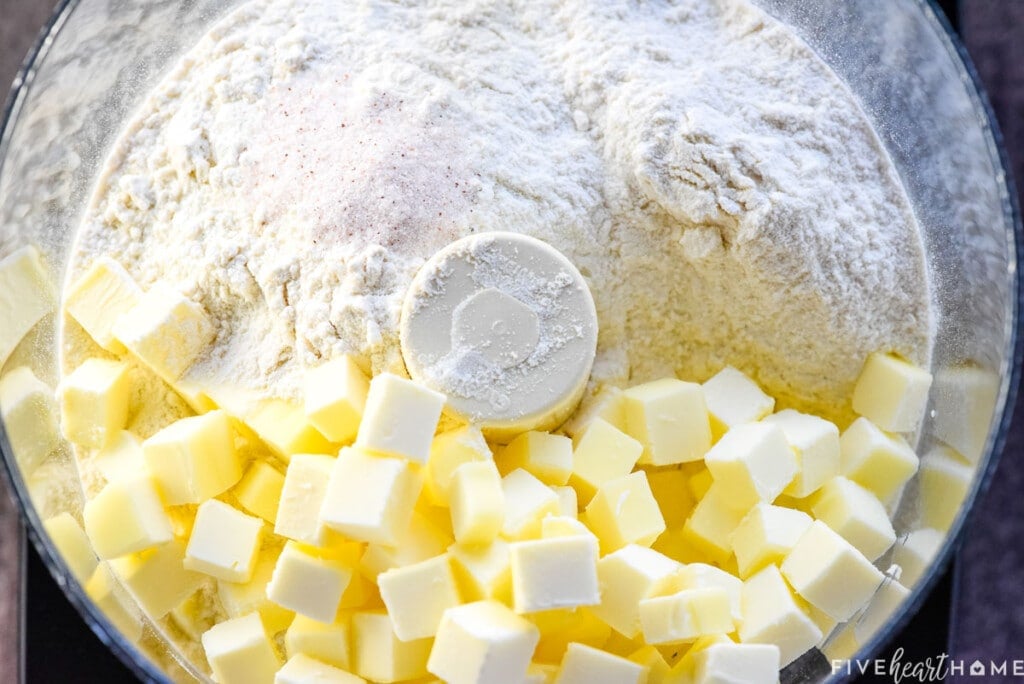
- Next, measure your flour and salt into the bowl of your food processor, and dump the butter on top. I like to make sure my cubes of butter are fairly broken up and not all clumped together when I do this.
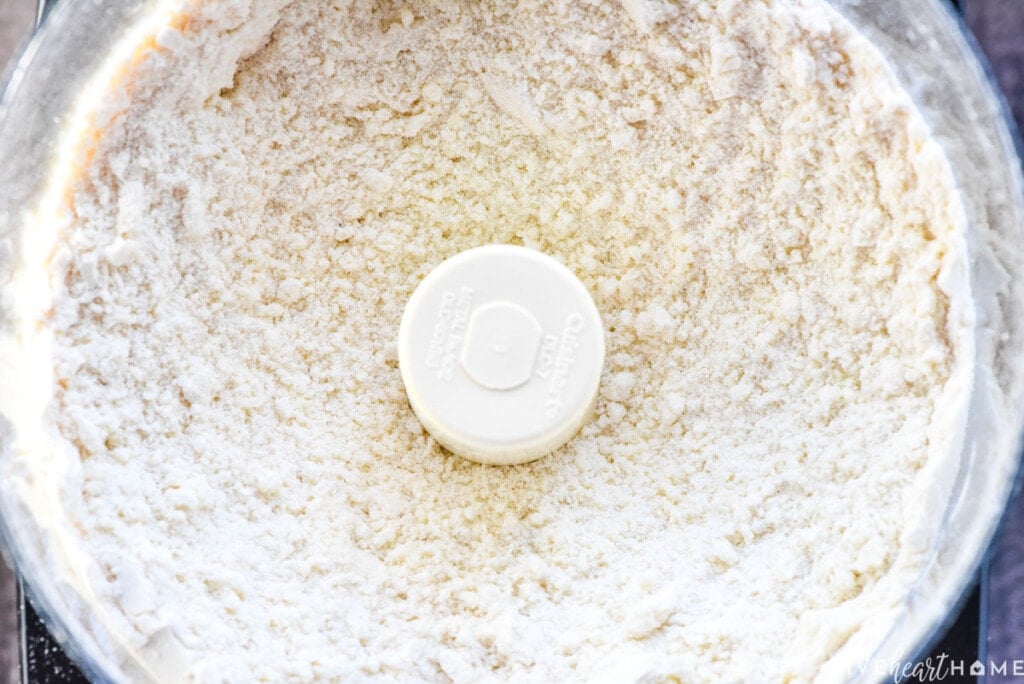
- Pulse the mixture until it resembles coarse, sandy crumbs. It's preferable for there to be some recognizable bits of butter remaining, but they shouldn't be larger than pea-sized.
- With the lid of the food processor on, pour 1 tablespoon of ice water through the feed tube and pulse a few times. Repeat this step, pulsing between each tablespoon of water until the dough starts clumping together and pulling away from the sides of the bowl. Be careful not to add too much water! Eight tablespoons is usually just right for me, but you could require a tad more. Just pay attention to your dough and stop before it gets too wet. If it does get too wet, you'll want to quickly pulse in an additional spoonful of flour.
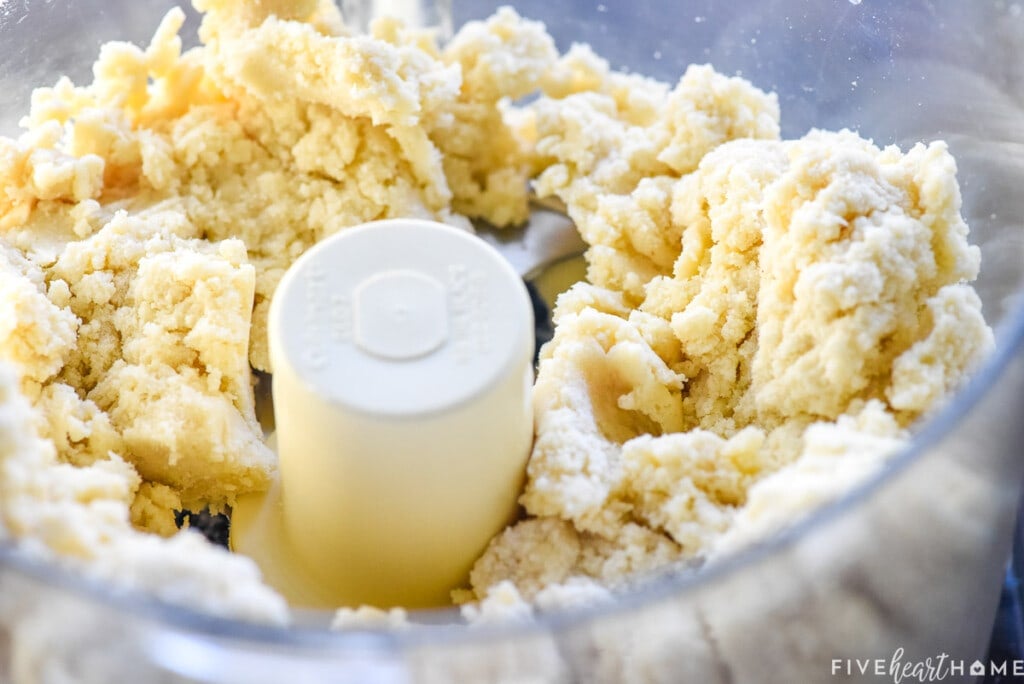
- Once your dough has reached the right consistency, dump the mixture onto a large cutting board or silicone mat or clean countertop.
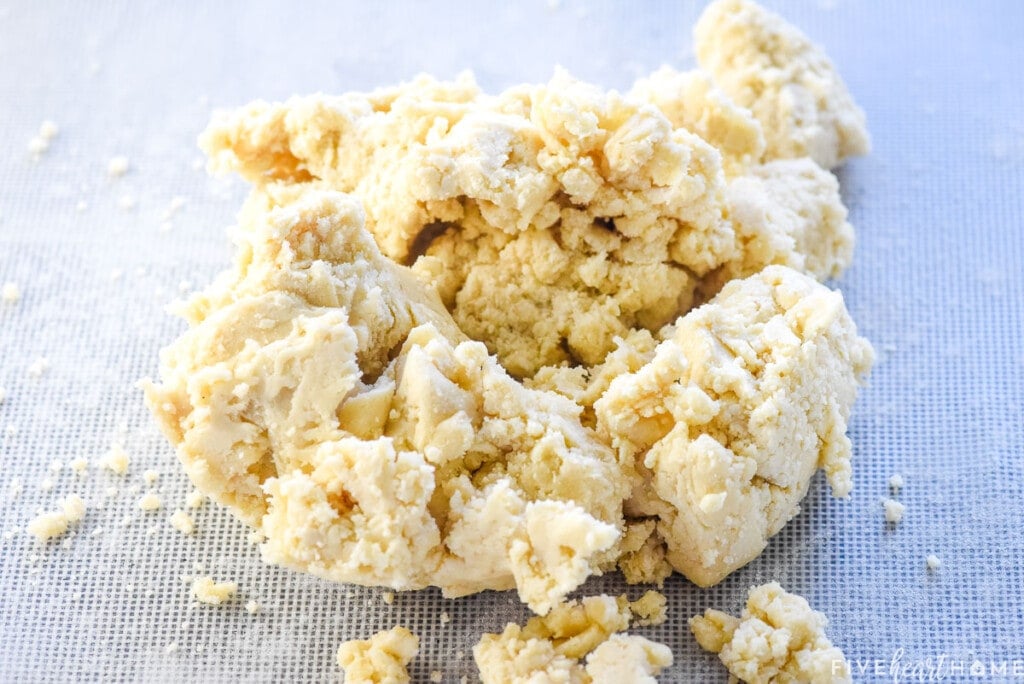
Form it into a lump...
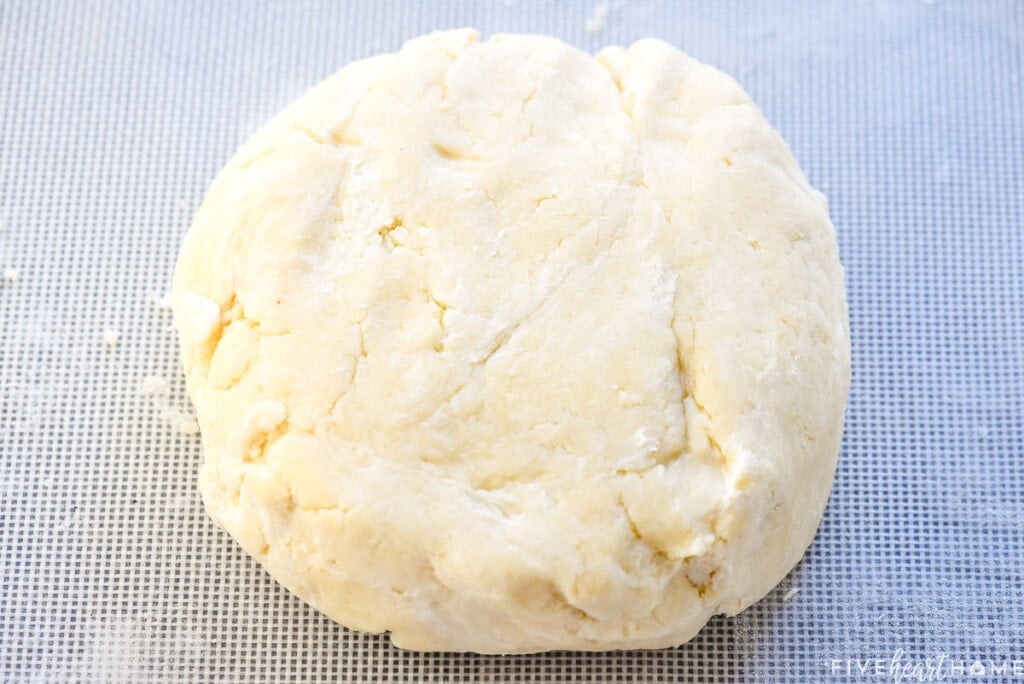
...and divide it in half.
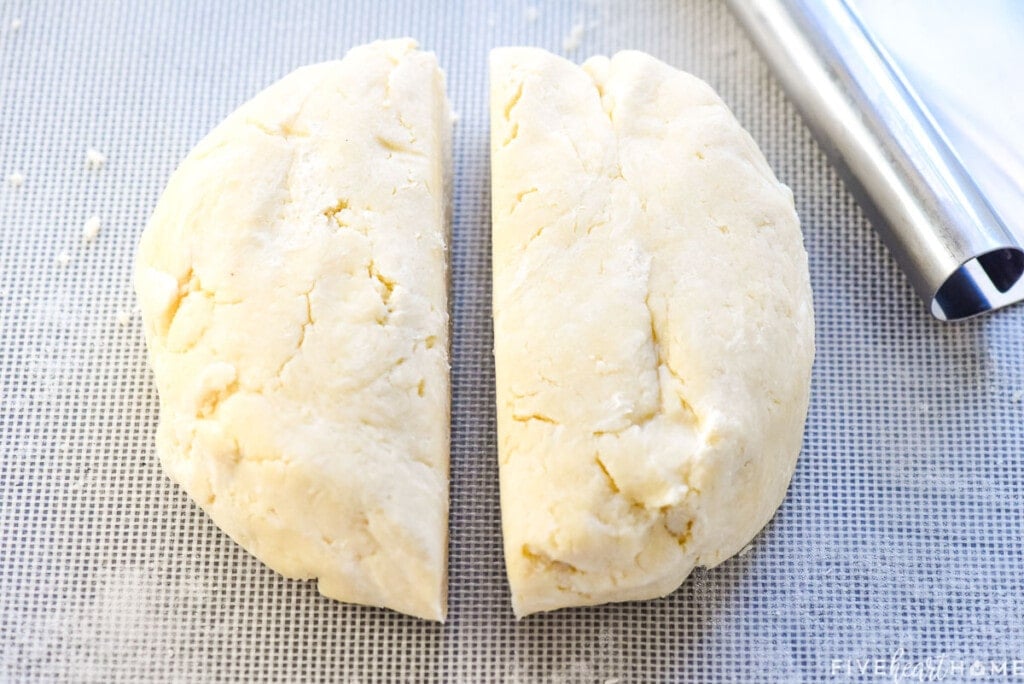
- Quickly form the halves into two balls and then flatten the balls into disks. Remember not to overwork the dough with your hands...you don't want to warm the dough and melt the butter!
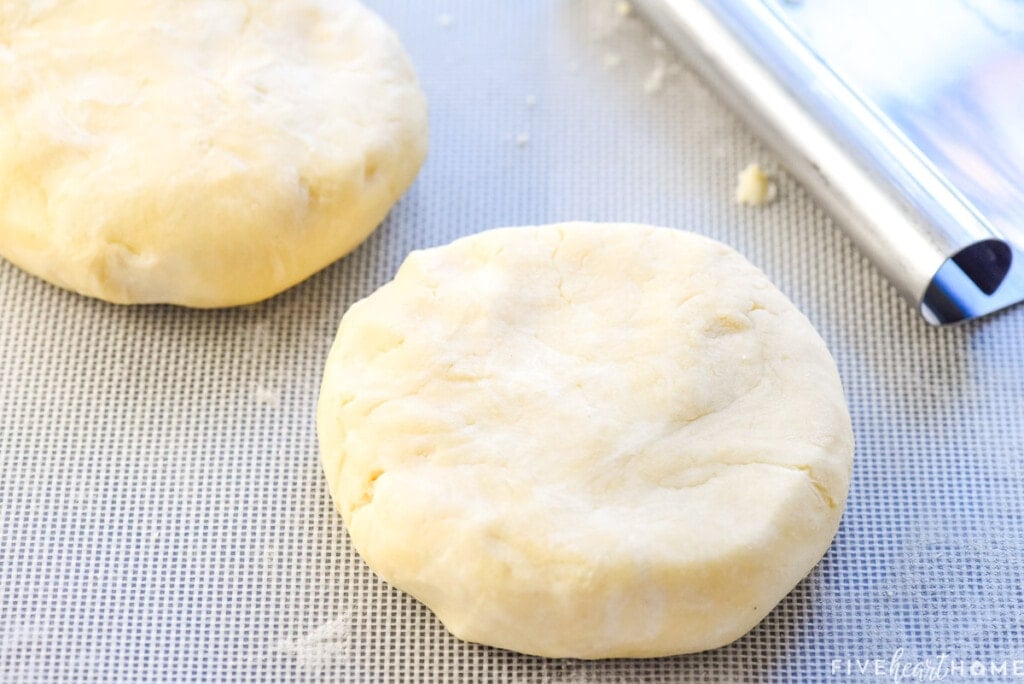
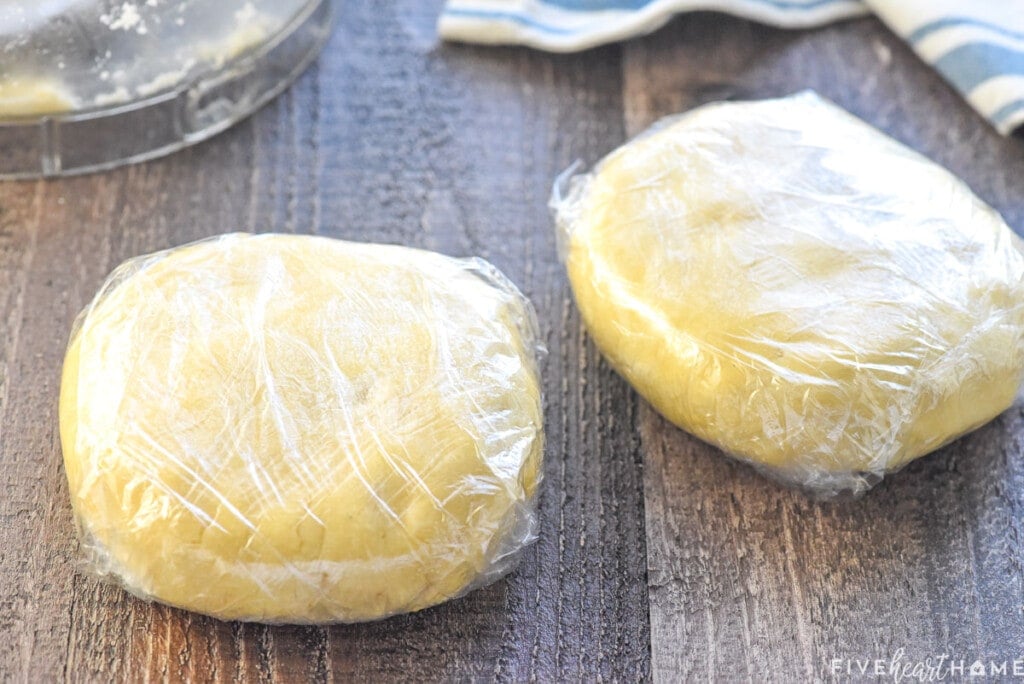
Place each disk of dough in a plastic baggie (or tightly wrap in plastic wrap) and put them in the refrigerator for at least an hour and up to 4 days.
Rolling Out Your Pie Crust Recipe
- Once your dough is nice and chilled, take one of the disks out of the refrigerator and let it sit on the counter for a few minutes. You want it to thaw just enough to soften for rolling, but remember…you still want it to stay cold! After chilling, your dough shouldn't be too sticky. However, you'll still need to lightly dust your work surface and rolling pin with flour. Just remember that if you use too much flour, you might end up with a tough pie crust.
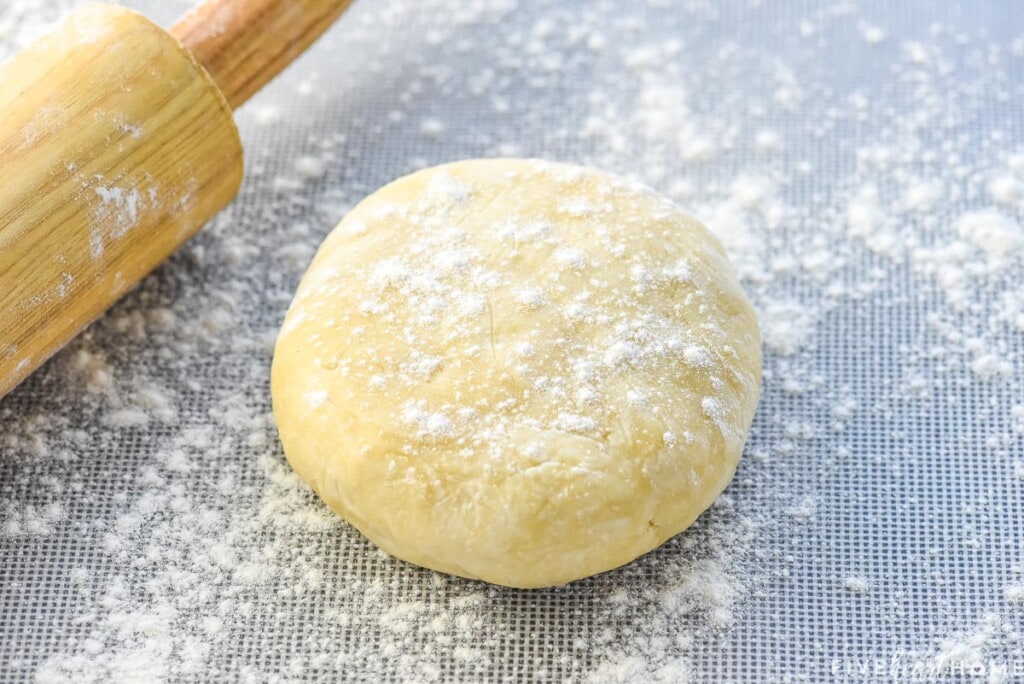
Take your time rolling out your Butter Pie Crust.
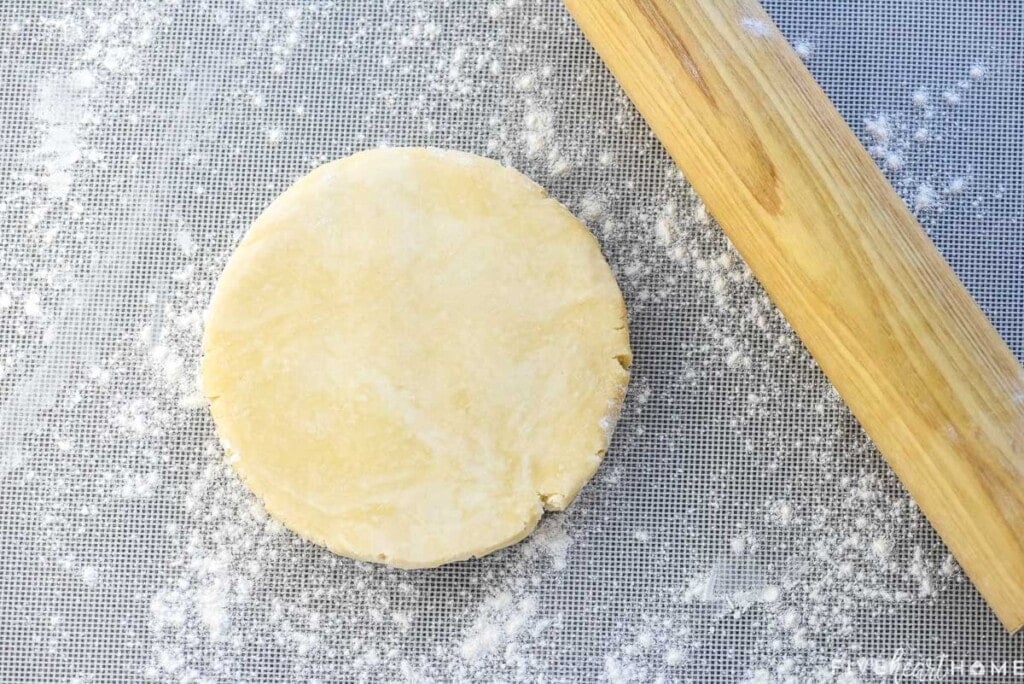
- Start at the center and roll outward, turning your dough a quarter turn and repeating until the diameter of the whole crust is about 4 inches larger than the pie pan. If the edges of the crust start to split, pinch them together before continuing.
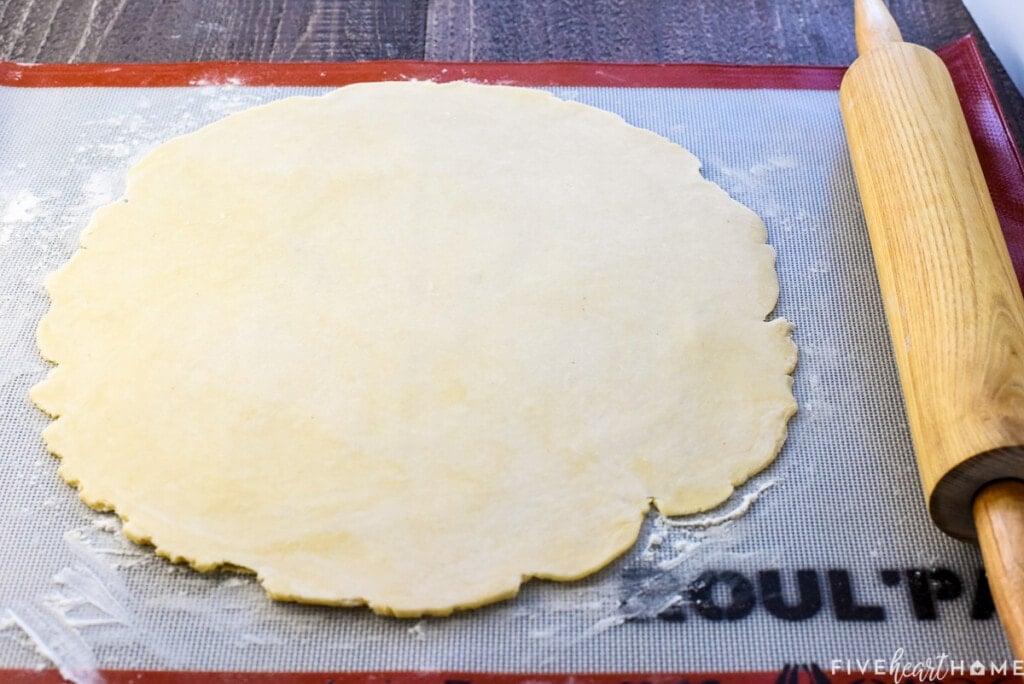
- Once your crust is rolled out, allow it to rest flat for about five minutes. Then transfer it by carefully rolling it over the rolling pin...
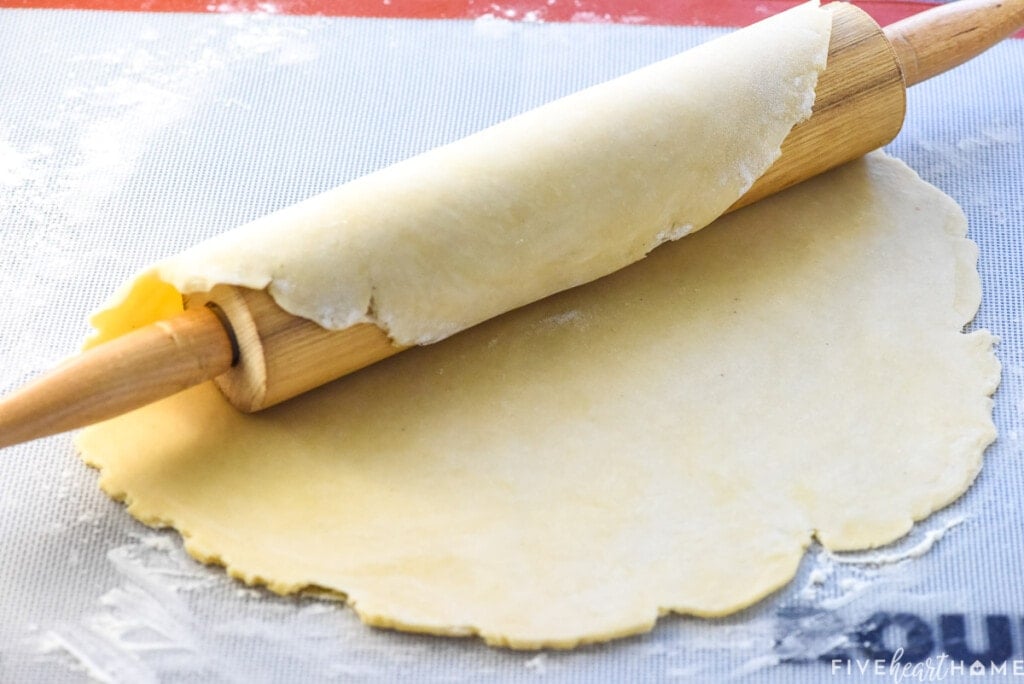
...and then unrolling it evenly over your 9- to 10-inch pie pan
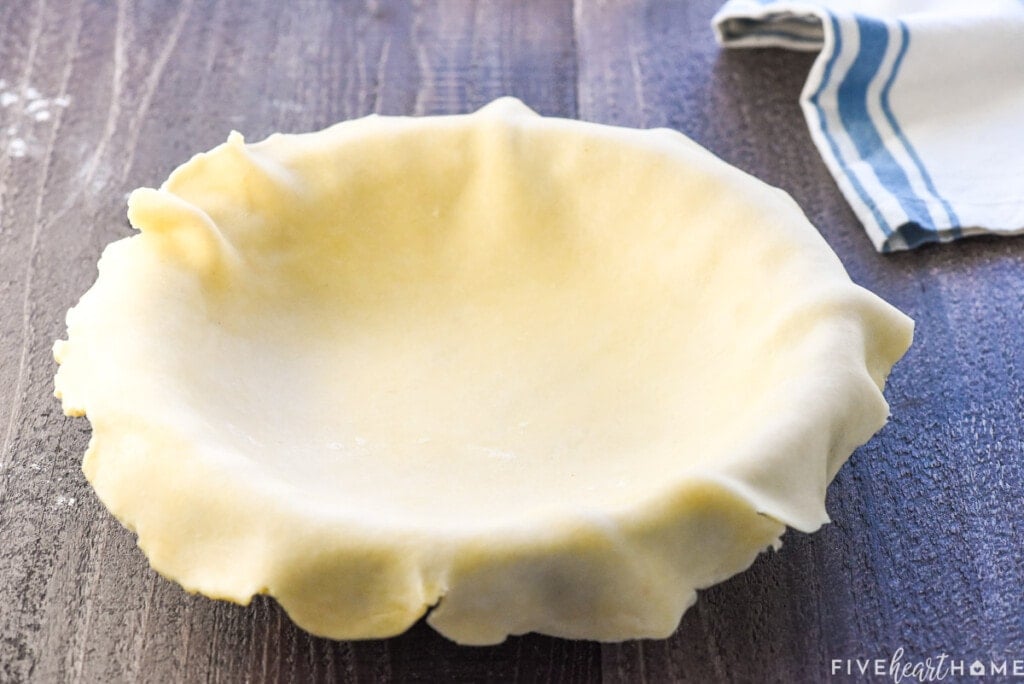
- Carefully lift the edges of the crust so that its center can be lowered into the corners of pan. Gently press the sides of the crust onto the sides of the pie plate and then fold under the overhanging crust so that the edge is thick and even.
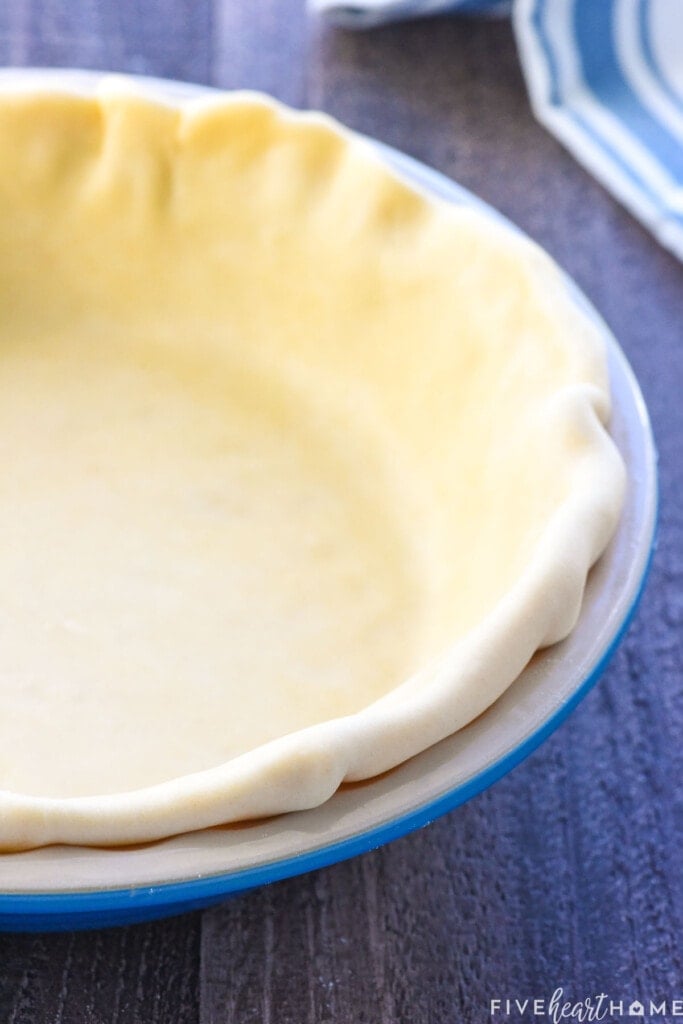
How to Flute a Pie Crust
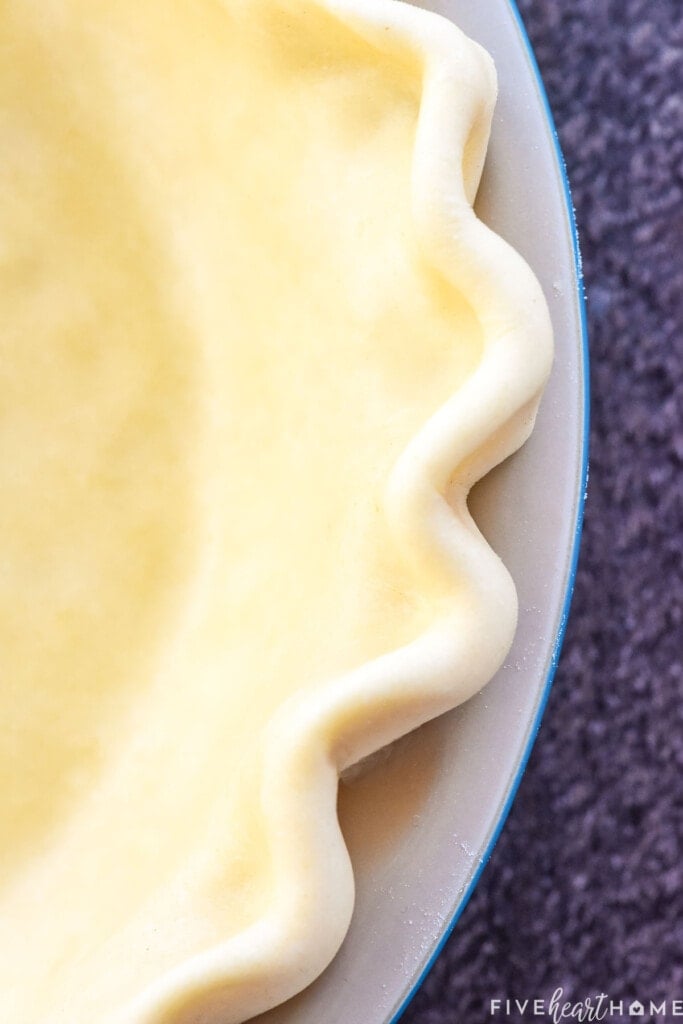
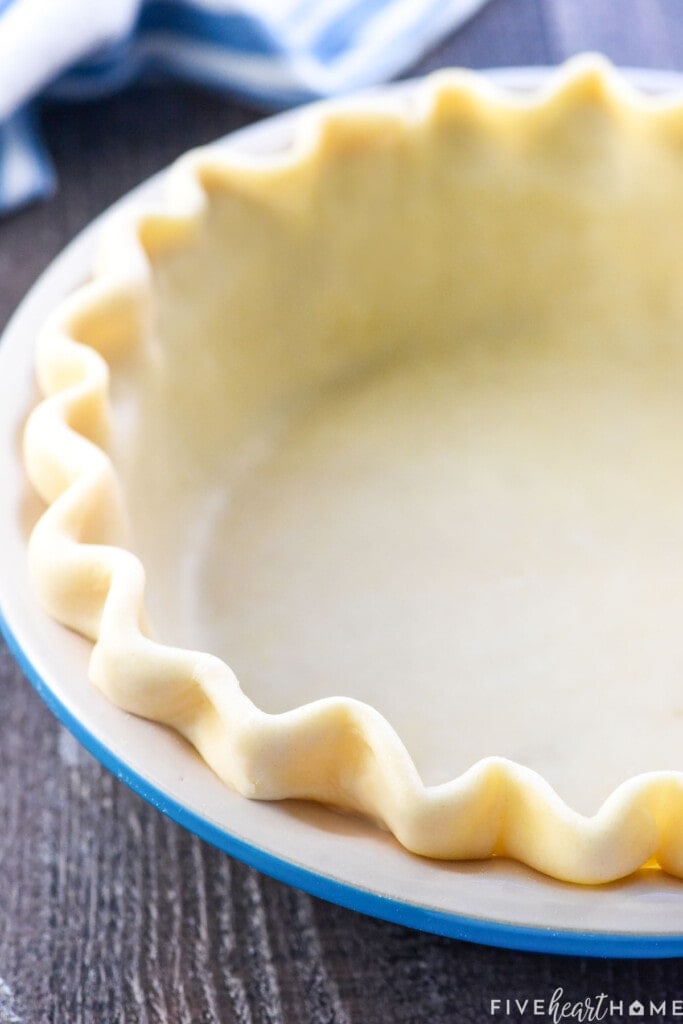
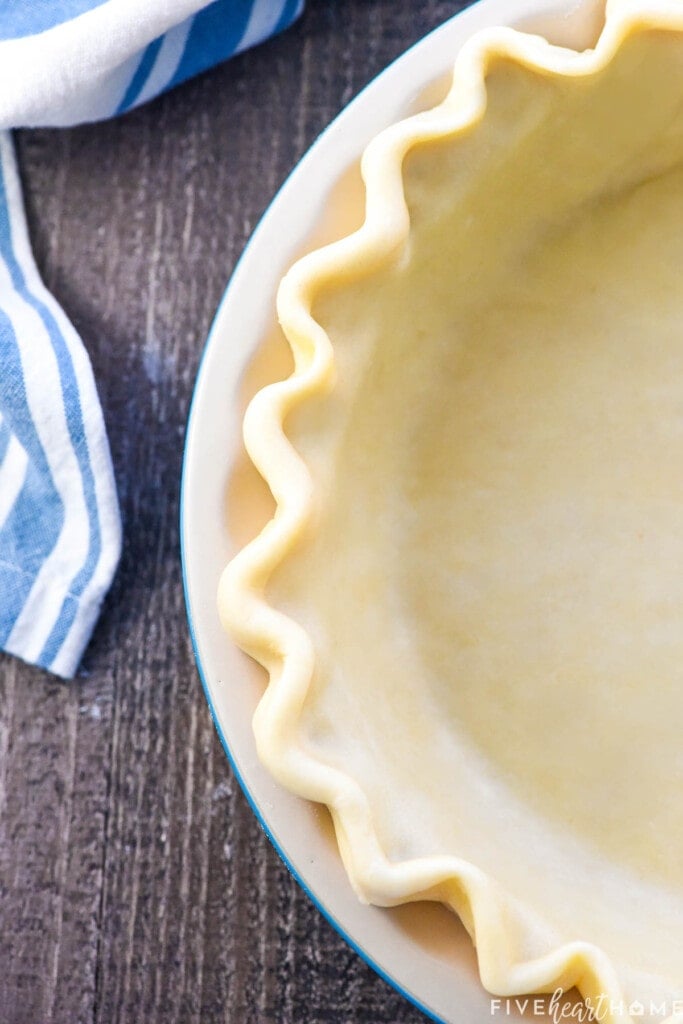
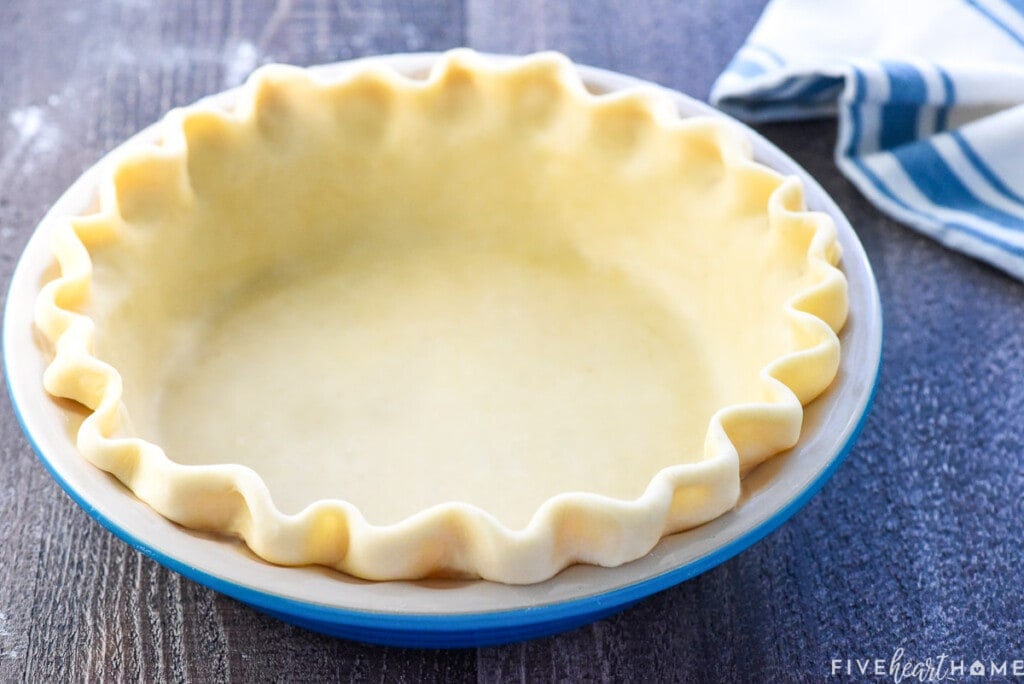
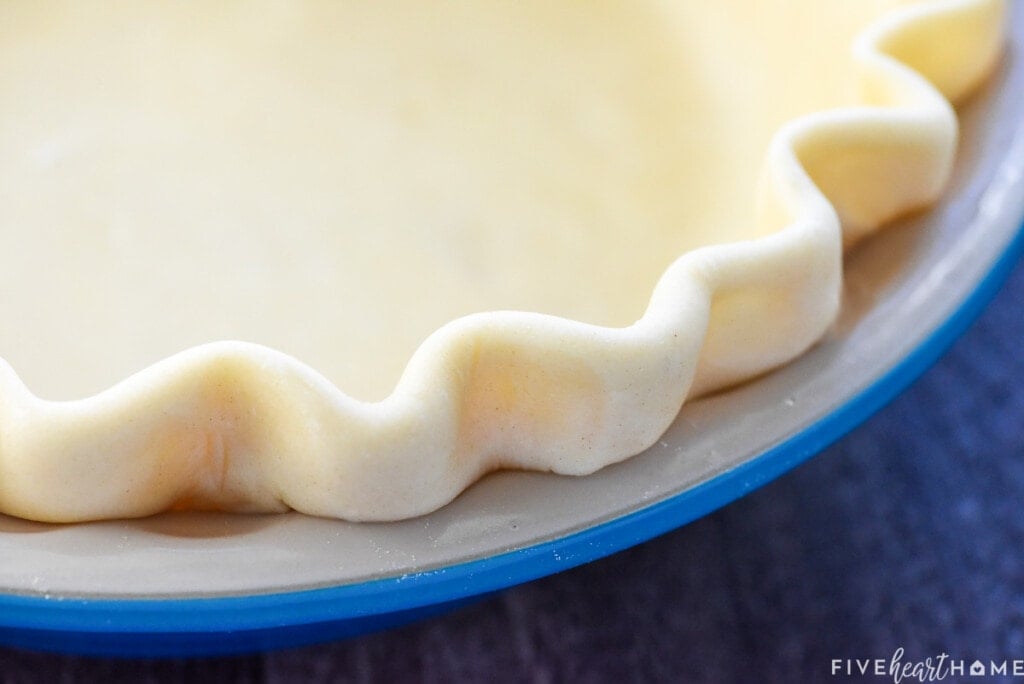
Now for the fun part! While you can absolutely leave the crust as-is, I highly recommend finishing the edges of the pie with your preferred decorative edge. I typically go for a fluted or crimped edge. It's easy to master and it's a classic!
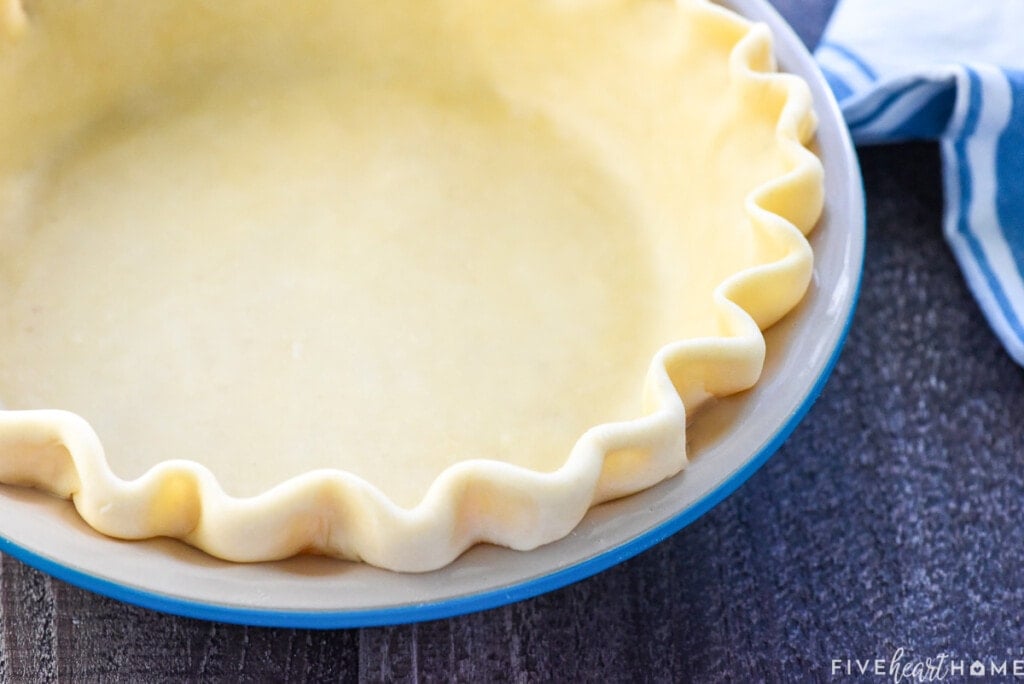
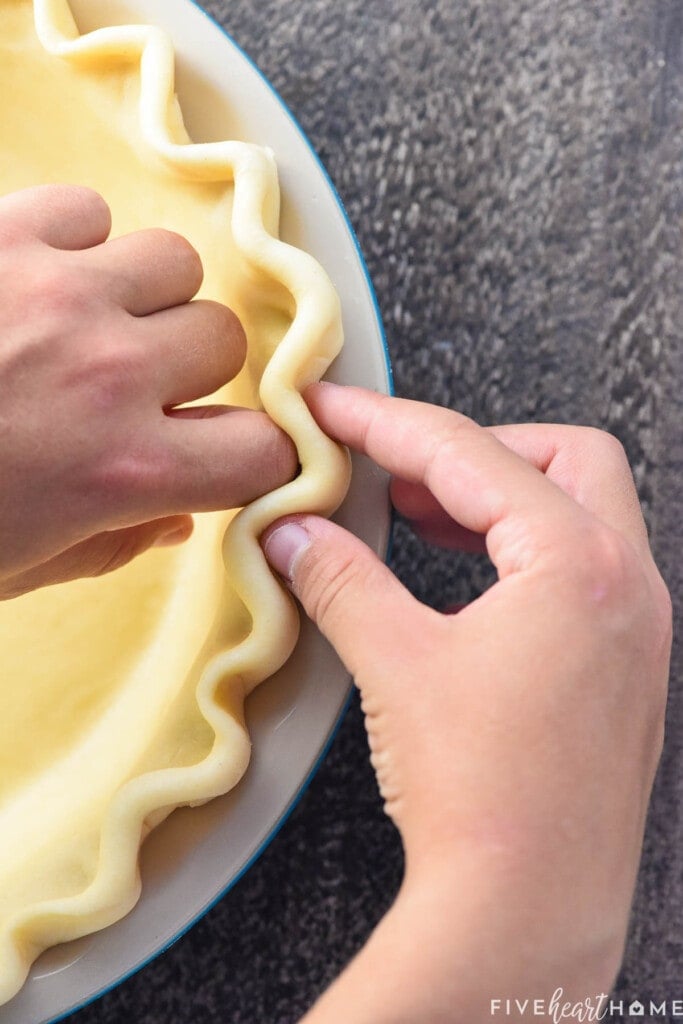
- It's as simple as starting from the center of the pie and gently pushing a knuckle into the edge of the pie crust going outward.
- At the same time, use the forefinger and thumb of your other hand (coming from outside of the pie) to push the crust around that knuckle, thereby making a flute or "wave."
- Then move your knuckle down and repeat all the way around the pie.
As much as I wanted to demonstrate these steps for you in this post, I didn't have a third hand to hold a camera and take photos while using my (other) two hands. But lucky for me (and you!), I grabbed the nearest 10-year-old hand model to help me out! Not to worry...I later paid him in pie.
Alternatively, if you don't want to mess with fluting, you can instead crimp your Butter Pie Crust by pressing down all around the top edge with the tines of fork. Go slowly for even, parallel lines, and be careful not to press down too hard or you might tear the crust.
Now all you have to do is fill and bake your pie according to whatever recipe you're making!
Voilà! Can you believe it? Together, we just made a tender, flaky, buttery, homemade pie crust! That wasn't so bad now, was it?
Prebaked Pie Shell Directions
If you're making a pie recipe that calls for prebaking your pie crust, follow these additional directions once your crust is in its pie plate, with that pretty edge you worked so hard to create. 😉
- Refrigerate the pie plate for 40 minutes and then freeze it for an additional 20 minutes.
- While the dough-lined plate is finishing chilling, adjust an oven rack to its lower-middle position and preheat the oven to 375°F.
- Remove the pie plate from the freezer and line the shell with a large (about 15 inches long) double layer of foil. Press the foil into the corners and fold it over the top to shield the fluted edge.
- Pour ceramic or metal pie weights and/or dried beans into the foil-lined crust (I typically use a combo), filling it all the way to the top.
- Place the pie plate on a metal baking sheet, which will transfer heat gradually from the hot oven rack to the bottom of the cold pie plate in order to prevent shocking the glass.
- Put the pie plate-topped baking sheet into the preheated oven and bake the crust -- lined with foil and filled with weights -- for 25 to 30 minutes, until it looks dry and lightly colored.
- Remove the dish from the oven and carefully lift the corners to remove the foil and weights from the shell. Prick the crust across the bottom with a fork to keep it from bubbling up.
- Return the empty crust to the oven. For a partially baked crust, bake for 5 more minutes or until light golden brown. For a fully baked crust, bake for 12 more minutes or until deep golden brown.
Can I Freeze my Butter Pie Crust?
Aside from its simplicity, another bonus of this recipe is that it makes a double crust. So if you need two crusts for a pie, you're good to go. But if you only need a bottom crust, you have another whole crust to stash in the refrigerator or freezer until you're ready for it!
Wrapped in several layers of plastic wrap followed by foil or a freezer-thickness plastic baggie, a disk of this pie dough may be stored in the freezer for up to 3 months. I like to write the date on the wrapping with a sharpie to keep track of how fresh it is. Simply thaw in the refrigerator for a couple days -- and then allow to come to room temperature for a few minutes -- before rolling it out.
Troubleshooting
Sometimes, despite your best efforts, your beautiful Butter Pie Crust falls or shrinks while baking. There are a multitude of reasons why this can happen, so here are some tips to help prevent it!
- I said it once and I'll say it again...do not overwork the dough. 😉 An overworked, overly-firm crust is more likely to shrink.
- Roll out your crust to be large enough (even slightly oversized is fine)...don't try to stretch it into the pan. If you stretch it, it will shrink back when baking.
- Don't skimp on any of the resting times. After you mix up your crust and form it into a disk, it needs to be refrigerated for at least an hour. After you roll it out, let it rest for a few minutes before transferring it to the pie plate. And be sure the crust adequately chills once it's in the pie plate and before baking.
- Some people will argue that the type of pie plate you choose can affect the "grip" of your pie crust. I feel like there are pros and cons to using glass vs. ceramic vs. metal, and I typically choose ceramic. But no matter what type of dish you use, be sure that you really press the edges of your crust into the pie plate to help them stay in place.
- When you fill your pie with weights, fill it all the way to the top. The crust may slip down to the level of the pie weights if they don't reach the top edges.
- And finally, if you can avoid baking your pie at a high temperature, a more moderate oven temp (around 350°F) discourages shrinking.
The holiday season is right around the corner, and with it, many occasions calling for pie (yippee!). Just don't forget that this very best pie crust recipe happens to be just as good complementing a savory pie (think Chicken Pot Pie!) as a sweet one.
Even if you're already a pie crust professional, I think you'll enjoy this seriously flaky, melt-in-your-mouth, all butter pie crust. And if you've never attempted a pie crust recipe from scratch before, this is a great place to start.
You can do it! Pinky swear. And after you do, you'll see how easy it was and how buttery it tastes...and you'll wonder what took you so long to make your own homemade pie crust in the first place. 😉
More Sweet or Savory Pie Recipes
- Mini Pecan Pies
- Beef Pot Pie
- No-Bake Frozen Margarita Pie
- Impossible Cheeseburger Pie {without Bisquick!}
The Best EASY Butter Pie Crust (Foolproof...YOU Can Do It!)
Ingredients
- 1 cup (2 sticks) unsalted butter, cut into ¼-inch cubes and chilled
- 2 ¼ cups all-purpose flour
- 1 teaspoon salt
- 8 to 10 tablespoons ice water
Instructions
- Pulse the butter, flour, and salt in a food processor until the mixture resembles coarse sand, with some small lumps of butter (no larger than pea-sized) remaining. This will probably take 15 to 20 (1-second) pulses.
- Feed one tablespoon of ice water at a time through the feed tube of the food processor, pulsing 4 to 5 times after each addition. Stop adding water when the mixture begins to form large clumps and pulls away from sides of the food processor bowl.
- Dump the mixture onto a work surface and push it together into a big lump using your hands. Evenly divide the dough in half. Quickly form the halves into two balls and flatten them into 4-inch disks. Place each disk in a plastic baggie or wrap it in plastic wrap, and refrigerate for at least an hour and up to 4 days. Remove the dough from the refrigerator 3 to 4 minutes ahead of time so that it just starts to soften and is easier to roll.
- Lightly flour your work surface and rolling pin. Roll out the disk of dough from the center moving outward, turning it a quarter turn and repeating until the diameter of the whole crust is about 4 inches larger than the pie pan. If the edges of the crust start to split, pinch them together before continuing. Once the crust is rolled out, allow it to rest for 5 minutes.
- Carefully transfer the pie crust to the pie pan, flute the edges, and proceed with your pie recipe as directed. (To prebake your crust, see 'Notes' section below for directions. Further details can also be found in the post above the recipe card.)
Video
Notes
- Eight tablespoons of ice water is usually the perfect amount when I make pie crust, but you could require a tad more. Just pay attention to your dough and stop adding water before it gets too wet.
- Please see the photos and directions in the post (above the recipe) for information on how to fold and flute the edges of your pie crust.
- Remember...try not to handle the dough too much or your hands will warm it and start to melt the butter, resulting in a less-flaky crust.
- Tightly wrapped in several layers of plastic wrap followed by foil or a freezer-thickness plastic baggie, a disk of this pie dough may be stored in the freezer for up to 3 months. Thaw in the refrigerator for a couple of days before rolling out.
-
TO PREBAKE A PIE SHELL:
-
Refrigerate the dough-lined pie plate for 40 minutes and then transfer it to the freezer for an additional 20 minutes.
-
Place the oven rack in the lower-middle position of the oven and preheat the oven to 375°F.
-
Remove the pie plate from the freezer and press a double layer of aluminum foil into the pie shell, folding over the edges so that the entire crust is covered.
-
Fill to the top of the foil with pie weights.
- Place the pie plate on a metal baking sheet (which will transfer heat gradually from the hot oven rack to the bottom of the cold pie plate in order to prevent shocking the glass).
-
Put the baking sheet (with the pie plate on top) into the oven and bake for 25 minutes.
-
Take the pie plate out of the oven and carefully remove the foil and pie weights by lifting up the corners of the foil.
-
Prick the empty crust on the bottom with a fork, return it to the oven, and bake for 5 more minutes until light golden brown (for a partially baked crust) OR 12 more minutes until deep golden brown (for a fully baked crust).
-
Nutrition
Post originally published on October 21, 2013, and updated on October 25, 2019, August 1, 2020, July 23, 2021, and October 20, 2023.

I don't usually take the time for comments but this is the EASIEST and best pie crust to make!! I felt intimidated making a pie crust... not anymore!! I used my ninja blender and it came out beautiful! ! This is my new go to pie crust recipe!! Thank you! 🙂
So happy to hear it, Sarah! I made this recipe twice myself yesterday... 😉 Thanks for taking the time to let me know that it was a hit. Happy Thanksgiving!
Thanks so much … I've been struggling w/ my pie crust the past few years, so I'm eager to try this. I want to share w/ you how I deal "cutting in" butter w/ flour. (I used to have a cookie business, and my cut-out recipe called for cutting butter into flour … for the amount of dough I had to make, it was just too much work to do it by hand or w/ a pastry cutter.) Anyway, what I do is to take frozen butter and shred it into the flour, using the large holes on the grater. It works like a charm … it's quick & makes the perfect size pieces. I'm thinking that will be quicker than cutting the butter into little squares (& then putting that into the food processor to add water to) … but I'll have an extra pound on hand in case I'm wrong!
What a great tip, Mari Ann...thank you for sharing that! I think your method would work in this recipe as well. 🙂
So I made this crust last night for my Pi Pie, and it was delicious! I'm not sure I added enough water, because instead of rolling out beautifully like yours it kind of crumbled and wouldn't stay in one piece, so I just puzzle-pieced it into the pie tin, and it still tasted great. Also I was a little worried because I only have a mini-processor, so I just did it in shifts and stirred it all together at the end.
Last year for Pi Day I used a regular all-shortening recipe, and now in the future I'll definitely be using this butter one. So good!
So glad this was a hit, Quixii! I think pie crust making gets smoother/easier with practice, so I bet that your crust will turn out even better next time! 🙂
Thank you! This was only the second time I've ever made pie crust, and people were super enthusiastic about it, so I can only imagine how good it can get. 🙂
This pie crust came out awesome! Thanks so much for an ALL Butter recipe! I dont like to use shortening and ur tips about keeping the butter & crust cold (not over working it w/the hands either) really helped. I used a pastry cutter cuz i dont have a big food processor. I also tripled the recipe to make 6 pie crusts at once I kept the butter in the freezer like u suggested and added it lil by little. It took some muscle but definitely was well worth it. This is my go to pie crust from now on. Thanks!
You're so very welcome, Stephanie...I'm very happy to hear that this pie crust is a keeper for you! As a bonus, I bet your arms are nice and toned after making 6 crusts at once by hand...wow! This recipe my favorite, too...butter makes everything better. 😉 Hope you enjoy this recipe for many years to come...thanks for coming back to let me know that it was a hit!
hi - thanks for the recipe & instructions. I'm an experienced cook & a pretty good baker, but I've never consistently turned out a good pie crust! My nemesis! I have a question - can I make this crust with regular salted butter? If so, would I need to reduce or eliminate the salt in the recipe?
Hi Barbara! I hope this crust recipe ends up being the tasty and consistent one you've been searching for! Yes, you can use salted butter, and yes, you might want to cut back on the added salt just a tad to compensate for it. Salted butter can be made with varying amounts of salt depending on the brand, which is why I prefer to use unsalted and control how much salt I'm adding back...but salted butter will work just fine in pie crust. 🙂 Thanks for the question and good luck with this recipe!
I have your recipe pie crust chilling in my fridge right now. This is the second time I make a pie today, the first recipe I used was an epic fail....
I am a beginner when it comes to making pie crust. Well honestly, this is the second time I attempt a crust. I followed the recipe to a tee. Wish me luck, as it is Christmas Eve and I have no choice to serve this pie good or horrible.
I will keep you posted on my families feedback!
Hi Valerie! I'm sorry to hear you've had a rough go with pie crusts, but I really hope that this recipe turned out well for you! If you followed the steps, I'm betting it did. 😉 Hope you had a great Christmas!
It was a success! I was pretty proud of myself. Everyone liked the pie or at least they said they did. Either way it turned out. Thanks for the perfect instructions
Your comment totally made my night, Valerie...I'm very happy to hear that your pie crust was a success! Thanks so much for coming back to let me know. 🙂
You make it look so easy!! I've only made pie crust from scratch a few times, and I'm definitely pinning this for future reference! Thanks so much for sharing, Samantha : )
Thanks, Liz, and you're welcome! 😉 I promise, it is easy! Plus, if you make a few batches in a row and pop them the disks of dough in your freezer, you have quick homemade pie crust any time you need it...
Dear Samantha, I love making homemade crusts. This sounds easy and looks perfect! Thank you for sharing. Just stopping by from Best of the Weekend. Blessings, Catherine xo
You just made the most perfect looking pie crust I've ever seen!! 😉 Stunning!
You are too kind, Jocelyn. I just put the ugly side away from the camera... 😉
These are great tips, I also like to use the food processor, I used to do it by hand. I've also realized that refrigerating the crust is a must. I do tend to favor a hybrid pie crust as my last butter crust didn't turn out as well as I would have liked but I think I'll give it another try. 🙂
Thanks, Angela! Hybrid crusts definitely have great texture, but I'm an all-butter girl and have been really happy with how this one turns out, taste and texture-wise. Hope it works well for you if you end up trying it! 🙂
I love your pie crust tips! Cold ingredients are a must, so much so that I even freeze my flour, it's just one more way to keep in the cold! I've never made a crust with just butter. I like to use a mixture of shortening and lard, but this is something I really might like to try. Thanks for sharing on Strut Your Stuff!
What a great idea to freeze the flour, too, Cheryl! I'm sure your pie crust turns out great...I hope you enjoy this all-butter version, too! 🙂
Hi Samantha! You make a pie crust look easy! I can hardly wait to give it a try! Thanks for sharing! Blessings from Bama!
Thanks, Felecia! Believe me, if I make it look easy, that just means that anyone can do it. 😉 Good luck! Thanks for stopping by!
Samantha, this looks like the perfect pie crust! A lot of people are going to be happy to have this in time for Turkey Day! 🙂 Thank you so much for joining us and sharing at Best of the Weekend! Pinning! Hope you have a happy weekend!
There's no reason to be intimidated by this crust, Erin...it will turn out great and go perfectly with your pie filling! Thanks so much for stopping by, and i appreciate the invite to your link party! 🙂
Suzanne of Simply Suzannes at Home
Samantha! You made the perfect pie dough!
There really is nothing like a pie dough made with butter, and lots of it!
Oh ~ and your pie is also quite beautiful :0) Such pretty scallops (my favorite!).
Have a beautiful week,
Suzanne
Thanks so much, Suzanne! I totally agree...you just can't beat the flavor of a buttery pie crust!
I really appreciate you stopping by and leaving such a thoughtful comment. Hope your week is going well!
I love apple pie and I cannot wait to try your pie crust recipe Samantha! I really hate cleaning my food processor, but you are so right about it being the way to make crust.
Thanks, Emily! The food processor makes throwing together a pie crust so much easier, doesn't it? I don't like cleaning my food processor either, so I usually end up sticking all of the parts in the dishwasher. They take up a lot of room, but somehow I always find a way to make them fit... 😉 Thanks for stopping by!
OK, Samantha....I haven't even attempted to make a pie crust for many years; therefore, I've never tried it in a processor. Maybe even I could get this recipe to turn out right?? Seriously, I'm a darn good cook, AND baker, but pie crust is something that never worked out for me. If I try it, I'll let ya know! Thanks for posting - it's very intriguing!
Deb (we won't talk about the Aggie game this time!)
You can do it, Deb! Seriously, if you have a food processor, making a pie crust is cake. 😉 Do let me know how things go if you end up trying it!
And your Aggie comment made me laugh. I'm going to need to start taking blood pressure meds before the games if they keep playing such close ones! Too bad that one didn't turn out in our favor...hopefully we didn't lose our QB in the process. 🙁
Good luck with the pie crust!
Looks perfect! I love my food processor for pulsing my pie crust. It cuts in the butter so perfectly and finely, way better than my hand-held pastry blender ever did. I know that people are intimidated by the idea of making pie crust. You've done a good job explaining how to do it, and people should also realize that any skill comes only with practice, practice, practice! 🙂
Thanks so much, Judy! I totally agree...I have much better pie crust outcomes using a food processor than I ever did by hand. I'm afraid I lack the patience to get everything to the just-right stage with a pastry blender! 😉 And practice is definitely key. I think the hardest part to making pie crust for the first time is not feeling sure that everything "looks right" at the various stages, which is why I felt like it was important to include step-by-step pictures for this post. I'm glad to hear that you think that these directions looks like they'd be helpful to a newbie crust maker. 🙂 I really appreciate you stopping by and commenting...have a great week!