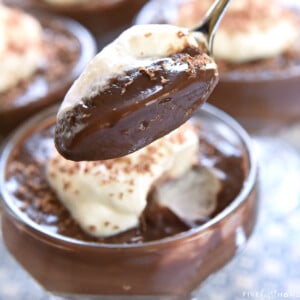
The BEST Homemade Chocolate Pudding
Homemade Chocolate Pudding is a classic, creamy dessert that's surprisingly easy to make…and after trying this silky, decadent chocolate pudding recipe, you'll never want store-bought again!
WANT TO SAVE THIS RECIPE?
If you enjoy homemade chocolate desserts, you'll also love Raspberry Swirl Brownies, Chocolate Bread Pudding, or Triple Chocolate Cookies!
Sometimes a girl gets a craving for chocolate pudding, and I'm not talking about the packaged stuff from the store. Nooo, I'm talking about Homemade Chocolate Pudding: rich, thick, smooth and silky, with no weird ingredients or powdery aftertaste. Pudding that's simple, classic, and positively addictive!
Homemade Chocolate Pudding is magical in its simplicity and deliciousness. It's a challenge not to eat it warm, straight out of the pot. But allowed to chill, it becomes thick and glossy, ready to satisfy any chocoholic or pudding lover's deepest cravings.
Homemade Pudding for the Win
Can I admit a little something if you promise not to judge? I'm a pudding snob.
That's right...I can't stand the instant boxed kind that requires no cooking. The cook-and-serve variety is immeasurably better, but guess what?
With only slightly more effort, you can cook up a pot of 100% Homemade Chocolate Pudding that is above and beyond anything you can find in the inner aisles of the grocery store.
In fact, I have no doubt that I could ingest a whole pot of this stuff in one sitting. But fortunately for my waistline, I have pudding aficionado children who wouldn't allow such a travesty to occur in their presence. Nooo, if I tried to keep it to myself, you'd be able to hear their protests (AKA, whining) from here to Timbuktu. So as long as I don't make this recipe in solitary confinement, I have no choice but to share. Yay and darn.
Ingredients
So enough of my yammering about how amazing this chocolate pudding is. The first important order of business is what you'll need to make it!
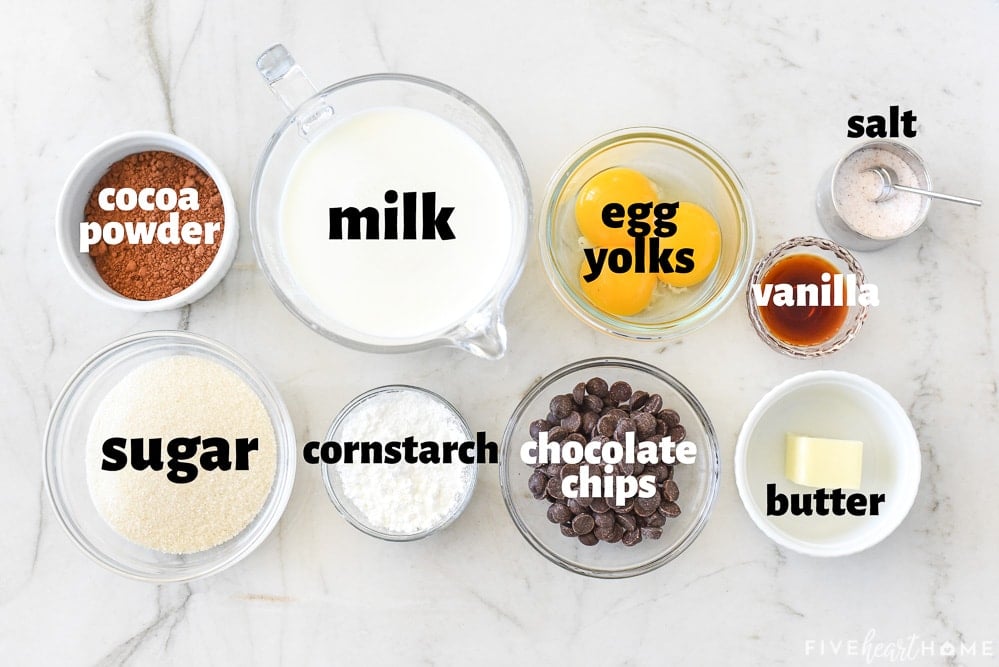
Just a handful of simple ingredients...
- Unsweetened cocoa powder. Since the primary flavor in Homemade Chocolate Pudding is, well, chocolate, it's important to use a good quality cocoa powder if at all possible. I find the flavor of Dutch processed cocoa to be a bit too intense in pudding, but it will work in this recipe if you're going for a deep, dark chocolate flavor.
- Granulated sugar. The regular ol' white stuff...not powdered sugar.
- Whole milk. The standard for homemade pudding. If you opt to use 2% or 1% milk instead, keep in mind that your pudding may turn out a bit less decadent and rich-tasting. I have not personally tested this recipe using a non-dairy milk, but a commenter reported success making it multiple times with unsweetened almond, cashew, and coconut milks.
- Cornstarch. The primary thickening agent in this recipe.
- Egg yolks. For further thickening and creaminess.
- Salt. To enhance flavor. I use my favorite fine sea salt.
- Semi-sweet chocolate chips. Melted. I find that stirring some melted chocolate into my finished chocolate pudding makes it even silkier and acts to "smooth out" the chocolate flavor.
- Unsalted butter. Again, to further enhance the decadent flavor and texture of homemade pudding.
- Pure vanilla extract. As counterintuitive as it sounds, vanilla adds important depth of flavor to chocolate pudding.
How to Make Chocolate Pudding
(The below photos are intended to be helpful, but please refer to the recipe card at the bottom of this post for FULL DIRECTIONS.)
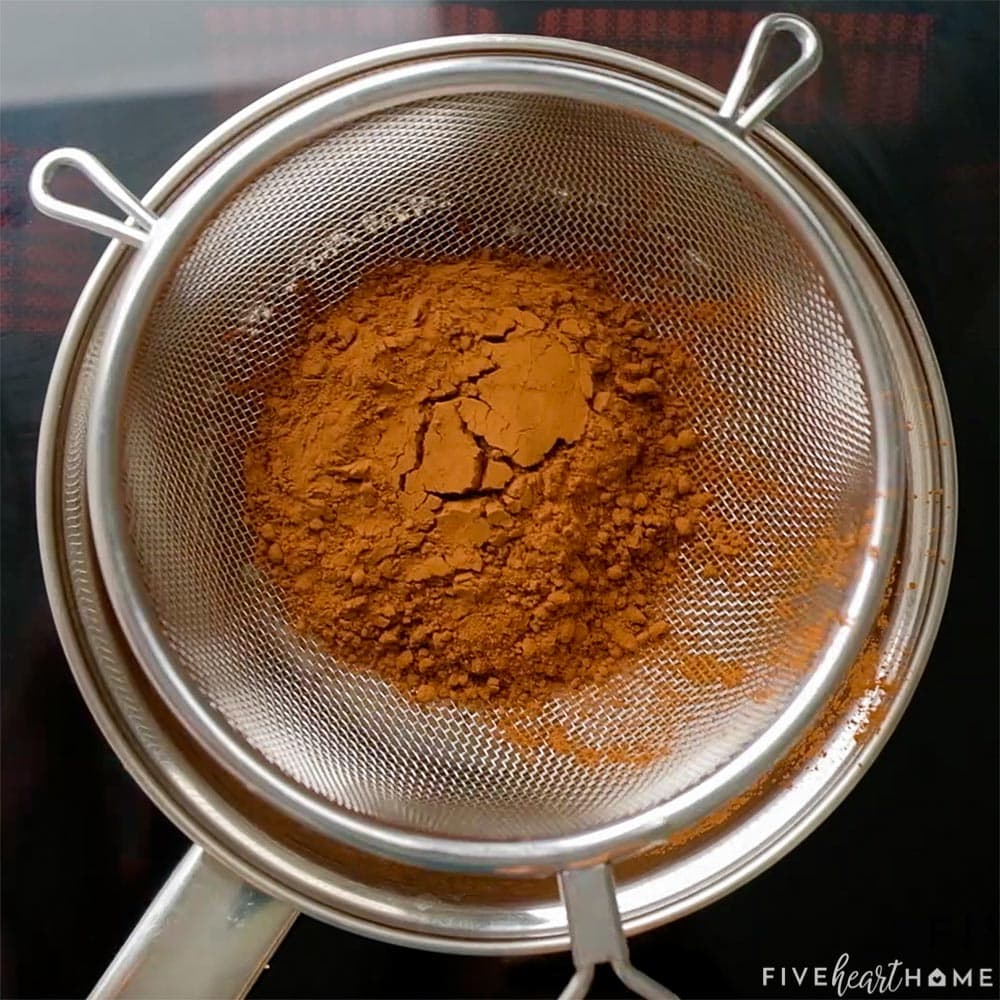
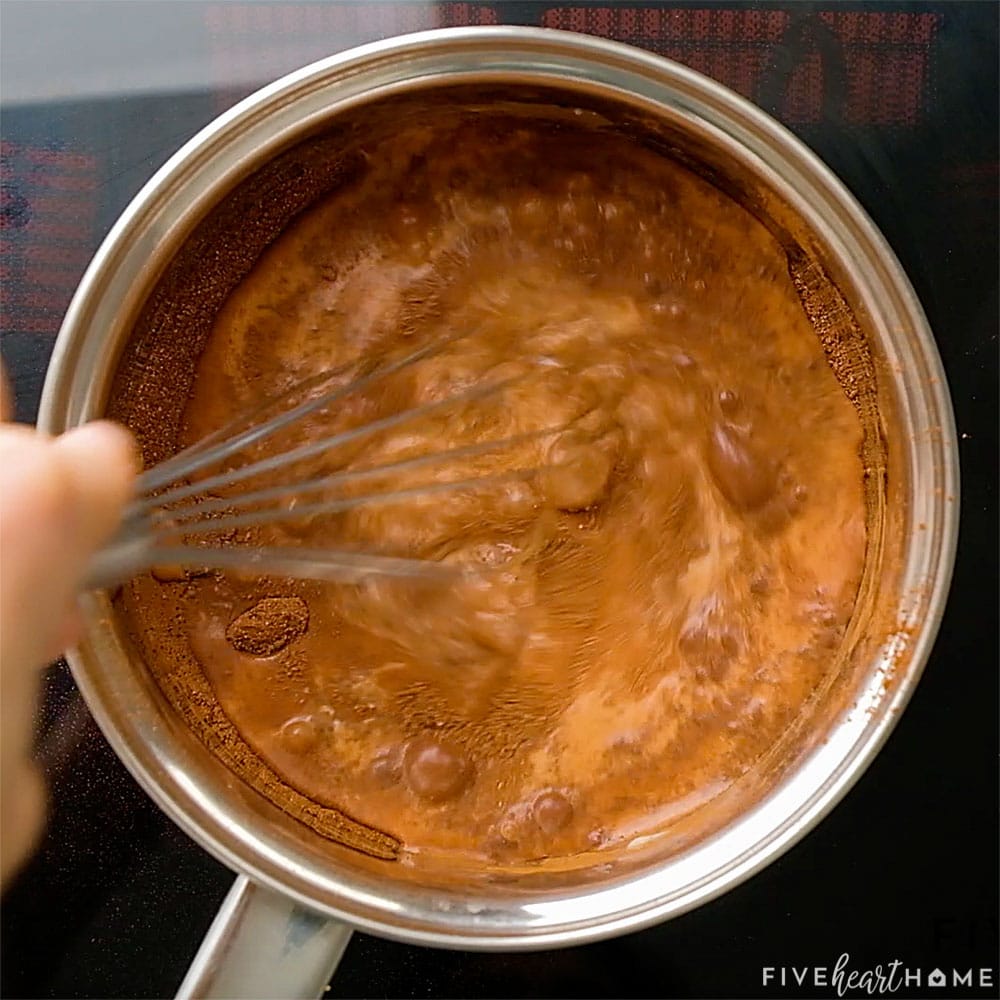
- Sift the cocoa powder in a saucepan.
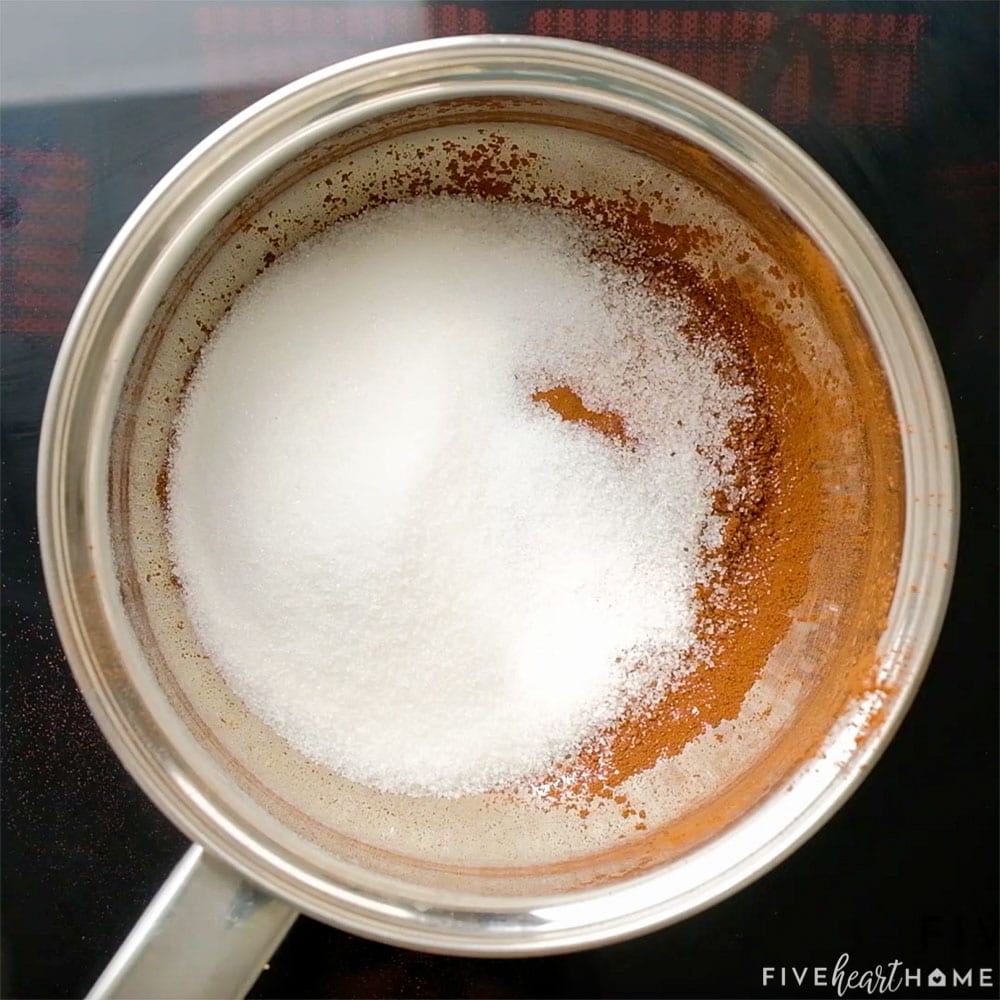
- Stir in the sugar.
- Slowly whisk in three-quarters of your milk until smooth.
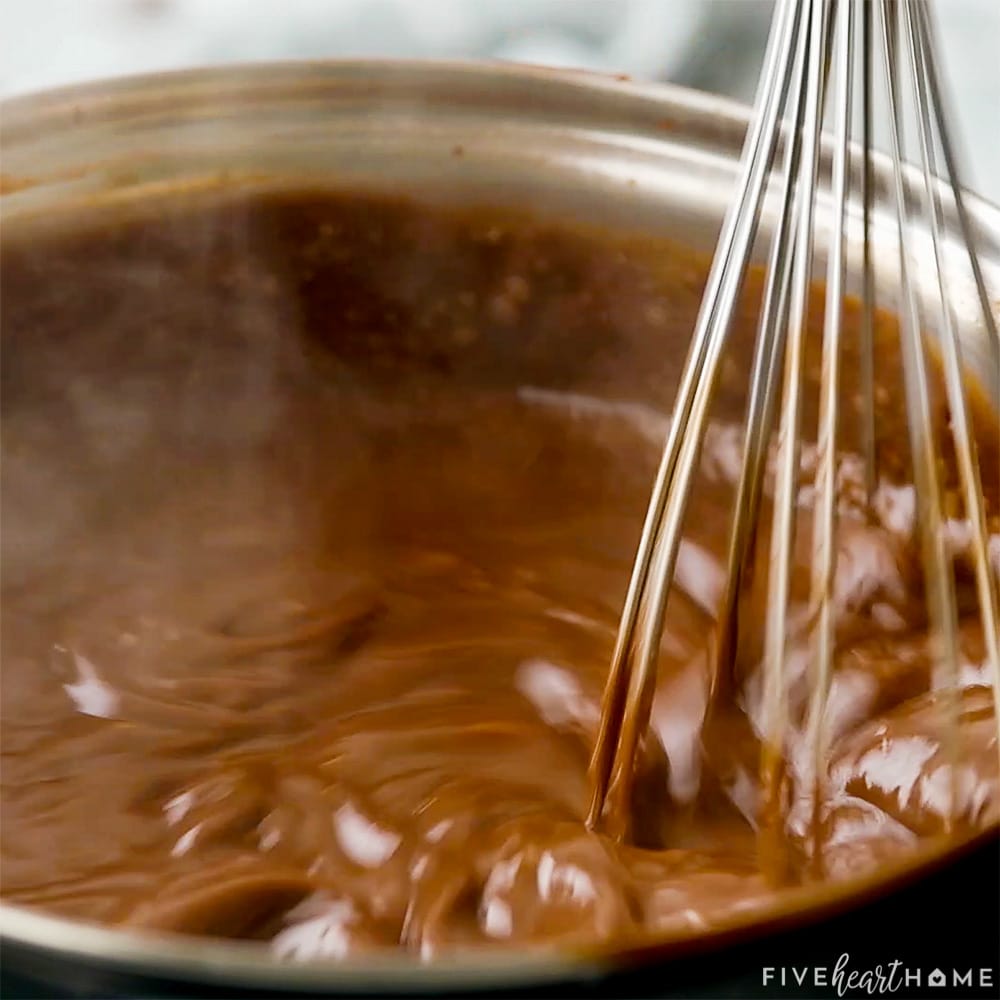
- Set pot over medium-high heat and stir constantly while bringing the mixture to a simmer.
- Remove from heat and set aside.
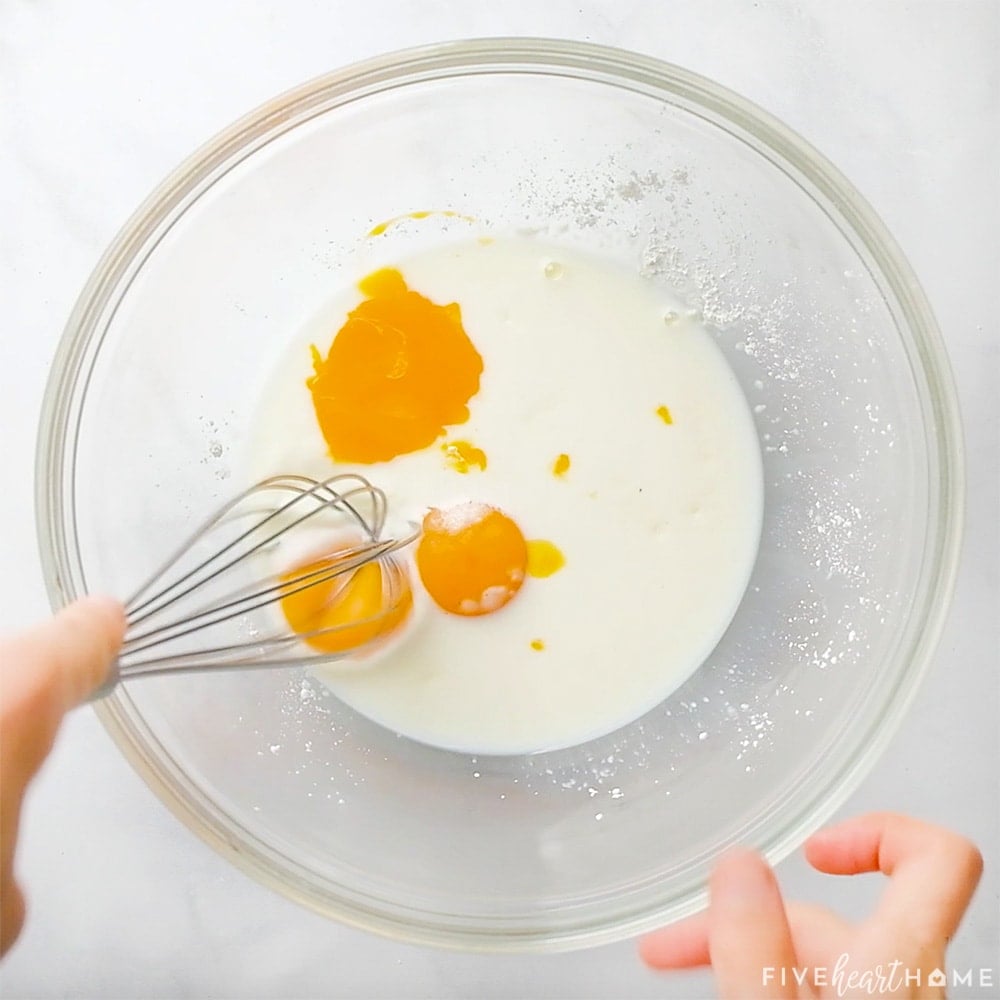
- In a large bowl, whisk the remaining milk with the cornstarch, egg yolks, and salt until smooth and well-combined.
- Whisk rapidly while very slowly pouring the warm milk/cocoa powder mixture into the egg yolk mixture.
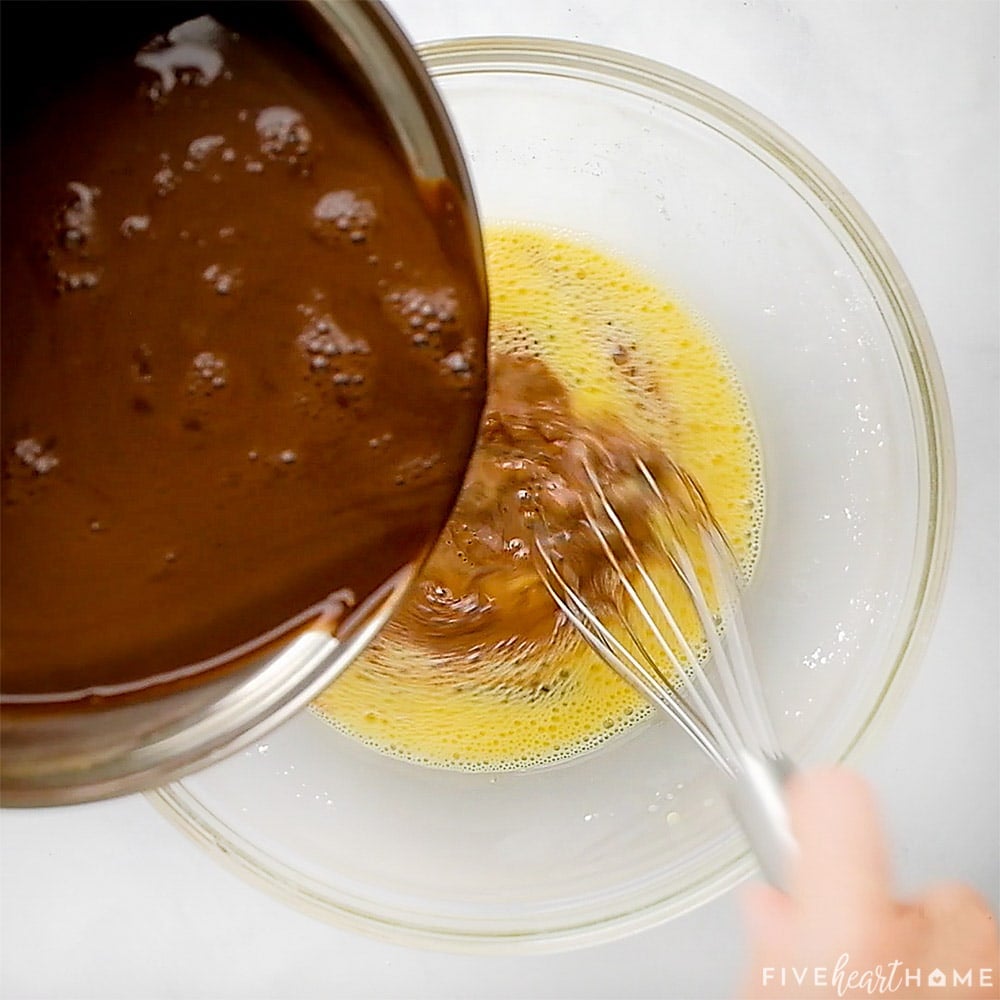
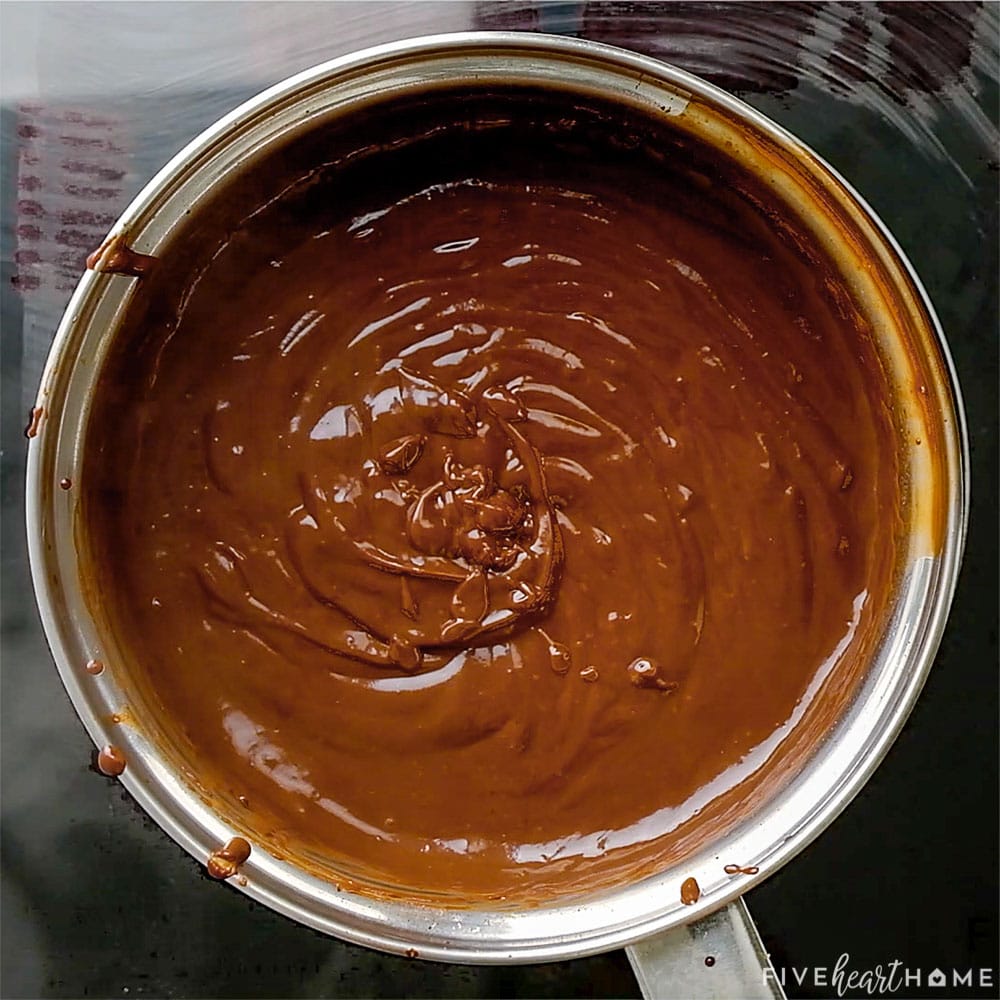
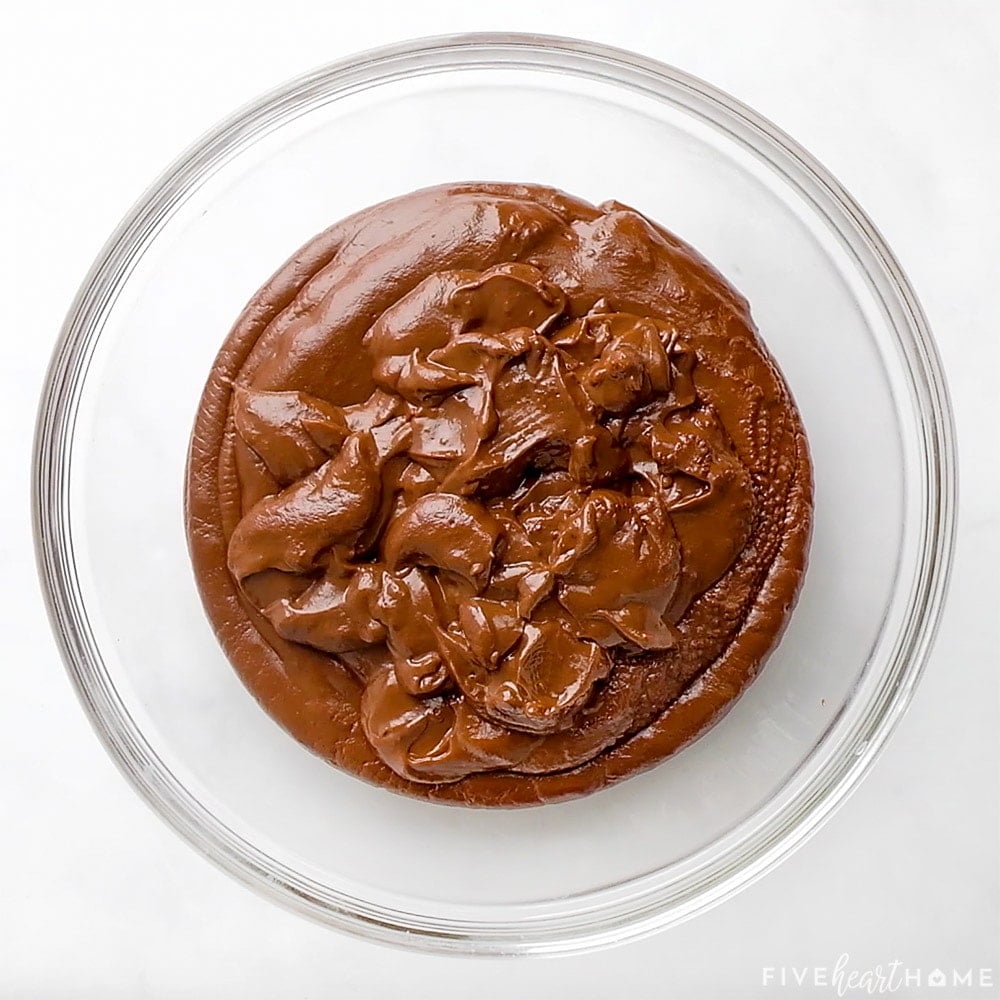
- Transfer the entire mixture back to the saucepan and set the pot over medium-high heat, whisking constantly, until the chocolate pudding comes to a full boil.
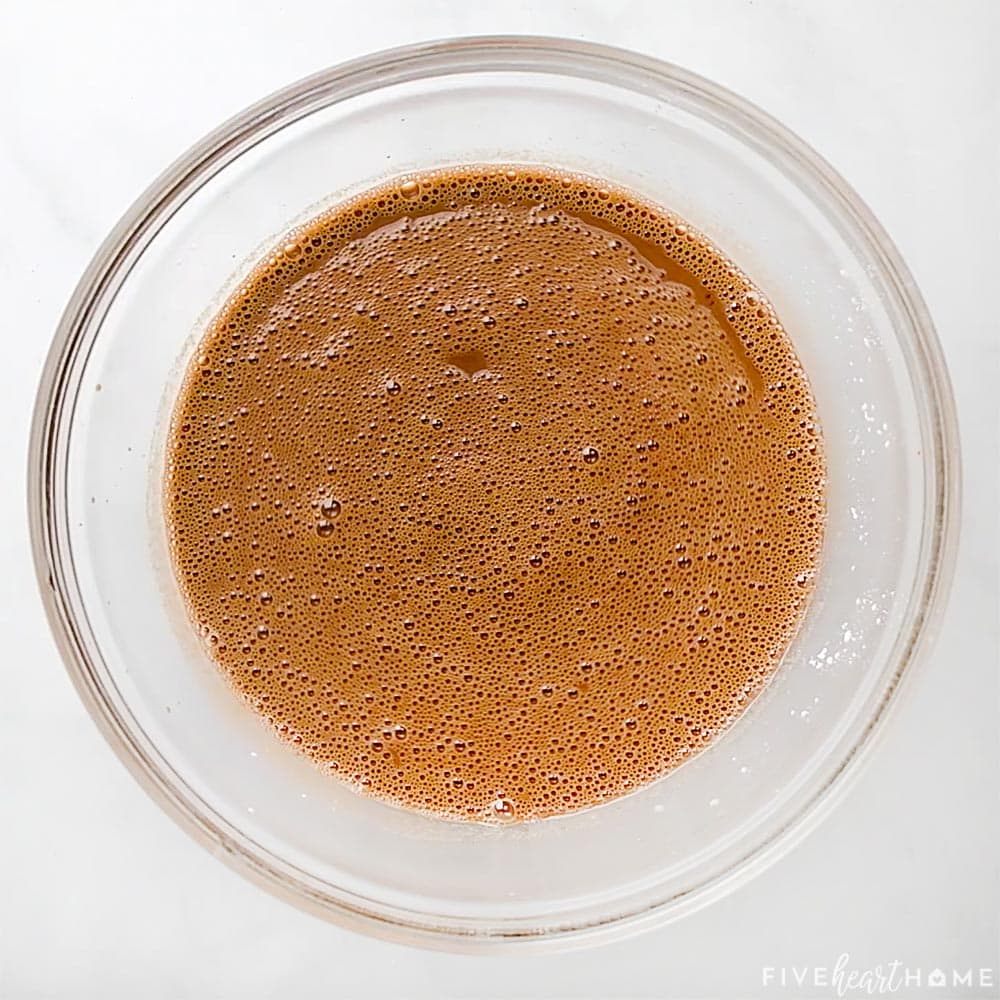
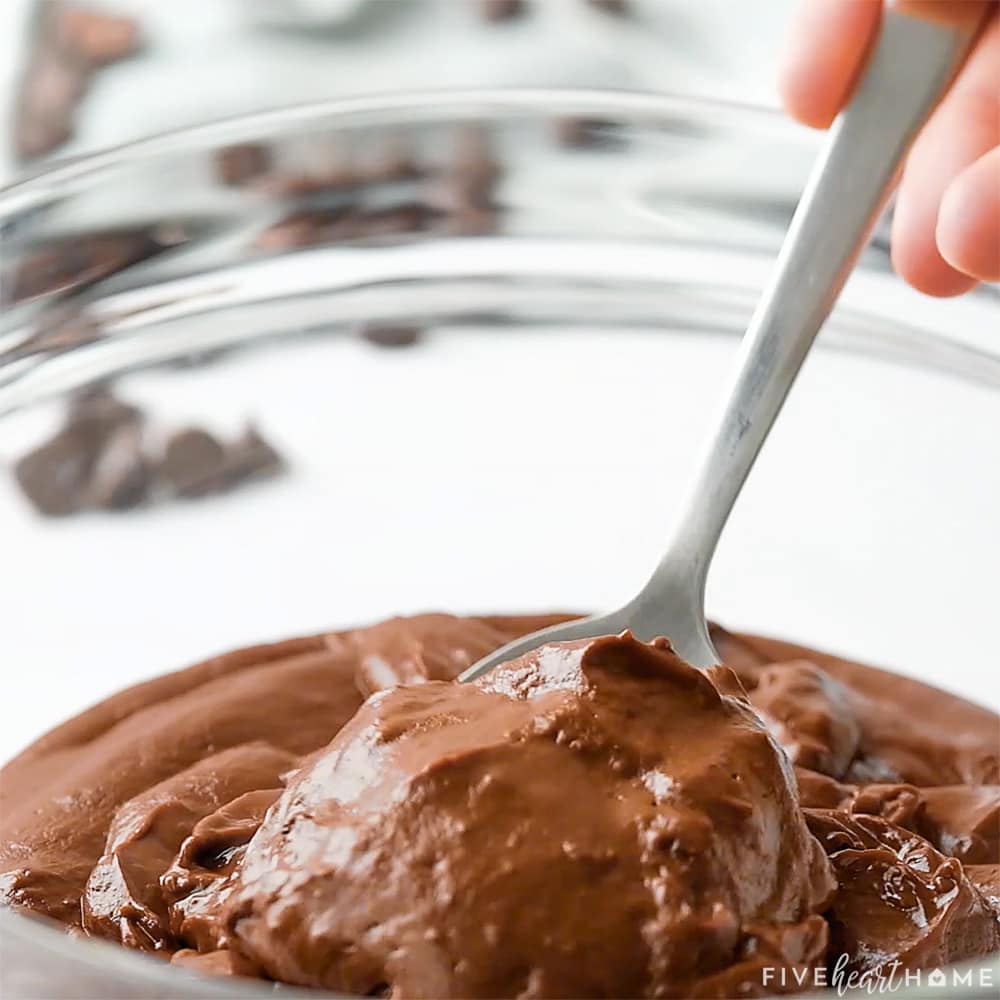
- Reduce the heat to a simmer and continue whisking for a couple more minutes until the pudding is thick.
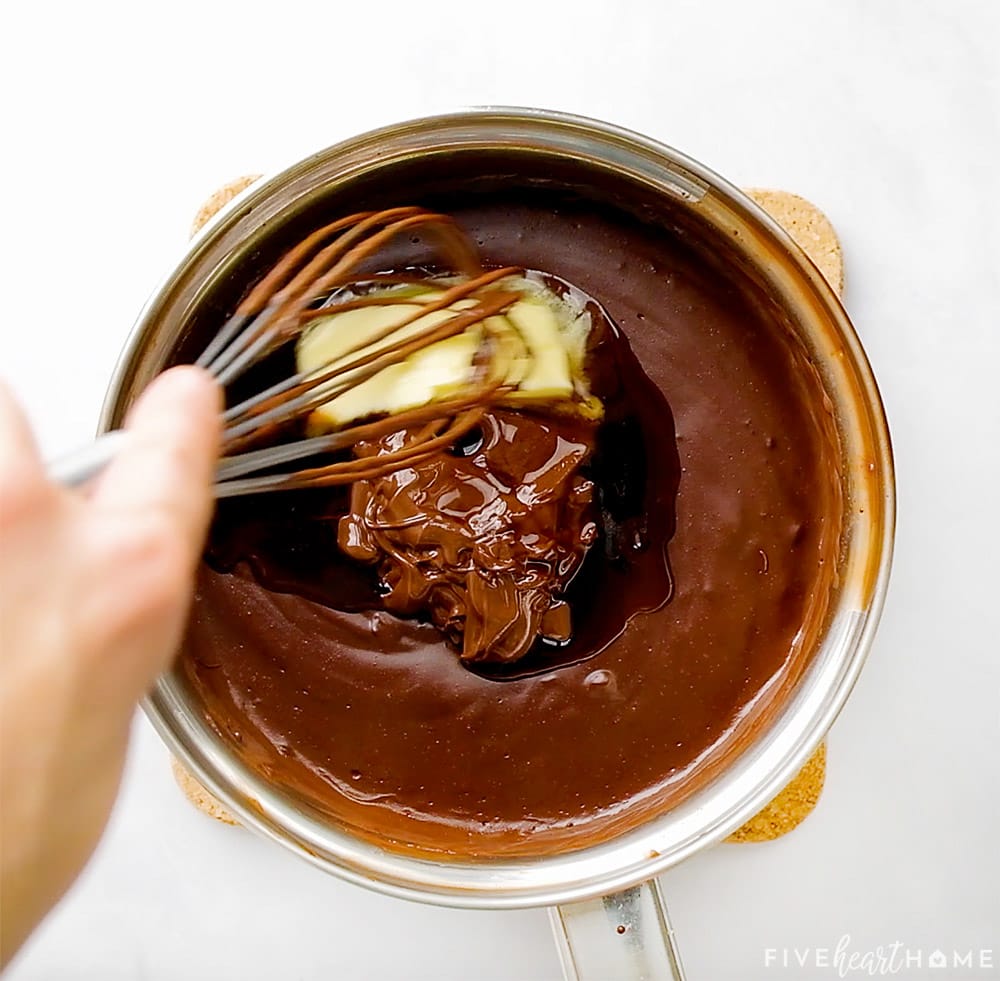
- Remove from heat and mix in melted chocolate chips, butter, and vanilla, stirring until smooth.
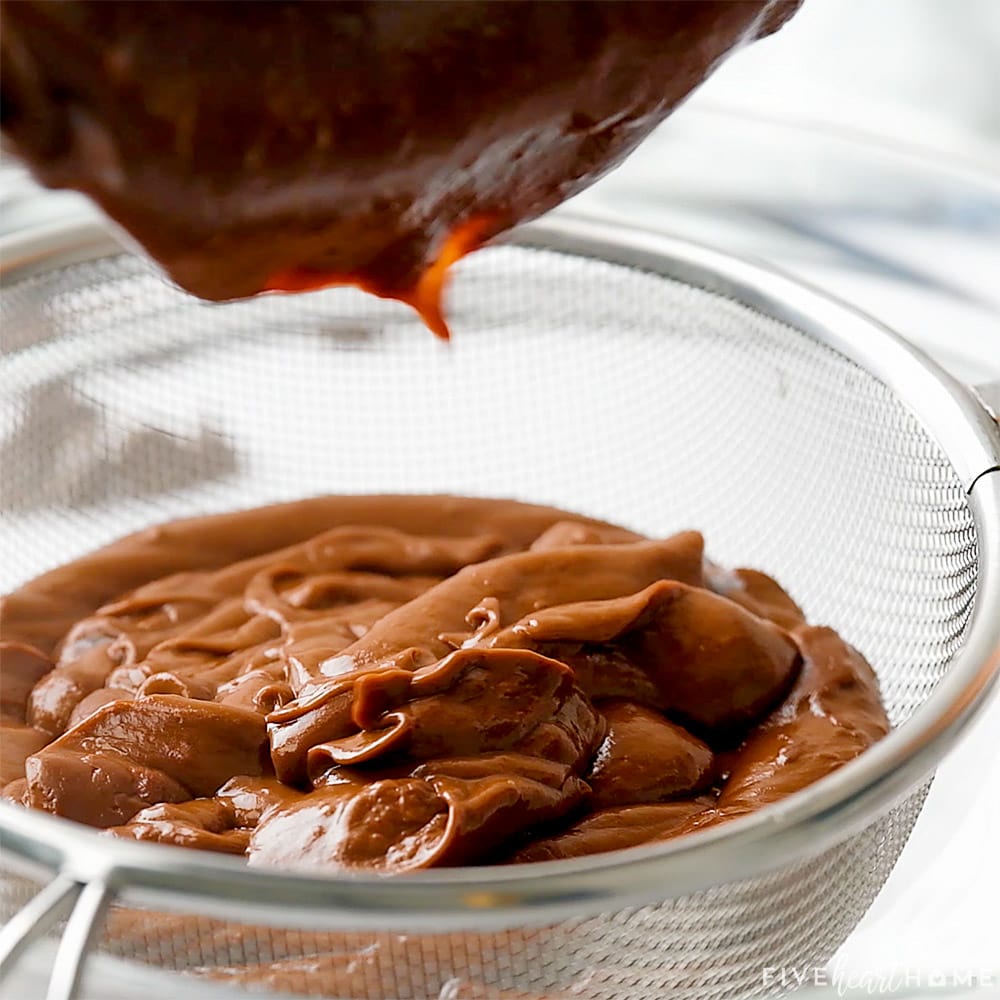
- Strain pudding through a fine mesh sieve. This step is optional but recommended for ultimate silkiness.
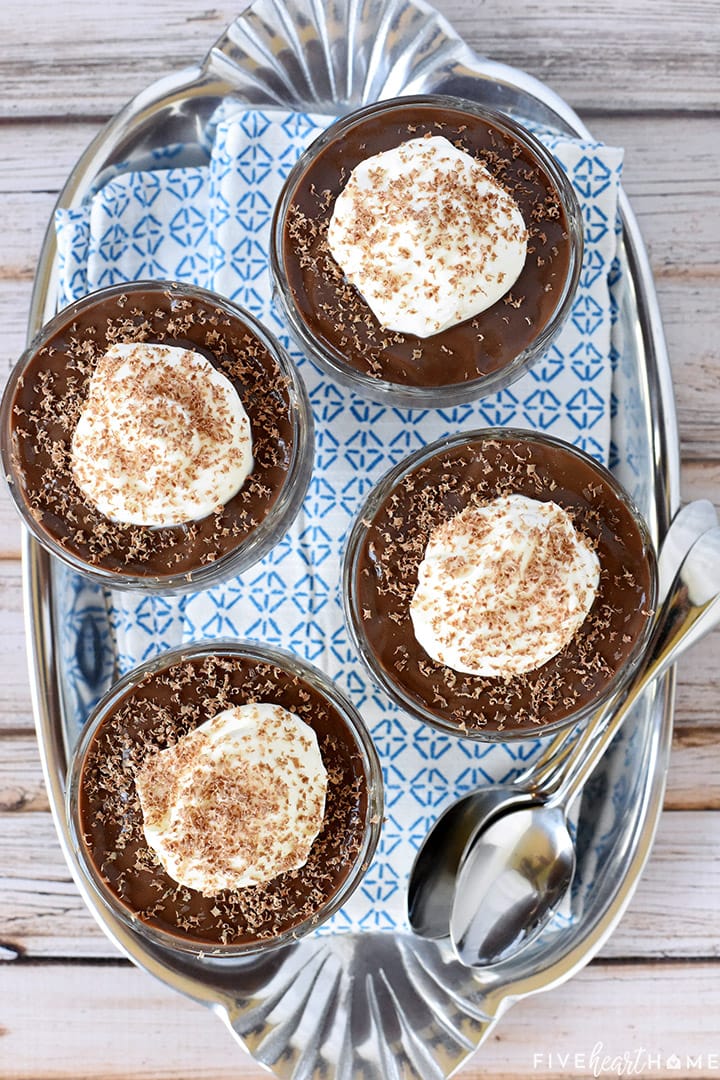
- Divide between four cups or small bowls.

- Chill until set, for at least 4 hours.
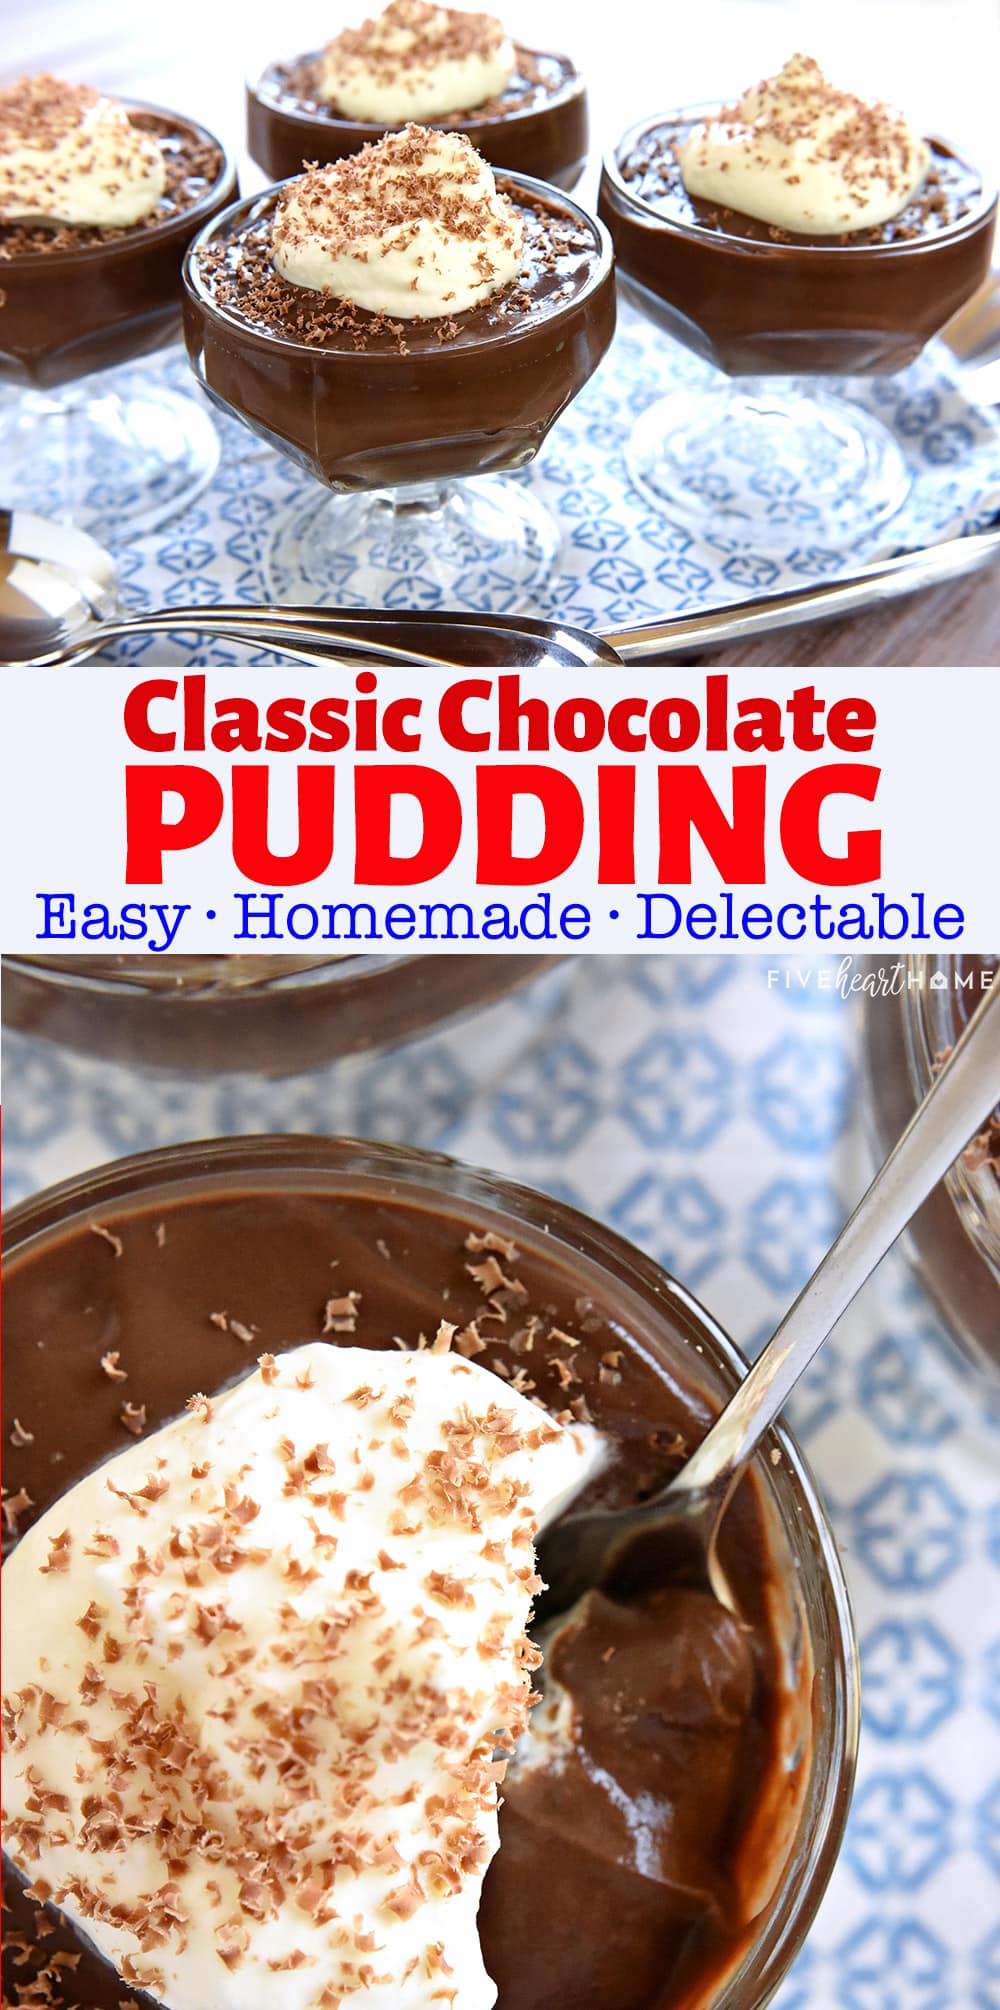
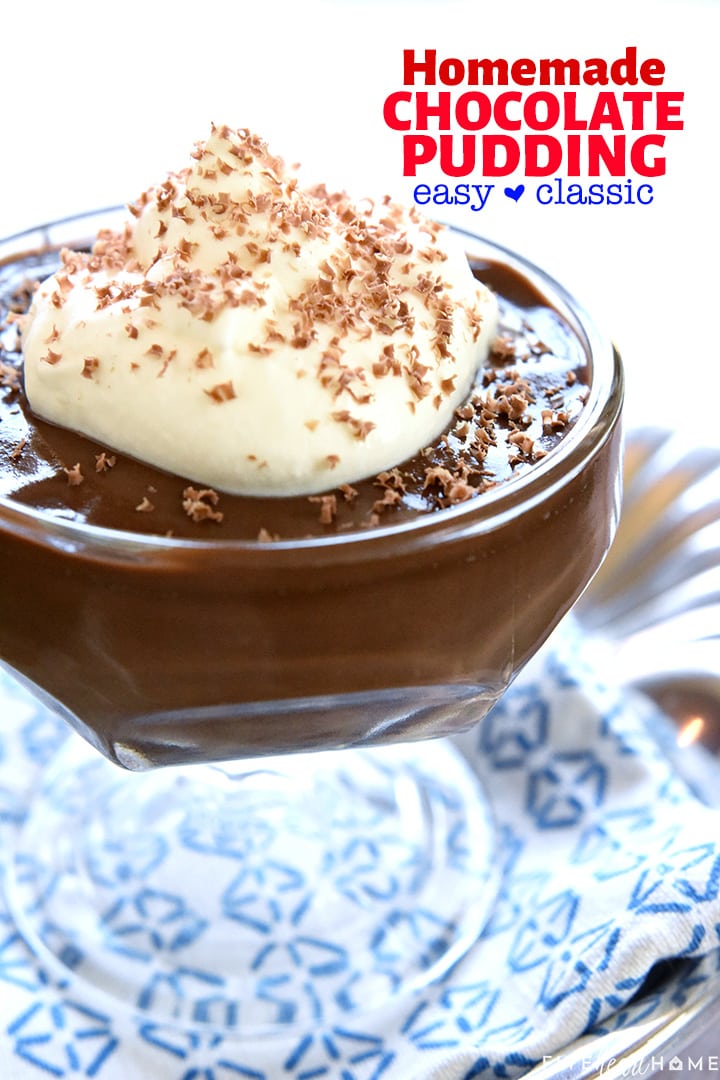
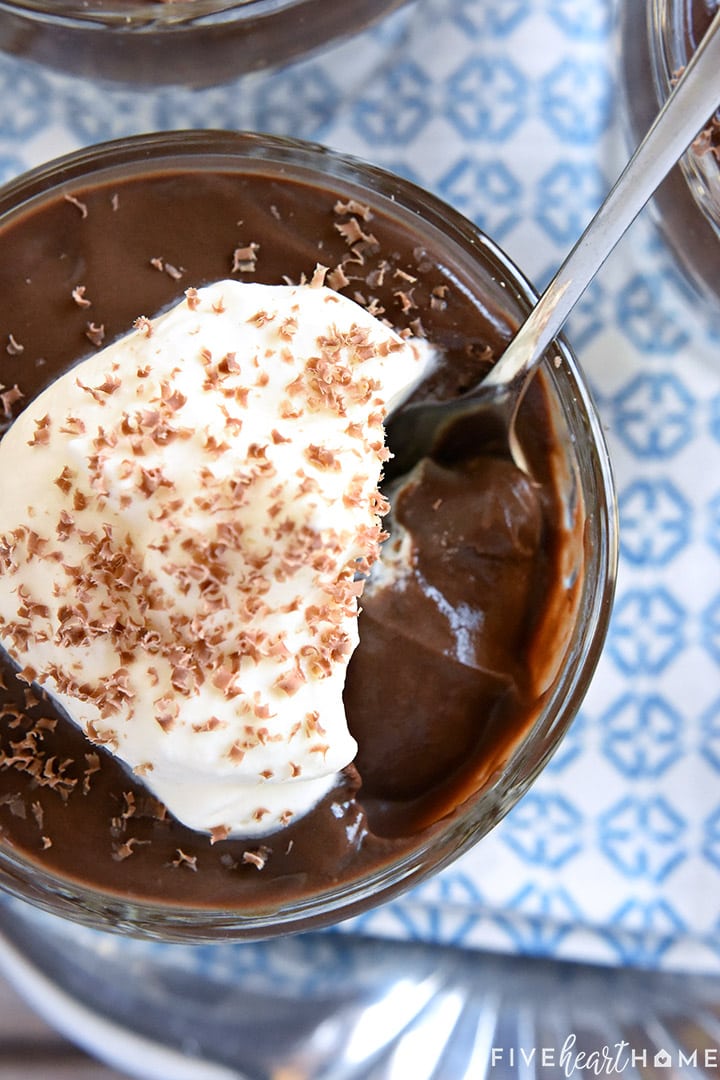
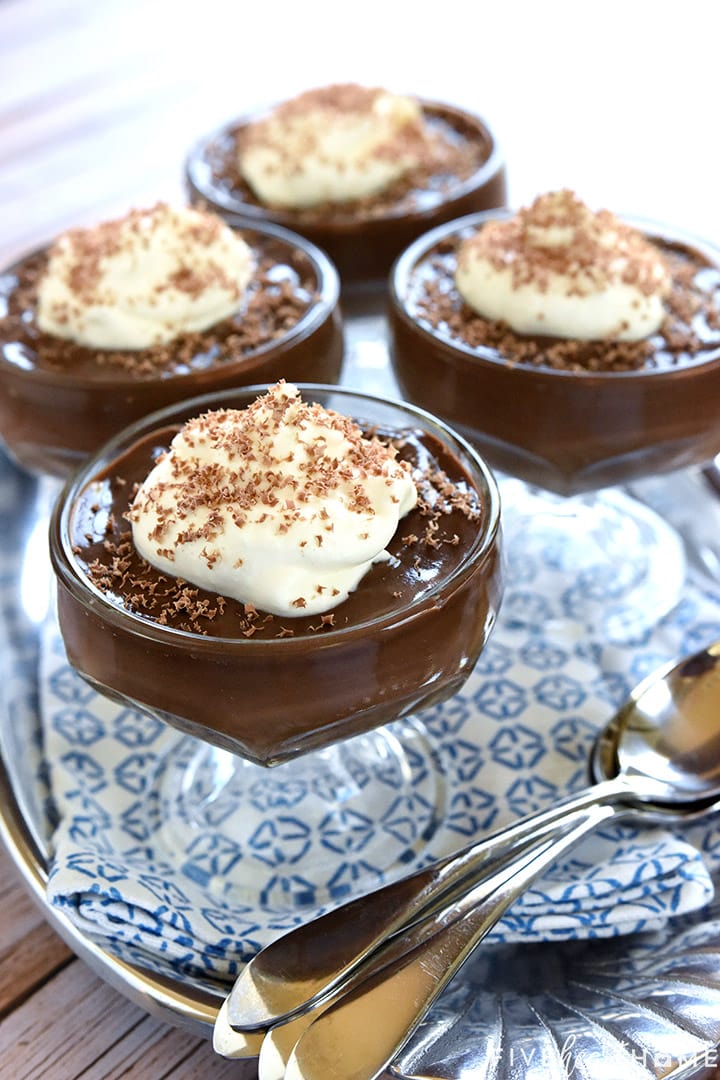
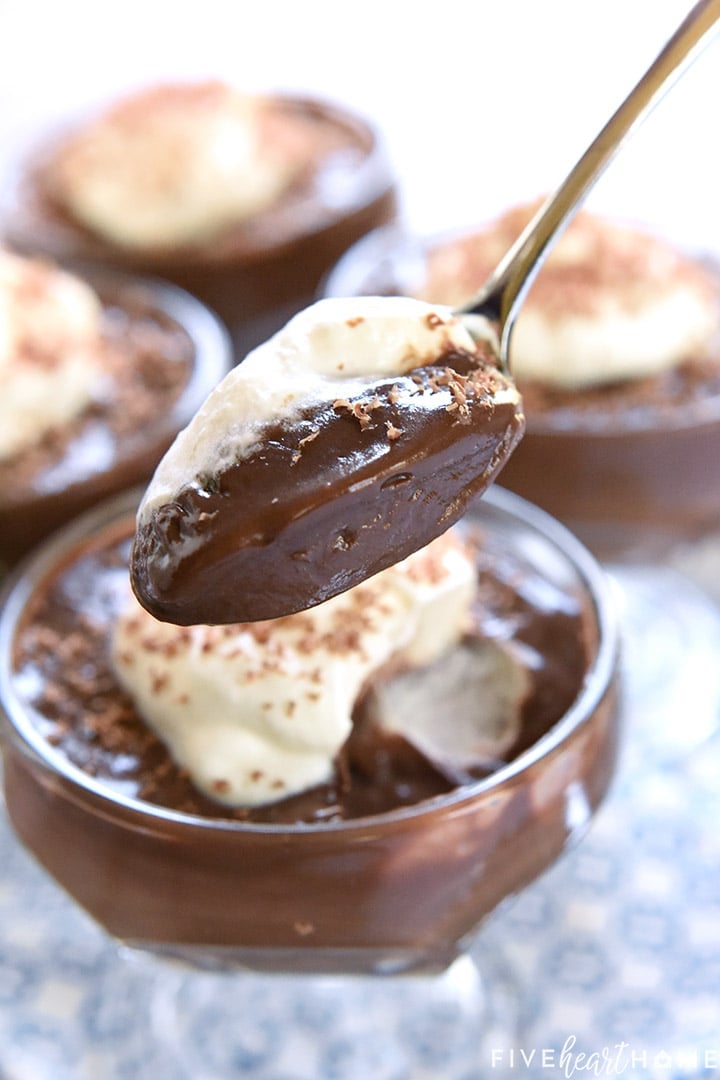
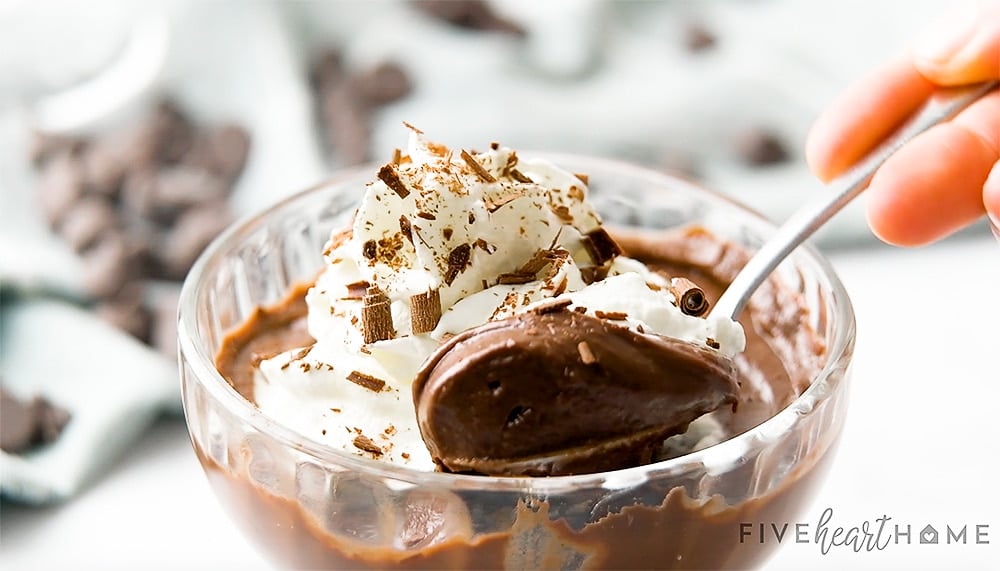
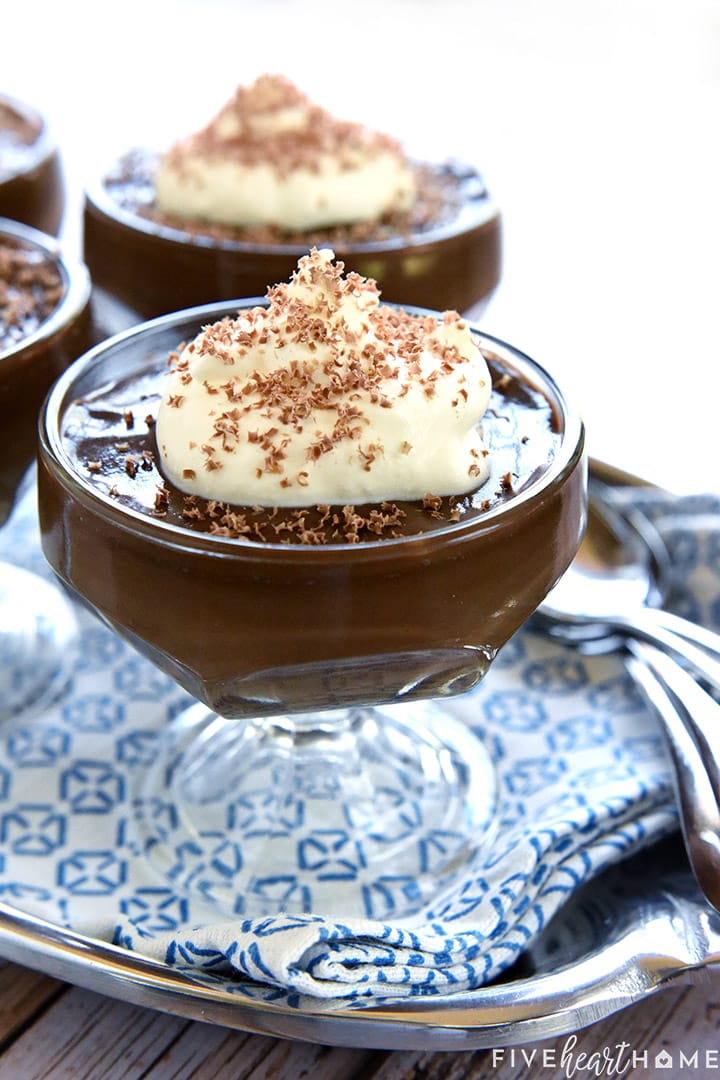
- Garnish with whipped cream and chocolate shavings -- I mean, since we took the time to make Homemade Chocolate Pudding, now we're going all out here 😉 -- and ENJOY!
And if you prefer chilling your pudding in one big bowl without messing with individual serving dishes, that works fine, too!
Individual dishes just make homemade pudding feel fancy. 🙂
Tip to Prevent Skin on Pudding
Before going any further, I feel obliged to share my favorite Homemade Chocolate Pudding-making trick, in case you're not already privy to it. (And it actually works for any flavor of pudding!)
If you don't like the thick skin that forms on top of cooked pudding as it cools, simply lay a piece of plastic wrap directly on the surface of the pudding while it's still warm. Ensure that the plastic is touching the entire surface with no air bubbles.
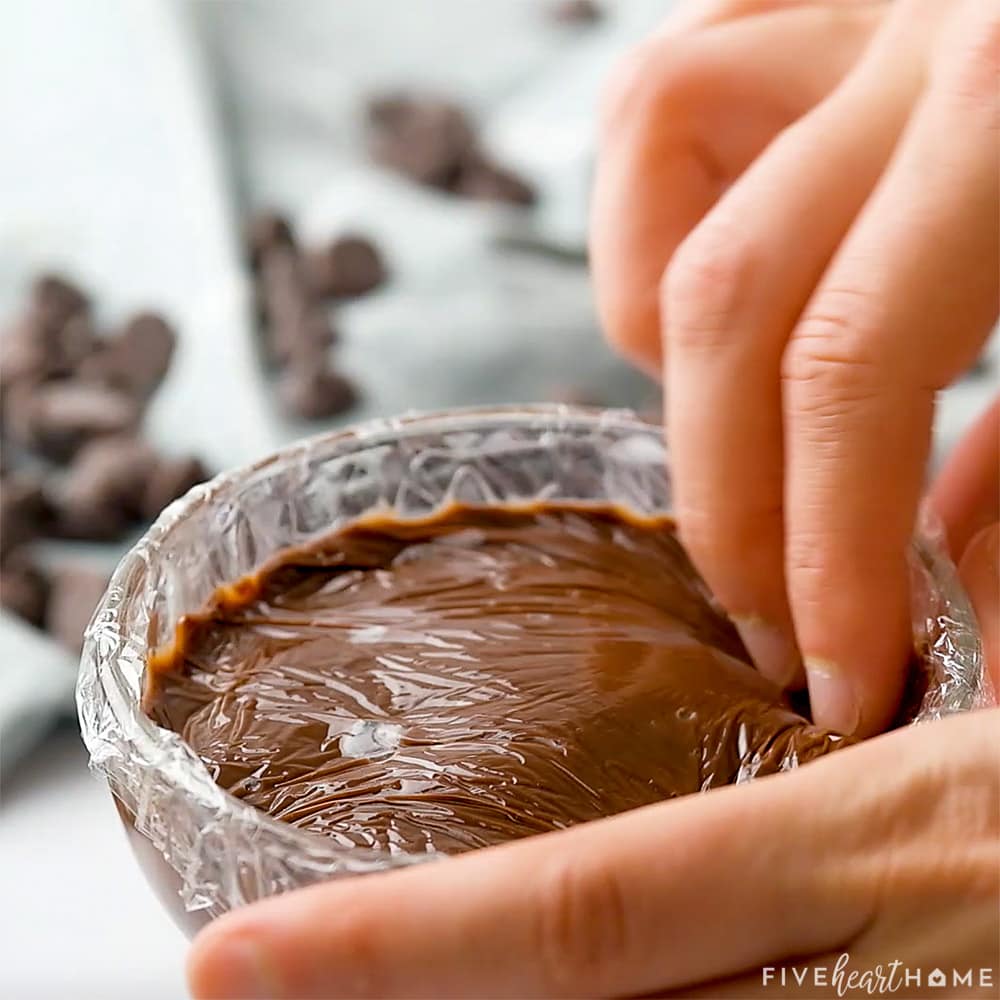
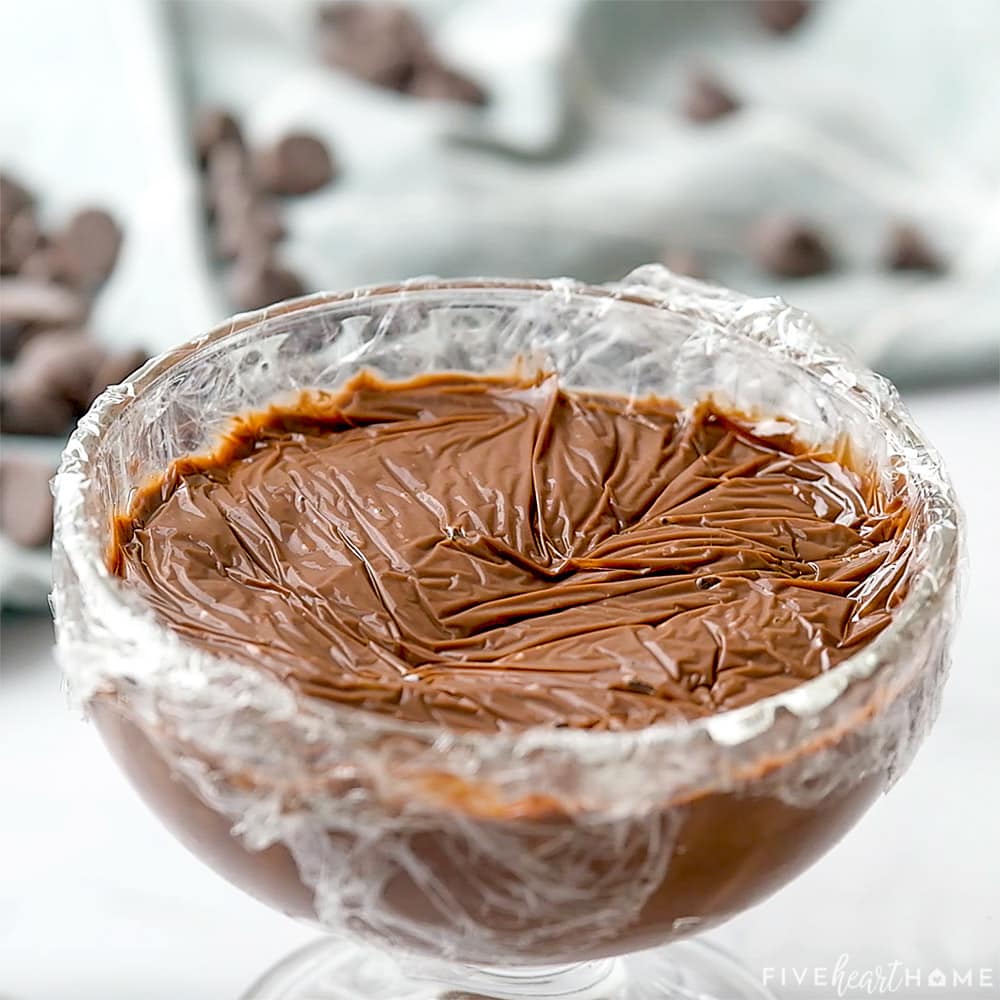
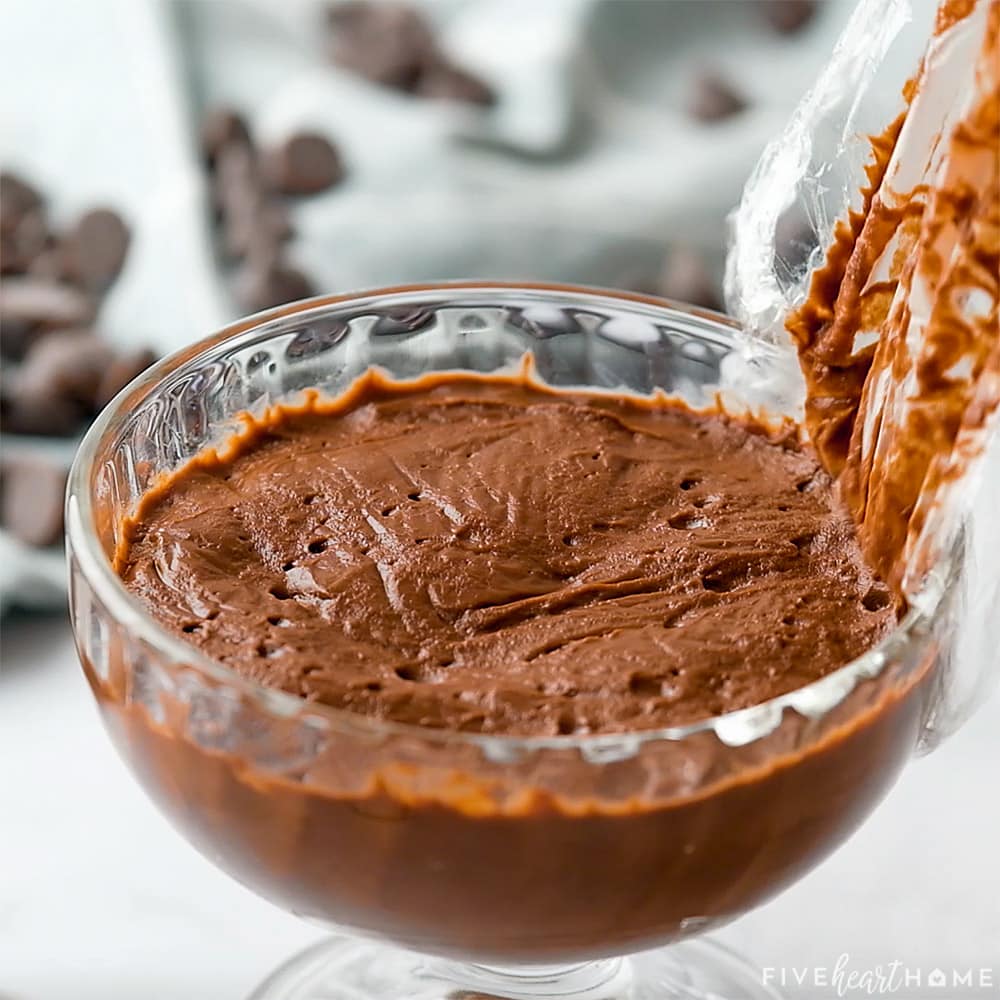
The plastic wrap will act as a replacement for the "skin" and, once peeled off, it will reveal completely smooth and silky pudding underneath.
To Make Whipped Cream
You should definitely use canned whipped cream if you've already got some on hand! But in case you only have plain heavy cream in the fridge, it's super easy to make your own homemade whipped cream:
- Using the wire whisk attachment(s) of an electric mixer, beat ½ cup chilled heavy cream at medium speed until soft peaks begin to appear.
- Sprinkle 2 tablespoons powdered sugar and ½ teaspoon vanilla extract over the whipped cream.
- Beat at medium-high speed until stiff peaks just form. (Be careful not to overbeat or you'll end up with butter instead of whipped cream!)
HINT: Whipped cream beats up the fluffiest when your heavy cream, your whisk, and your bowl are all chilled.
How to Store Chocolate Pudding
Tightly cover any leftover chocolate pudding and refrigerate for up to three or four days.
But to be honest, it's never lasted that long at my house!
And NO...you cannot freeze and then thaw pudding, as the texture will unpleasantly change upon thawing. However, if you'd like to consume your pudding in frozen form -- à la a frozen pudding popsicle -- that will work just dandy.
So are you a fellow pudding fanatic?
There's nothing really groundbreaking about this Homemade Chocolate Pudding, y'all. It's just simple and straightforward to make, and dang good, and a recipe that I feel you should have in your repertoire.
Say it with me now! Easy…homemade…BLISS.
More Chocolate Delights
- Brown Butter Chocolate Chip Cookies
- Mini S'mores Trifles
- Homemade Chocolate Cake Mix
- Chocolate Cream Cheese Frosting
- Fluffy Chocolate Fruit Dip
- Warm Chocolate Cobbler
- One-Minute Chocolate Peanut Butter Mug Cake
- Easy S'mores Dip
- Zucchini Fudge Bundt Cake with Chocolate Glaze
BEST Homemade Chocolate Pudding
Video
Ingredients
- ⅓ cup good-quality cocoa powder
- ½ cup granulated sugar
- 2 cups whole milk, DIVIDED
- 4 teaspoons cornstarch
- 3 egg yolks
- ¼ teaspoon salt
- ¼ cup semi-sweet chocolate chips, melted
- 1 tablespoon unsalted butter, softened
- 2 teaspoons pure vanilla extract
OPTIONAL GARNISHES:
Instructions
- Sift the cocoa powder into a medium saucepan and stir in the sugar. Slowly whisk in 1 ½ cups milk until the mixture is smooth. Set on the stove over medium-high heat and bring to a simmer, stirring constantly. Remove from heat and set aside.
- In a large bowl, whisk together the remaining ½ cup milk, cornstarch, egg yolks, and salt until smooth and well-combined. Continue to whisk rapidly while very slowly pouring the hot milk/cocoa powder mixture into the egg yolk mixture.
- Transfer the entire mixture back to the saucepan and set pot over medium-high heat, whisking constantly, until the pudding comes to a full boil. Immediately reduce heat to a simmer and continue whisking until pudding is thick, about 2 to 3 minutes more. Remove from heat and mix in melted chocolate chips, butter, and vanilla, stirring until smooth.
- Strain pudding through a fine mesh sieve and divide between four (4-ounce) cups or small bowls. Cover each pudding with plastic wrap, ensuring that the plastic is touching the entire surface with no air bubbles (to prevent a skin from forming). Chill until set, for at least 4 hours and up to overnight.
- Garnish chilled pudding with fresh whipped cream and chocolate shavings, if desired. Store any leftovers in the fridge, tightly covered, for up to four days.
Equipment Needed
Notes
- Take care not to cook the pudding too long or over heat that's too high, which can cause the cornstarch to break down and result in watery pudding. Similarly, pudding that isn't cooked long enough won't thicken properly either.
- The quickest way to melt such a small quantity of chocolate chips is to microwave for 20 seconds at a time, stirring well in between and repeating until melted and smooth.
- TO MAKE HOMEMADE WHIPPED CREAM: Beat ½ cup chilled heavy cream (using the wire whisk of an electric beater) until soft peaks begin to appear. Sprinkle 2 tablespoons powdered sugar and ½ teaspoon vanilla extract over the whipped cream and beat at medium-high speed until stiff peaks form, taking care not to overbeat.
Nutrition
Originally published on August 11, 2015, and updated on February 8, 2022.
Adapted from Food Network.

I am giving five stars because any cook can take an excellent recipe and make it her own. I no longer can use milk, so to make it more heart-healthy, I used vanilla-flavored Almond Milk. That's all the sweetness that is needed. I used zero sugar, zero semi-sweet chocolate chips, and a salt substitute. Since the Almond Milk is already vanilla flavored, I used only one teaspoon of vanilla. One can enjoy this recipe without garnishes that only can battle the tastebuds. I again enjoyed the full flavor of the chocolate pudding I experienced as a child over 70 years ago. Note, if you have to strain your pudding through a sieve, you poured the hot liquid too fast into the beaten egg yolks without whisking fast enough. It takes practice but pouring the hot liquid more slowly will produce a beautiful, creamy, pudding.
This recipe is delicious with one however. I don’t think you need the semisweet chocolate chips. I used high quality cocoa powder and when I make the recipe again I’m going to use less than a quarter cup. Probably 4 tablespoons. I did not add the semisweet chips and the recipe was plenty rich. I also used Dr. Oetker’s Bourbon Vanilla Sugar from Germany vs. vanilla extract, as the flavor is much better. Germany has turned me off of vanilla extract. I’m going to make my own vanilla sugar with vanilla beans. I think I’ll also use less sugar. Thank you for sharing this delicious recipe.
Oh my gosh, I normally wouldn't leave a comment without having made the recipe first, but you can just tell how delicious this is going to be! I just made "cook and serve" chocolate pudding for a Thanksgiving day dessert, and today I actually read the ingredients and saw that it was basically cocoa powder, sugar, and cornstarch and realized that I could just as easily make it from scratch. A quick google brought me here, and the details and extras look like they will work so well, much like making your own hot chocolate. I'm also making homemade whipped cream, since I was spoiled by it once I tried it, and I have to say: THIS looks like the chocolate pudding worthy of freshly whipped cream and not the the cook and serve pudding I just made. I can't wait to try this next time we have chocolate pudding!
It is an easy recipe. I used cocoa powder and chocolate chips. I used a whole can of evaporated milk and a 1/4 cup regular milk. I will never buy pudding mix again. It is convenient to make pudding. I will make sure I have all ingredients. Next I will try vanilla pudding.
I had some extra ingredients from another recipe - milk, cream, and sweetened condensed milk - so I made this to use them up. I used the half-can (about 5 oz) of sweetened condensed milk in the second step and I also used a half a bar of 80% Belgian dark chocolate instead of chocolate chips. It was THE best chocolate pudding I've ever had. I now have a favorite recipe if I ever have leftover sweetened condensed milk (though I will try it without either way next time I have a serious chocolate craving).
I'm vegetarian and I substituted with oat milk and vegan (non-soy) butter and I used choc. chips from the "enjoy" product line as they are vegan and allergen free which for me is really important as anaphylaxis is not fun. This was an easy and very tasty recipe that worked really well as a pie filling with homemade marshmallow on top instead of the whipped cream. It was like eating a s'more as I made a graham cracker crust.
I'd leave out the chocolate chips. Made it too rich. Otherwise good recipe.
I never thought of making chocolate pudding at home but this recipe was so easy and delicious! Thank you for sharing.
Super duper creamy and delicious! We loved this pudding so much. I will absolutely make it again!
Great pudding recipe. Tried melting chocolate in microwave.
First time making a more than cocoa desert, so I made a huge mess on the stove.
I came out decadent, very rich and chocolaty. Hit the spot.
Excellent flavor, but it was gelatinous, not creamy.
I had not made homemade chocolate pudding in a while and wanted one without too much cornstarch that can sometimes be overwhelming in taste. After searching, for a recipe with ingredients I had on hand, I decided to try yours. I loved this
recipe! It reminded me of a chocolate meringue pie my late grandma made when I was growing up. I did try tasting it before I added the 2nd half and decided to add another 1/4 cup of sugar before taking it off the heat and adding the 2nd half. Thanks for sharing a recipe I plan to make more of and add to my collection.
I’ve made this several times with dairy free milks. Almond, cashew and coconut unsweetened and they all work well! I never have cornstarch on hand so we use tapioca starch with success. We love this recipe!
Thanks so much for sharing your substitutions, Kaila. I'm glad this recipe has been such a hit! 🙂
Nice -- chocolatey and creamy but too much sugar for my liking. I reduced it to 1/3 cup for my first try and would go lower next time...1/4 c maybe less. I like the skin too!
Loved the pudding...used extra egg whites and put a meringue top on pudding.
I needed to make a dessert that was not only decadent, but easy and delicious - and also gluten free for a new family member. I used a package of gluten free graham crackers (holy crap are they expensive!) to make a graham cracker crust and made a batch and a half of this pudding as a filling. I didn't want to estimate a half an egg yolk so i just used 4 and added another teaspoon of cornstarch. That amount was just perfect to completely fill up the pie shell...which is kind of sad as I was hoping there would be a tiny bit left to have as a pudding lol. Thanks for making this so easy to do!
Thank you! I just made this chocolate pudding. It was exactly as discribed. Creamy decadent chocolatey goodness!
So happy you enjoyed it, Anna! 🙂
I had always wanted to try making my own chocolate pudding and this recipe turned out so good!
I am also a chocolate pudding snob. I hate the instant stuff, buuut I LOVE the pudding skin. I really think it's the best part! I usually pour my pudding into wide, shallow bowls in order to get more skin. Lol
I was wondering, why it's necessary to pour the cocoa/milk mixture into the milk/cornstarch mixture instead of the other way around? Especially since you have to transfer it back to the saucepan. Why are we not supposed to just whisk the cornstarch/milk mixture directly into the cocoa/milk mixture in the pan?
And is the sieve step necessary? I don't own a fine sieve, just a pasta colander. Will my pudding be lumpy or something? I dont mind, but I don't know if maybe it wouldn't set if it's not strained. Thanks!
Hi Sharon! Too funny that you try to create extra skin on your pudding while a lot of people try to avoid it altogether! 😉
The reason for pouring the hot milk mixture into the egg yolks mixture is to temper the eggs. This brings up the temperature of the eggs gradually. If you added the egg yolks directly to the hot milk mixture, their temperature would increase all at once and they would likely scramble/cook, which would result in your pudding having lumps instead of a nice, silky texture. 🙂
As for the sieve step, you could definitely skip it if you don't have one. There shouldn't be any big lumps in this pudding, but there could be tiny ones, so I always like to strain my pudding just to make sure it's completely smooth.
Hope that helps, and I apologize for my delayed reply. Happy Friday!
Thank you! I wondered about the sieve step. Can’t wait to try it!